At its core, a feature toggle is just a conditional block of code you can switch on or off from a dashboard somewhere. It’s a simple idea, but this practice—often called feature flagging—is what separates your code deployments from your actual feature releases. It lets you push new updates to the app store without ever showing users something that’s half-baked or buggy.
Why Feature Toggles Are a Game-Changer for Mobile Apps

Before we jump into the code, it’s worth taking a moment to appreciate the strategic shift this brings to mobile development. Feature toggles turn the release cycle from a high-stakes, all-or-nothing scramble into a controlled, flexible process. This isn’t just a small technical tweak; it completely changes how teams build, test, and launch their products.
The central concept is to decouple merging code from making a feature live for your users. Your team can keep merging new features into the main branch, but they all stay hidden behind a toggle. This is a cornerstone of trunk-based development, and it dramatically cuts down on merge conflicts, keeping everyone moving forward.
Unlocking Agile Development and Safer Releases
The real magic of feature toggles is in risk mitigation. We’ve all been there: a buggy feature gets released, and it’s a frantic rush to submit a hotfix to the app stores, followed by an agonizing wait for review. With a feature toggle, you can just flip a switch in your dashboard. The problematic feature is instantly disabled for everyone, containing the damage in seconds.
This capability is a massive win for app stability. In fact, many teams I’ve worked with have seen a huge drop in deployment-related incidents after adopting feature flags. That newfound reliability means you can release code more often and with way more confidence, which speeds up the whole development process.
Feature toggles give you the power to test in production—safely. You can turn on a new feature for just your internal QA team or a small group of beta testers, gathering real-world feedback without touching your entire user base.
Enabling Advanced Strategies and Data-Driven Decisions
Feature toggles are more than just on/off switches. They’re the foundation for sophisticated rollout strategies that used to be a huge headache to implement for mobile apps. They empower your team to be more strategic and innovative.
Here’s a look at what they make possible:
- Canary Releases: You can slowly introduce a new feature to a tiny fraction of your users—say, 1%, then 5%, then 20%. This lets you keep a close eye on performance and stability in a controlled environment before going all-in.
- A/B Testing: Want to know which button color converts better? Show different versions of a feature to different user segments and let the data tell you what works. It takes the guesswork out of product decisions. You can get more ideas on this by reading our guide on setting up analytics for React Native.
- Targeted Rollouts: Need to launch a feature only in Canada? Or just for your premium subscribers? Toggles make it easy to enable functionality for specific groups based on location, subscription plan, or device type.
Integrating CodePushGo into Your React Native Project
Alright, time to roll up our sleeves and actually connect your React Native app with the CodePushGo service. This is where we handle the practical setup—installing the right packages, tweaking project settings, and making sure everything talks to each other. A smooth integration here is the foundation for every feature toggle you’ll build later.
First things first, you need to add the CodePushGo SDK to your project. This is a simple command-line task using either npm or Yarn. Pop open a terminal in your project’s root folder and install the client-side library. Think of this package as the essential bridge between your app’s code and your CodePushGo dashboard.
Initial Configuration for iOS and Android
With the package installed, a bit of native configuration is required for both iOS and Android. This is a critical step because it ensures the SDK boots up correctly as soon as your app launches. For iOS, most of this work will happen inside your AppDelegate files, where you’ll link the SDK.
Over on the Android side, you’ll be making small changes to MainApplication.java and your build.gradle files. You’ll add a few imports and some initialization code so the SDK can hook into your app’s lifecycle. It might sound intimidating, but the official documentation offers clear code snippets that make this part pretty painless.
One of the most common pitfalls I’ve seen is mixing up deployment keys. You’ll get these from your CodePushGo dashboard—separate ones for staging and production. Double-check that you’ve put the right key in the right place. A simple typo here can lead to a lot of head-scratching later.
To keep your project clean and scalable, it’s always a good idea to follow standard system integration best practices. This will save you headaches down the road.
Wrapping Your App and Verifying the Setup
The final step brings us back to your JavaScript code. You need to wrap your root component (usually App.js) with the CodePushGo provider. This is a higher-order component that works its magic in the background, managing the state, synchronization, and communication required for your feature toggles to function correctly.
Here’s a quick look at how simple that wrapper is:
import codePush from “react-native-code-push-go”;
let App = () => { // … your app’s main component logic };
App = codePush(App);
export default App;
That’s really all it takes to activate the SDK in your app. It will now automatically check for updates and new toggle configurations whenever the app starts or resumes from the background.
Once that’s done, go ahead and build and run your app on a device or simulator. If you peek at your CodePushGo dashboard, you should see a confirmation that your app has connected. That’s it! You’ve laid the groundwork and are ready to start shipping your first feature toggle.
Implementing Your First Live Feature Toggle

Alright, you’ve done the groundwork and integrated CodePushGo into your React Native project. Now comes the fun part: putting it to work and launching your first dynamic feature. This is where the theory turns into tangible results, and you’ll see just how simple it is to control your app’s behavior from a web dashboard.
The process boils down to two key actions. First, you’ll define the toggle itself in your dashboard. Second, you’ll write a little bit of code in your app to check that toggle’s status and react accordingly.
To keep this from getting too abstract, let’s walk through a classic real-world scenario: adding a promotional banner to your app’s home screen. Marketing campaigns are notoriously time-sensitive, so being able to switch a banner on or off instantly—without going through another App Store review—is a huge win.
Defining the Toggle in Your Dashboard
Think of your CodePushGo dashboard as the mission control for your app’s features. The very first thing you need to do is create a new feature toggle.
You’ll want to give it a clear, descriptive name. Something like enablePromotionalBanner is perfect. Trust me, when you have dozens of these, you’ll be glad you didn’t name them toggle1 and toggle2. Good naming habits pay off down the road.
For now, you’ll set its initial state to false, which means it’s off by default. With just a couple of clicks, you’ve created the switch. The next step is to make your app aware of it.
Using Hooks to Conditionally Render UI
Now, let’s jump back into your React Native code. This is where the magic really happens, and it’s surprisingly simple. The CodePushGo SDK gives you a hook—usually named something like useFeatureFlag—that checks the current status of any toggle you’ve created.
Let’s wire this up for our promotional banner. Inside your HomeScreen component, you’ll call the hook and pass it the name of the toggle you just made in the dashboard.
import { useFeatureFlag } from ‘react-native-code-push-go’;
const HomeScreen = () => { const isBannerEnabled = useFeatureFlag(‘enablePromotionalBanner’);
return (
That little snippet of code is incredibly powerful. The <PromotionalBanner /> component will only render if isBannerEnabled is true. When you’re ready to launch the promotion, you just flip the switch in your dashboard. The next time a user opens or refreshes the app, the banner will appear. No code deployment, no waiting, no hassle.
Here’s a pro tip I’ve learned from experience: keep your rendering logic clean. It’s tempting to throw in complex
if/elsestatements, but a much better approach is to wrap the new feature’s UI into its own dedicated component. This makes your codebase far easier to read and maintain, which is a cornerstone of the best practices for managing feature flags.
This core loop—a lightweight SDK talking to a remote dashboard—is the foundation of modern feature flagging. With this first toggle under your belt, you’re now ready to explore more advanced rollout strategies.
Mastering Advanced Rollout Strategies
Flipping a simple on/off switch is just the beginning. The real magic of feature toggles happens when you get strategic about how you release things. When you move past a basic boolean flag, you can orchestrate sophisticated rollouts that dramatically lower risk and let you collect real-world data before going all-in. This is where you graduate from simply toggling features to truly managing their lifecycle in production.
Let’s say you’ve just finished a massive new feature, like a completely redesigned checkout flow. Pushing that out to 100% of your users at once is a high-stakes gamble. A much smarter play is a canary release. You could enable it for a tiny slice of your user base—maybe just 1% or 5%—and then watch your performance metrics and analytics like a hawk.
Targeted Rollouts for Precise Control
This is where a tool like CodePushGo really shines. It lets you create specific rules to control exactly who sees a new feature, giving you the kind of granular control that’s essential for modern app development.
Here are a few ways I’ve seen this work in the wild:
- Internal Testing: You can flip a feature on just for a list of specific user IDs. This lets your QA team hammer away at it in the actual production environment without a single real user ever knowing it’s there.
- Geographic Rollouts: Got a feature that only makes sense for users in, say, Germany? No problem. Just create a rule that targets users based on their location.
- Subscription Tiers: If you want to roll out a new perk exclusively for your premium subscribers, you can segment your audience based on an attribute like a “subscription plan.”
This level of targeting ensures the right features get to the right people at the right time. For a deeper dive into how this works alongside code delivery, you might find our guide on how OTA updates for Android work useful.
The thinking behind your rollout plan is just as critical as the code itself. Before you do anything, ask yourself: what’s my main goal here? Am I trying to validate performance? Gather user feedback? Test the market? Your answer will tell you whether a percentage-based, user-segmented, or purely internal rollout is the right call.
This visual guide lays out the best practices for managing your toggles as you start implementing these kinds of strategies.
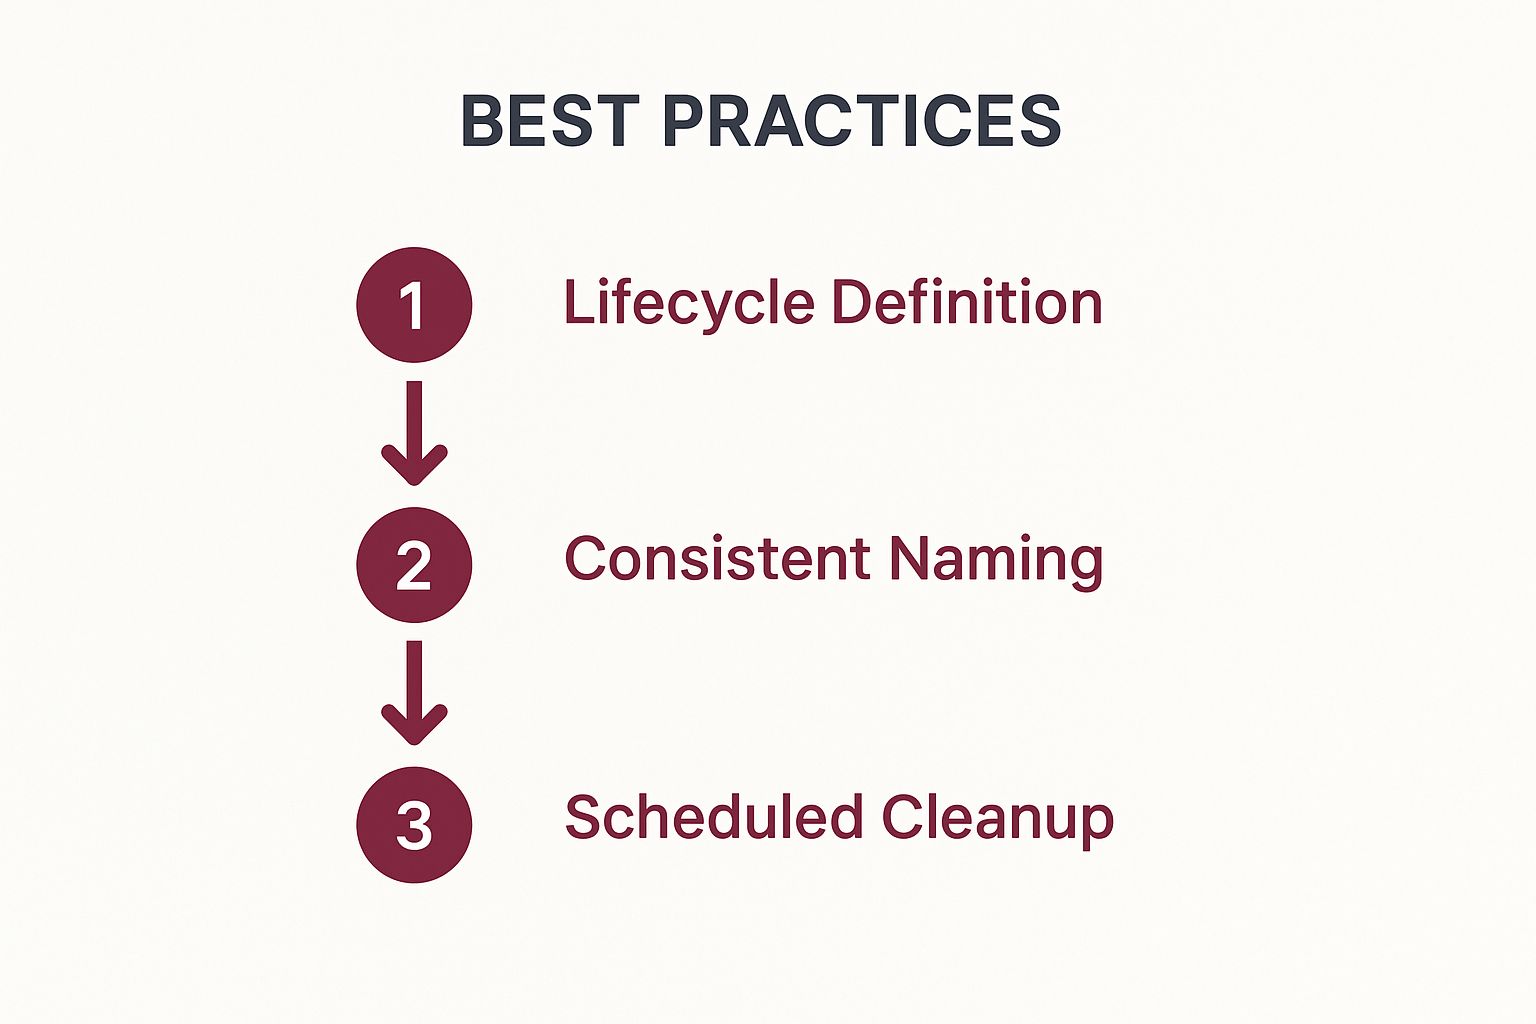
As you can see, a disciplined approach is key. Things like clear definitions, consistent naming conventions, and a plan for cleaning up old flags are what prevent your feature toggle system from turning into a pile of technical debt.
Choosing The Right Rollout Strategy
Picking the right rollout strategy is crucial for success. Each approach serves a different purpose, so understanding the trade-offs will help you make the best decision for your specific feature and goals.
Comparison of Rollout Strategies
This table breaks down the most common strategies to help you match your needs to the right approach.
| Strategy | Primary Use Case | Ideal User Group | Key Benefit |
|---|---|---|---|
| Canary Release | Validating performance and stability of a high-risk feature. | Small, random percentage (1-10%) of total users. | Minimizes the impact of potential bugs or performance issues. |
| A/B Testing | Comparing two or more versions of a feature to see which performs better. | Two or more distinct user segments, often 50/50 split. | Provides data-driven insights to make informed product decisions. |
| Segmented Release | Releasing a feature to a specific demographic or user group. | Users matching specific criteria (e.g., location, plan). | Delivers targeted value and allows for tailored marketing efforts. |
Ultimately, the goal is to create a release process that is both safe and efficient.
Thinking bigger, this ties into the world of project management automation. When you combine smart, targeted feature toggles with automated workflows, you create a release pipeline that is powerful, efficient, and carries significantly less risk.
Taming the Tangle: How to Avoid Feature Toggle Technical Debt
Feature toggles are a developer’s best friend for shipping code safely and incrementally. But they have a dark side. If you’re not careful, they can multiply, leaving behind a tangled mess of conditional logic that makes your codebase fragile and a nightmare to navigate. This buildup of old, forgotten flags is what we call flag debt, and it has a nasty habit of slowing everything down.
The secret to avoiding this mess is a simple shift in mindset: treat every feature toggle as a temporary tool, not a permanent part of your code. From the moment a flag is born, it should have a planned retirement date. Without this discipline, you’ll inevitably hit a point where nobody on the team knows what a flag does, if it’s still used, or if it’s safe to remove. That uncertainty is a breeding ground for bugs and stalled progress.
Build a Cleanup Process from Day One
The best way to fight flag debt is to have a solid cleanup process baked into your workflow. This isn’t just about deleting code later; it’s about establishing clear ownership and consistent habits for the entire team from the get-go.
Think of a toggle’s life in four distinct stages:
- Creation: The flag is introduced with a clear purpose and an assigned owner.
- Activation: It’s switched on for a rollout, A/B test, or canary release.
- Resolution: You make the call—either the feature is rolled out to 100% of users or it’s abandoned.
- Retirement: The toggle is completely scrubbed from your codebase and your feature flag management tool.
Here’s a pro-tip that works wonders: whenever you create a Jira ticket (or any task) to add a feature flag, immediately create a second ticket to remove it. This simple habit makes cleanup an official part of the original work, not some chore you’ll get to “later.” If you’re looking for more ideas on structuring these workflows, checking out some code release management best practices can be a huge help.
Naming Conventions and Documentation Are Not Optional
You can’t clean up what you can’t understand. A flag named new-ui-test is a mystery waiting to happen a few months down the line. A strong naming convention is your first and best defense against this kind of confusion.
A simple, effective practice is to prefix flag names with context, like the project ticket number. For example,
PROJ-123-redesigned-checkout-flowtells you everything you need to know at a glance. It’s tied to a specific task and a clear feature.
This small tweak provides instant context for any developer who stumbles upon the flag.
Just as important is good documentation. Your feature flagging dashboard—like the one in CodePushGo—should be your single source of truth. Every single flag needs a clear description that answers a few key questions:
- Purpose: What exact feature or change does this toggle control?
- Owner: Who is the go-to person if we have questions about this flag?
- Expected Removal Date: When is this thing supposed to be gone?
Instilling this discipline turns your feature toggle system from a potential liability into a clean, powerful, and maintainable asset. It’s not just good housekeeping; it’s a core part of how to implement feature toggles successfully for the long haul.
Common Questions About Feature Toggles
As you start working with feature toggles, a few questions always seem to come up. I’ve heard these from junior and senior developers alike, so let’s clear the air on some of the most common ones.
The first thing everyone worries about is performance. It’s a fair question. Are all these extra checks going to bog down my app? The good news is, no—not if you’re using a modern, well-built system.
Tools like CodePushGo are designed to be incredibly lightweight. The SDKs are smart about how they fetch and cache flag configurations locally on the device. This means the actual check is just a super-fast, local lookup. You won’t see any noticeable lag in your app’s startup or UI rendering.
How Are Feature Toggles Different from Feature Flags
This one’s a classic point of confusion. You’ll hear “feature toggles” and “feature flags” thrown around, and honestly, 99% of the time, people mean the exact same thing. They’re used interchangeably in daily conversation.
If you want to get really technical, some purists argue there’s a subtle difference. They might say a “toggle” is a simple on/off switch, while a “flag” can handle more complex rules, like percentage-based rollouts or targeting specific user groups.
In my experience, it’s best not to get hung up on the terminology. Think of it this way: all toggles are a type of flag, but not all flags are simple toggles. The real goal is the same—separating when you deploy code from when you release a feature.
What Happens If the Flag Service Goes Down
This is a big one, and it’s a critical question. What’s the backup plan if your app can’t connect to the feature flag service?
Any production-ready system is built with this exact scenario in mind. The SDK will always use the last known good configuration it successfully downloaded and cached on the user’s device.
This means your app just keeps running as it was. Your users won’t notice a thing, and the app’s stability is completely unaffected. Once the network connection is back, the SDK will quietly sync up in the background and grab the latest rules. It’s a crucial failsafe that protects your user experience from outside service interruptions.
Of course, a solid release strategy is about more than just flipping switches. It’s also about ensuring quality from the get-go. Catching bugs early is just as important. For more on that, you might find it helpful to look into how to automate Android testing, as it goes hand-in-hand with a robust feature flagging workflow.
Ready to take full control over your app’s releases? CodePushGo gives you the power to implement secure, reliable feature toggles with ease. Get started for free today and ship features with confidence.


