
When the standard, off-the-shelf CI/CD runners start feeling a bit cramped, it’s usually time to look at hosting your own. A self-hosted runner puts you in the driver’s seat, giving you total control over the environment where your jobs run. You get to use your own hardware—whether that’s a beast of a server in your office or a custom cloud instance—to run workflows. This unlocks a level of privacy and custom configuration that’s impossible to get otherwise, letting you perfectly mirror your production environment.
Why Your Team Needs a Self-Hosted Runner
Let’s be honest, the default cloud-hosted runners are fantastic for getting started. They’re simple and convenient. But as your team grows and your projects get more complex, you start hitting walls. Your pipeline feels slow, restrictive, and suddenly, surprisingly expensive. That’s the moment when moving your builds in-house becomes a smart, strategic move. The decision usually boils down to three big factors: cost, security, and raw performance.
For a lot of teams, the conversation starts with the monthly bill. Those build minutes add up fast, and the pay-as-you-go model for cloud runners can quickly get out of hand, especially if your team is pushing code and running tests all day long.
Cloud-Hosted vs Self-Hosted Runners At a Glance
To make the choice clearer, it helps to see the key differences side-by-side. Each approach has its place, but understanding the trade-offs is crucial for deciding what’s right for your team’s specific needs.
| Feature | Cloud-Hosted Runners (e.g., GitHub-hosted) | Self-Hosted Runners |
|---|---|---|
| Cost Model | Pay-per-minute; can become expensive with high usage. | Upfront hardware cost (CapEx) or fixed cloud instance pricing, but minimal running cost. |
| Hardware | Standardized, general-purpose VMs. Limited choices. | Fully customizable. Use any CPU, RAM, GPU, or storage you need. |
| Environment Control | Limited. You work within the provider’s pre-configured environment. | Complete control. Install any software, dependency, or OS you want. |
| Security | Code and artifacts are processed on a third-party platform. | Code never leaves your private network. Ideal for high-compliance environments. |
| Performance | Good for general use, but can be a bottleneck for demanding jobs. | Dedicated resources mean faster, more consistent build times. No “noisy neighbors.” |
| Maintenance | Fully managed by the provider. No overhead for your team. | Your team is responsible for setup, maintenance, and security updates. |
Ultimately, the table shows a clear trade-off: cloud-hosted runners offer convenience, while self-hosted runners provide control and long-term cost efficiency. If your needs are straightforward, the managed option is great. But if you’re hitting performance or security walls, self-hosting is the way forward.
Slashing CI/CD Costs
The most immediate win with a self-hosted runner is almost always the cost savings. Instead of bleeding money on per-minute rates for shared VMs, you’re just using hardware you already have or can get your hands on for a much lower cost.
Think about a startup running hundreds of builds a day. On a cloud platform, that usage can easily balloon into thousands of dollars a month. By switching to a self-hosted runner on a dedicated machine, you turn a recurring operational cost into a one-time hardware purchase, which dramatically lowers your total cost of ownership.
This isn’t just a niche trick; it’s a major trend. The adoption of self-hosted solutions is exploding. Some platforms are now handling over 600,000 jobs per day on self-hosted infrastructure—a workload that shot up by 50% in less than two months. This incredible growth shows just how many teams are cashing in on cost reductions, which can be up to 10 times less than what platform-hosted options charge. You can dive deeper into this trend in RunsOn’s 2025 report.
Locking Down Security and Compliance
If you’re working in a regulated industry like finance or healthcare, keeping your source code and build artifacts inside your own network isn’t a “nice-to-have”—it’s a hard requirement. A self-hosted runner operates entirely within your own infrastructure.
This means your proprietary code never leaves your security perimeter during the build and test process. It’s the ultimate solution for maintaining data sovereignty and meeting strict compliance standards like HIPAA or SOC 2.
This level of control is a cornerstone of solid CI and CD practices that put security first.
Achieving Unmatched Performance
Finally, let’s talk about speed. Performance bottlenecks can absolutely crush a development team’s momentum. Cloud-hosted runners are one-size-fits-all, and that size might not fit your build’s specific needs. They probably don’t have the powerful GPUs you need for machine learning models or the high core-count CPUs required for heavy-duty compilations.
With a self-hosted runner, you pick the machine. You can load it up with tons of RAM, stick in some blazing-fast NVMe storage, and choose the exact processor architecture you need to slash build times from minutes down to seconds. This dedicated hardware means your jobs aren’t fighting with anyone else for resources, which leads to a much faster feedback loop and happier, more productive developers.
Prepping Your Infrastructure for a Runner

Before you download a single thing, getting the foundation right for your self-hosted runner is absolutely essential. A little prep work here saves a world of hurt later. The first major decision you’ll face is choosing a home for your runner. Will it live on a physical machine, a virtual machine (VM), or inside a container?
Each path has its own set of pros and cons. A bare-metal server gives you raw, unfiltered power, which is perfect for really demanding build jobs. VMs, on the other hand, offer fantastic isolation and are a breeze to snapshot and restore, making them a really flexible sweet spot.
Then there’s containerization with Docker, which is my personal go-to for ensuring a clean, consistent environment every single time. Containers are lightweight and spin up incredibly fast, making them a perfect fit for ephemeral runners that exist only for the life of a single job. If you’re just dipping your toes in, this Docker Setup Guide is a great resource to get you started.
Sizing Your Runner Environment
One of the biggest mistakes I see teams make is just guessing on resource allocation. If you undershoot, your builds will crawl or fail. Overshoot, and you’re just burning money. The key is to look at your actual CI workloads.
- Simple web app builds? You can probably start with 2-4 vCPUs and 4-8 GB of RAM.
- Compiling a large C++ or Java application? You’ll want more muscle. Think 8+ vCPUs and 16-32 GB of RAM.
- Building container images? Don’t skimp on storage or RAM. That Docker layer caching needs room to breathe.
A crucial takeaway here: these are just starting points. The real power of self-hosting is that you can monitor your runner’s performance and tweak the specs to perfectly match your needs, hitting that ideal balance between speed and cost.
Choosing the right environment is a game-changer for your team’s velocity. It pays to get familiar with the different automation tools for DevOps that can help you manage and scale this infrastructure.
Networking and Security Permissions
Let’s talk about security, because it’s not optional. Your runner needs to phone home to your Git platform (like GitHub or GitLab), but you have to do it without throwing open the doors to your internal network.
The good news is that the runner itself initiates an outbound HTTPS connection over port 443 to check for new jobs. This means you rarely need to open any inbound ports, which is a massive security advantage right out of the gate. Just make sure your firewall rules aren’t blocking that outbound traffic.
When it comes to user permissions, always, always follow the principle of least privilege. Create a dedicated, low-privilege user account just for the runner service. This account should have just enough permission to clone code, execute scripts, and nothing more. Whatever you do, don’t run the service as root or an administrator. A single compromised build script could otherwise take over the whole machine.
Alright, you’ve got your infrastructure prepped and ready to go. Now for the fun part: actually installing the runner and getting it connected to your project.
This whole process boils down to grabbing the runner application, running a configuration script on your machine, and then linking it back to your GitHub or GitLab repository. The core idea is the same regardless of the platform, but for our examples, we’ll stick with GitHub Actions since it’s a common setup for a lot of teams.
This quick visual breaks down how it all comes together.
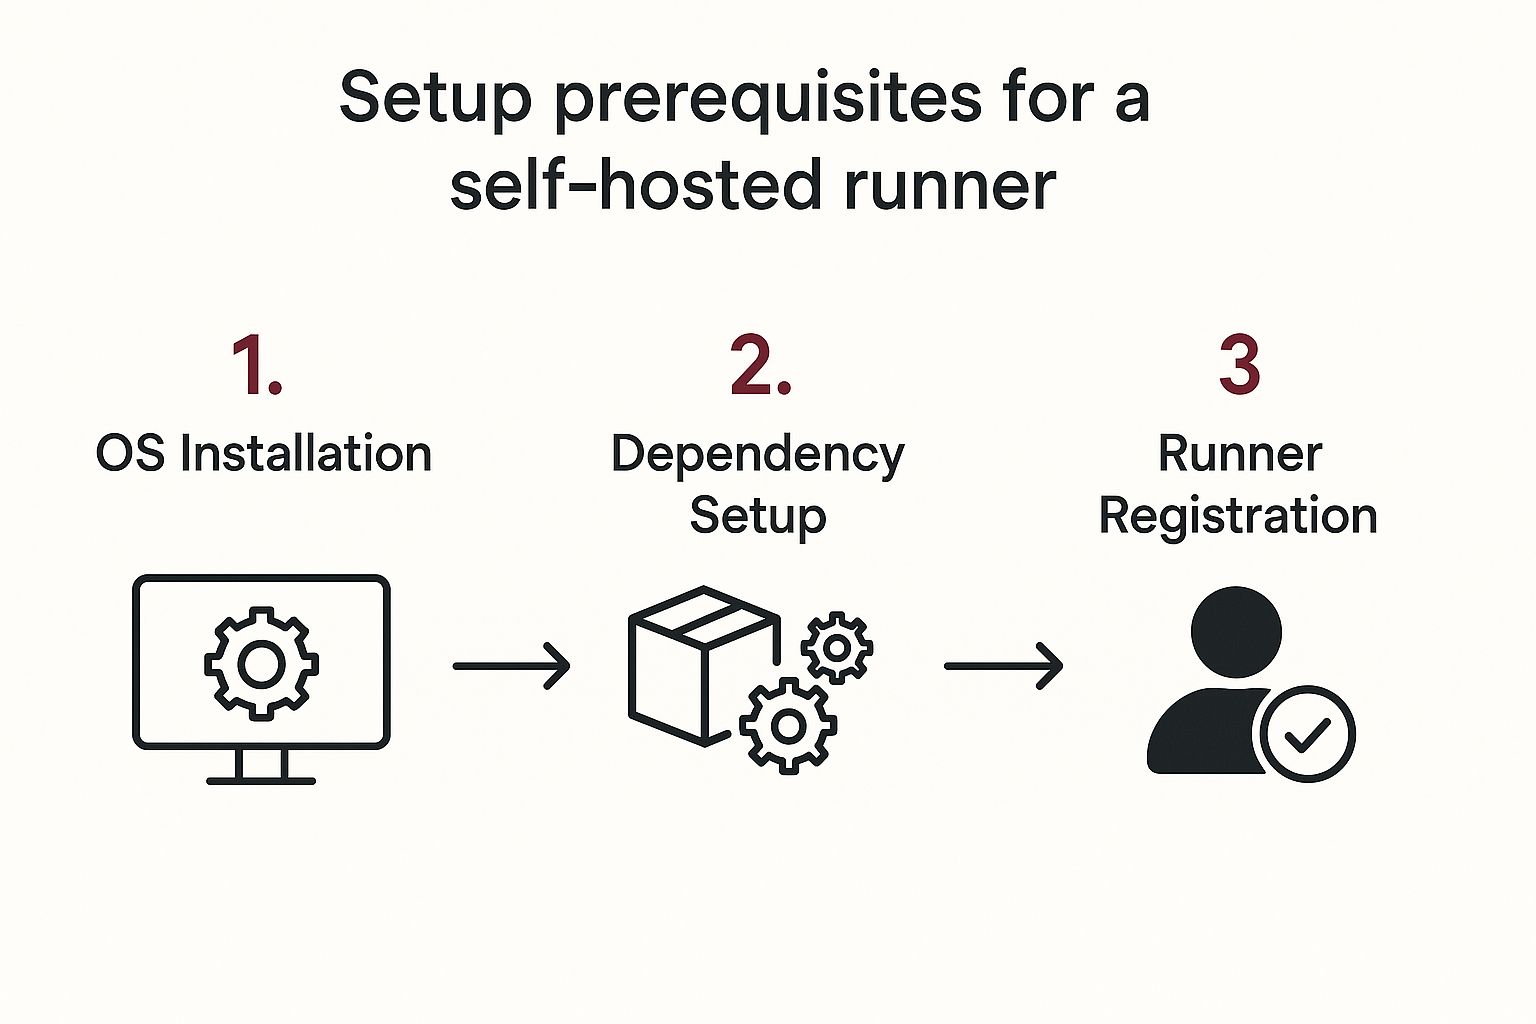
As you can see, it’s a pretty logical flow. You start with the base machine and layer on the configuration until it’s officially registered and ready for work.
Generating Your Registration Token
First things first, you need a token. This isn’t your standard API key; it’s a special, single-use token that’s only good for a short time. Think of it as a temporary password that proves your machine has permission to register itself as a runner for your project.
To get one in GitHub, head over to your repository or organization’s Settings, then click on Actions > Runners. You’ll see a “New self-hosted runner” button. Click that, and GitHub will instantly generate the token you need.
A Quick Tip from Experience: Make a decision early on whether this runner will belong to a single repository or your entire organization. An organization-level runner is way more efficient because it can be shared across multiple projects, saving you from setting up a new runner for every repo.
Keep that token somewhere safe and be ready to use it quickly. It usually expires in about an hour.
Downloading and Configuring the Runner Application
With your token in hand, it’s time to download the runner software. Right on that same GitHub page where you got the token, you’ll find the exact commands you need for Linux, macOS, or Windows.
For a typical Linux machine, the commands will look something like this:
First, make a dedicated folder for your runner
mkdir actions-runner && cd actions-runner
Download the latest runner package
curl -o actions-runner-linux-x64-2.311.0.tar.gz -L https://github.com/actions/runner/releases/download/v2.311.0/actions-runner-linux-x64-2.311.0.tar.gz
Now, unpack it
tar xzf ./actions-runner-linux-x64-2.311.0.tar.gz
Once that’s all extracted, the real magic happens when you run the configuration script: ./config.sh. This script will kick off an interactive prompt and ask for a few key details:
- The URL of your repository or organization: This tells the runner where to phone home.
- Your registration token: The one you just generated a minute ago.
- Runner group (optional): A nice way to organize runners if you have a bunch of them.
- Runner name: Be descriptive here. Something like
prod-deployment-runner-01is much better thanmy-runner. - Labels: This is where the real power lies. Labels are how you control which jobs run on which machines.
The Power of Labels for Routing Jobs
Honestly, labels are the secret sauce to a truly effective self-hosted runner strategy. They are just simple tags you assign to your runners, but they give you incredibly granular control over your workflows. Without them, any job could get picked up by any runner, which can quickly become a mess.
Think about the possibilities. You could use labels like:
macos-latest: To make sure your iOS build job always runs on your dedicated Mac Mini.gpu-enabled: To send a heavy machine learning task to the one machine with a powerful graphics card.windows-x64-vs2022: For a build that absolutely requires a specific version of Visual Studio.
When you’re running the ./config.sh script, you can provide a comma-separated list of labels. Once you finish the script, your runner will connect to GitHub, show up in the UI with an “Idle” status, and patiently wait for a job that matches its labels.
Weaving Runners Into Your CI/CD Workflows

Getting a runner up and running is one thing, but making it a smart, effective part of your pipeline is where the real magic happens. The whole point of integrating your new self-hosted runner is to tell your CI/CD platform when and why to use it. This is where those labels you assigned during setup become so important—they’re the bridge between your workflow file and your custom machine.
By calling out specific labels in your pipeline’s configuration, you can send certain jobs to the exact runner built for them. It’s a simple concept, but it gives you an incredible amount of control, making sure the right environment is used for the right task, every single time.
Directing Traffic with Labels
I like to think of labels as a routing system for my build jobs. When a workflow kicks off, the CI platform scans the runs-on property for a particular job. Then, it looks for an available runner that has a matching set of labels. This is exactly how you make sure your iOS app only builds on your Mac Mini, or that your heavy-duty machine learning tasks are sent to the server with the powerful GPU.
For instance, a standard GitHub Actions workflow file can get very specific with its runner requirements.
jobs: build: name: Build on Custom Linux runs-on: [self-hosted, linux, x64] steps: - uses: actions/checkout@v3 - name: Run build script run: ./build.sh
In this snippet, a job will only be picked up by a self-hosted runner that has all three of those labels: self-hosted, linux, and x64. This is your safety net, preventing the job from accidentally landing on a cloud-hosted machine or one of your other runners that isn’t configured for it. If you’re building a pipeline from the ground up, our guide can help: https://codepushgo.com/blog/ci-cd-pipeline-tutorial/
Putting It All Together: Real-World Scenarios
Let’s get practical. Imagine you have a deployment job that needs to connect to a private staging database. For security reasons, that database isn’t exposed to the public internet. A self-hosted runner sitting right inside your private network is the perfect tool for the job.
Here’s how you could set up a GitLab CI job to manage this securely:
deploy_staging: stage: deploy script: - echo “Deploying to staging…” - ./deploy-to-staging.sh tags: - internal-network - deployment-agent
In the GitLab world, tags are the equivalent of GitHub’s labels. Here, they guarantee this sensitive deployment step only runs on a trusted machine that can safely access your internal infrastructure.
The key takeaway is that labels give you surgical precision. They allow you to orchestrate complex workflows across a diverse fleet of machines, each with its own unique capabilities and security context.
As you start integrating more runners, it’s a great time to zoom out and look at your whole process. Following continuous integration best practices will help you keep your workflows efficient and secure as they inevitably get more complex. This isn’t just about setting up a build machine; it’s about turning your self-hosted runner into a core, strategic piece of your development infrastructure.
Security Best Practices for Self-Hosted Runners

Bringing your CI/CD runners in-house gives you incredible control, but it also means you’re now holding the keys to the kingdom—and all the security responsibilities that come with it. Once a runner is on your infrastructure, it’s a potential target.
One of the biggest gotchas is running workflows from forked repositories. It’s a classic scenario where malicious code could sneak in and execute on your machine.
Thankfully, platforms like GitHub have thought this through. You can—and absolutely should—disable workflows from forked pull requests at the organization or repository level. Flipping that switch is your first and most important line of defense, stopping untrusted code before it even gets a chance to run.
Isolate Every Job Environment
Even when you trust the code, you have to operate with a “zero trust” mindset for the job environment itself. Every workflow could leave behind sensitive artifacts or mess with the machine’s state in ways you didn’t anticipate. The only real solution is to make each runner environment completely disposable.
- Go Ephemeral: Set up your infrastructure to spin up a fresh virtual machine or container for every single job. When the job finishes, that environment gets torn down completely. This guarantees a clean slate for the next run, every time.
- Containerize Everything: If you’re using long-lived runners, execute each job inside a new Docker container. This creates a solid wall between jobs, so one can’t snoop on another’s files or processes. It also makes cleanup a breeze.
The core principle is simple but powerful: no two jobs should ever share the same execution environment. This single strategy drastically cuts down the risk of data leaks or contamination between different projects.
Maintain and Harden Your Runner Machines
A self-hosted runner is only as secure as the operating system it’s sitting on. Letting system maintenance slide is just asking for trouble. It’s critical to lock down a regular patching schedule for both the runner’s OS and the runner application itself.
This security-first approach is becoming the norm as more companies choose self-hosted solutions. In fact, by 2025, it’s estimated that 82% of software vendors will offer a self-hosted option, largely because enterprises demand tighter control over their security. You can read more on this trend in the 2025 State of Self-Hosted Survey findings.
Putting these practices into action is non-negotiable for building a tough, resilient pipeline. For a much broader look at securing your development lifecycle, take a look at our complete guide on CI/CD security best practices. By pairing strict environment isolation with solid maintenance, you can get all the advantages of self-hosted runners without opening yourself up to unnecessary risk.
Common Questions We Hear About Self-Hosted Runners
Once you start exploring self-hosted runners, a few key questions always pop up. It’s totally normal. Getting a handle on performance, cost, and concurrency from the get-go will save you a world of headaches down the line and help you build a much smarter CI/CD pipeline.
Let’s break down the questions I hear most often from teams making the switch.
How Do I Make My Self-Hosted Runner Faster?
This is almost always the first thing people ask. The simplest, most direct answer? Give it more resources. The beauty of self-hosting is that you’re in the driver’s seat. Unlike the fixed specs of a cloud runner, you can beef up the CPU or throw more RAM at the host machine whenever you need to.
Another huge win is getting smart with caching. When you cache dependencies, build artifacts, and container layers right on the runner itself, you slash the time spent on network-heavy tasks. It’s a game-changer for cutting out redundant work between jobs.
Are Self-Hosted Runners Really Cheaper?
This one’s a classic, and the answer isn’t a simple yes or no. People hear “no more per-minute fees” and think it’s free, but that’s not the whole story. You’re really just shifting where the money goes—from a predictable operational cost to a mix of capital expenses and some less obvious overhead.
You’ve got to factor in the complete picture:
- Infrastructure Costs: This is the straightforward part—the price of your server, whether it’s a physical machine in a rack or a cloud instance like an EC2 or Azure VM.
- Maintenance Overhead: This is the hidden cost that bites a lot of teams. Your engineers will spend real time patching, updating, and troubleshooting the runner infrastructure. Don’t underestimate this “human cost.”
- Egress Fees: If your jobs are constantly pulling massive container images or artifacts from the public internet, your cloud provider’s data transfer fees can add up surprisingly fast.
So, while self-hosting can be significantly cheaper for teams with high build volumes, you absolutely have to calculate the total cost of ownership, not just the hardware’s sticker price.
The crucial insight is that you’re shifting your investment from paying a vendor’s per-minute rate to paying for your own infrastructure and your engineers’ time. For many, this trade-off is absolutely worth it for the added control and performance.
Can a Single Runner Handle Multiple Jobs?
Out of the box, a standard runner is a one-track mind. It pulls a single job from the queue, runs it to completion, and then looks for the next one. This serial approach is simple and reliable, but it can quickly turn into a frustrating bottleneck when multiple workflows kick off at once.
You’re not stuck with that, though. To get more bang for your buck, you can run multiple runner processes on a single, powerful machine. Each one registers itself as a separate runner and can grab a job from the queue. This is a great way to maximize a beefy server, but it demands careful resource management so your jobs aren’t fighting each other for CPU and memory.
For a more modern and scalable setup, tools like Kubernetes can dynamically spin runner pods up and down to match demand. Of course, a fast runner is only one piece of the puzzle. Optimizing your deployment process itself is also critical; you can explore various zero-downtime deployment strategies to make your releases as smooth as possible.
At CodePushGo, we simplify the complexities of your release cycle. Our platform empowers React Native teams to deploy code updates instantly, bypassing app store reviews and delivering critical fixes in minutes, all while maintaining end-to-end security. Discover a faster, more agile way to manage your app updates at https://codepushgo.com.


