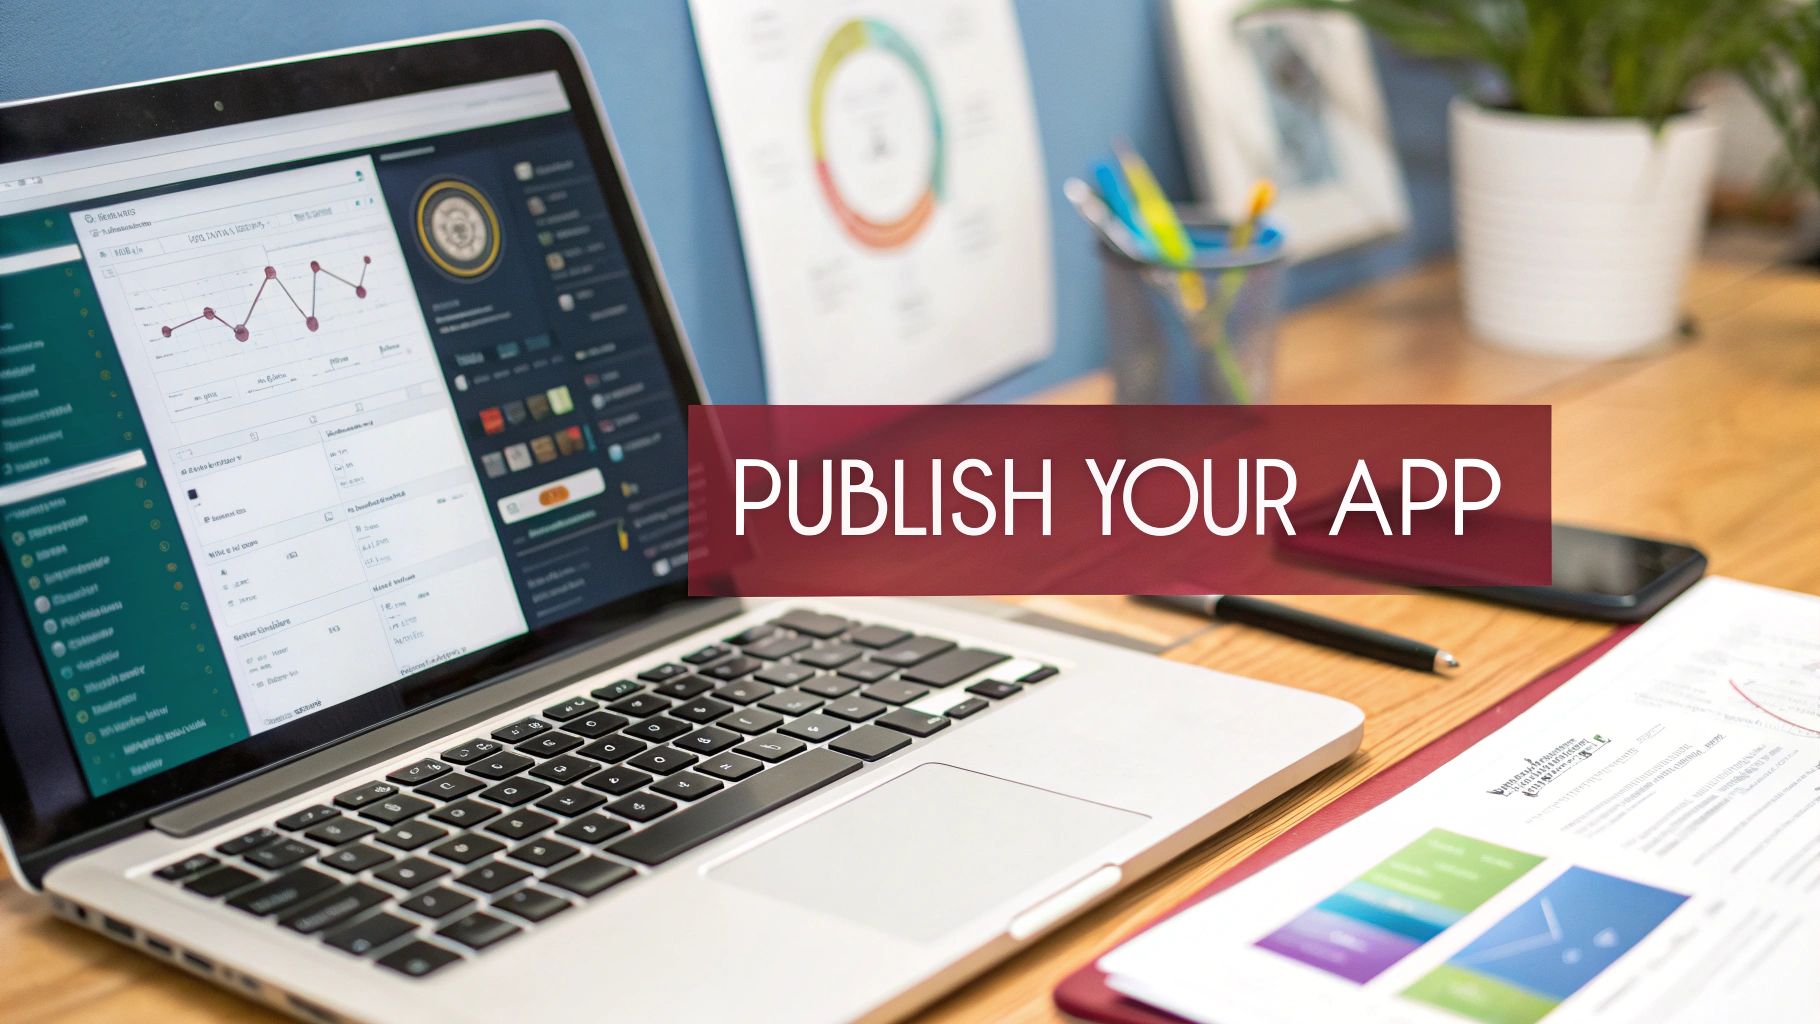
Before you can even think about hitting that “submit” button, you need to lay the groundwork. Getting your app ready for its big App Store debut is about more than just writing the final line of code. It’s about setting up your developer credentials and project settings meticulously to avoid those all-too-common headaches and last-minute delays.
Your Pre-Launch Foundation for a Smooth Submission
Think of this as your pre-flight checklist. Proper preparation here is what separates a smooth, successful launch from a frustrating cycle of rejections and fixes. This initial planning is crucial, especially when it comes to choosing the right path for your software mobile application in the first place.
The first step, and it’s a big one, is enrolling in the Apple Developer Program. There’s no way around it. This annual membership is your golden ticket to the entire Apple ecosystem, giving you access to essentials like Xcode, App Store Connect, and the ability to generate the certificates and profiles you’ll need for distribution.
Essential Technical Preparations
With your developer account squared away, it’s time to get into the technical nitty-gritty. This is where a little bit of extra attention to detail now will save you a world of pain later.
Your command center for this phase is Xcode, Apple’s integrated development environment (IDE). If you haven’t already, grab it for free from the Mac App Store. Once it’s installed, you’ll want to navigate into your React Native project’s ios folder and open the .xcworkspace file. That’s your entry point.
Inside Xcode, one of the first things you must set is the Bundle Identifier. This is a unique, reverse-domain name string (think com.yourcompany.yourapp) that acts as your app’s unique fingerprint across Apple’s entire system. It’s critical that this ID is identical in both your Xcode project and the app record you’ll create later in App Store Connect.
Key Takeaway: Your Bundle Identifier is permanent once you upload your first build. I can’t stress this enough: double-check it for typos and make sure it perfectly matches your branding. A mistake here is a real pain to fix.
Navigating a Competitive Marketplace
Getting the technical side right is only half the battle. You also need to understand the App Store itself. It’s not just a digital shelf; it’s a fiercely competitive marketplace. What started in 2008 with a mere 500 apps has ballooned into a universe of around 1.91 million applications.
That incredible growth means the bar for entry is high. To get noticed—and approved—your app needs to be polished. Apple isn’t shy about enforcing its standards; they rejected roughly 1.7 million submissions in a recent year alone for failing to meet quality or policy guidelines. It pays to know the rules of the road before you start driving.
Archiving Your React Native App in Xcode
Alright, you’ve handled the initial setup. Now it’s time to take your project out of the day-to-day development world and start treating it like a real product destined for the Apple App Store. This transition happens through a process called archiving in Xcode.
Think of archiving as more than just a simple compile. It’s a specialized build process that cooks up a production-ready version of your app. This means stripping out all the debugging tools, running performance optimizations, and bundling everything into a neat package that App Store Connect is built to receive. Getting this part right is a make-or-break moment in the publishing journey.
As you can see, having your developer enrollment sorted out is the non-negotiable first step. Without it, you can’t even get to the starting line.
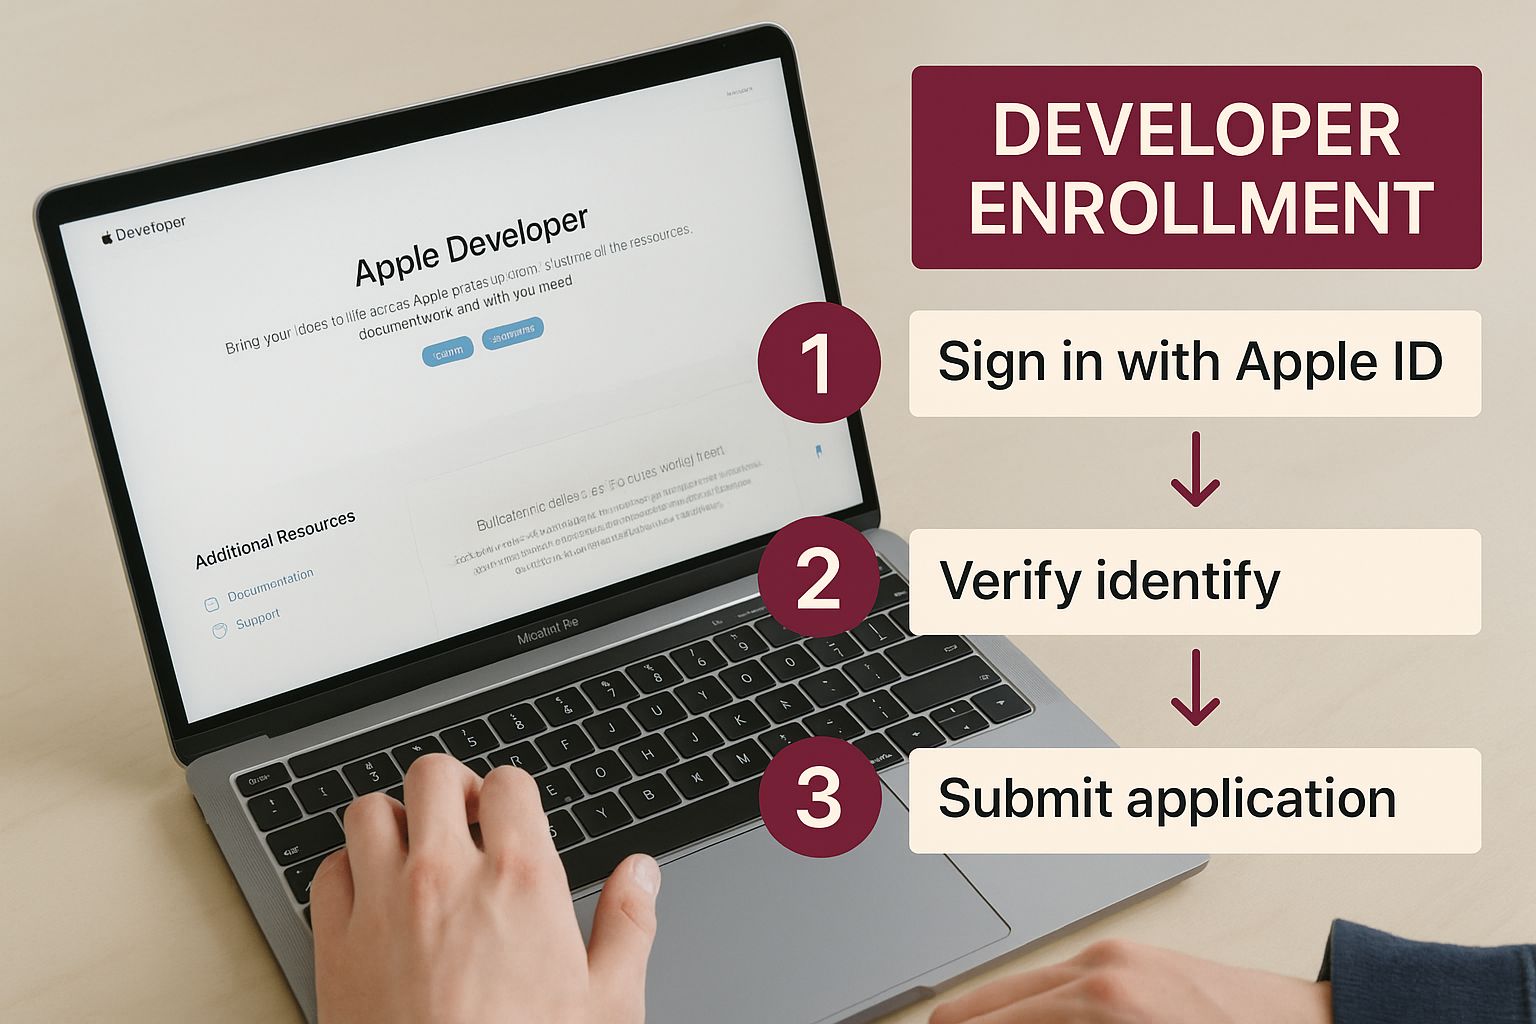
This visual really drives home the point: your active Apple Developer Program account is the key that unlocks the entire submission process, from archiving your app all the way to hitting that final “publish” button.
Getting Your Release Scheme in Order
Before you hit that archive button, you absolutely must make sure you’re using the right build scheme. In Xcode, a scheme is basically a recipe for building your app—it tells Xcode which targets to build, what configuration to use, and which tests to run.
For the App Store, you need the Release configuration. This is different from the Debug setting you’ve been using while coding. The Release build is optimized for speed and a smaller file size, which is precisely what your users need.
It’s an easy check. Just go to Product > Scheme > Edit Scheme. When the window pops up, click “Archive” on the left and double-check that the “Build Configuration” dropdown is set to Release. This one small step can save you the embarrassment of submitting a slow, bloated debug version.
My Two Cents: While you’re in that scheme editor, pop over to the “Build” tab. I’ve seen builds fail because a crucial extension or framework wasn’t checked off here. Make sure everything that’s part of your app is actually included in the build. It’s a common and frustrating oversight.
Handling Version and Build Numbers
Versioning is a surprisingly common tripwire for developers. If you look in the “General” settings for your app’s main target in Xcode, you’ll spot two very important fields:
- Version: This is the number your users will see on the App Store page, like 1.0.1. It’s your public-facing version.
- Build: This is your internal version number. It has to be unique for every single upload to App Store Connect for a specific version string. My personal system is simple: just increment it by one for every new archive (1, 2, 3, etc.).
Keep these straight. Apple’s system is strict and will flat-out reject a new build if you reuse a build number that’s already been submitted for the current app version.
Tackling Common Archive Failures
Even with a perfect setup, archives can sometimes fail. More often than not, the culprit is related to code signing. A mismatched provisioning profile or an expired certificate can bring the whole process to a screeching halt.
Getting a handle on these issues early is key to avoiding headaches later. If you find yourself stuck, it’s worth taking the time to learn more about how to manage your Apple Developer provisioning profiles to ensure everything is configured correctly. A few minutes of troubleshooting here can save you hours of frustration down the line.
Alright, with your app neatly archived in Xcode, it’s time to shift gears and head over to the main event: App Store Connect. Think of this as your mission control for everything that happens after the code is written. This is where you’ll manage your app’s listing, set its price, decide where it’s available, and ultimately, submit it for review.
It’s more than just a dashboard; it’s your digital storefront. Getting this part right is just as important as the code itself.
The very first thing you’ll do in App Store Connect is create the official record for your app. Just find “My Apps,” hit that little “+” icon, and select “New App.” You’ll be asked for some core details right away. Pay close attention here, because some of these—like the Bundle ID—are a real pain to change later.
Building Your Store Listing
When you’re creating that new app record, you’re basically giving it an identity. This includes your app’s name, its primary language, and the critical Bundle ID. This has to be an exact match to the one you set up back in Xcode. If it isn’t, your builds will simply fail to upload. No wiggle room here.
You’ll also set a SKU (Stock Keeping Unit), which is just a unique ID for your own tracking purposes—it’s not public. Once those foundational pieces are in place, you can get to the fun part: crafting the metadata that will actually sell your app to real people.
This is where you move from developer to marketer. Your app description, your keywords, and especially your screenshots all need to work together to tell a compelling story and convince someone to tap that download button.
Expert Tip: Avoid the temptation to just list features in your app description. The first few lines are your hook. Lead with the benefit. What problem does your app solve? How does it make someone’s life easier or more fun? That’s what grabs attention and drives downloads.
Crafting High-Impact Metadata
Your App Store listing is a collection of several crucial elements, and each one deserves some thought. Nailing this is a massive part of a successful launch.
Here’s a quick-reference table to help you gather everything you’ll need. Think of this as your pre-flight checklist before you start filling out the forms in App Store Connect.
App Store Metadata Checklist
| Metadata Element | Purpose | Key Consideration |
|---|---|---|
| App Name | Branding & Discovery | Try to balance a unique brand name with a relevant keyword for better search visibility. |
| Screenshots | Visual Marketing | Your most powerful sales tool. Show the app in action and highlight key benefits. Must be high-quality. |
| Keywords | Search Optimization | You get a 100-character field. Research what terms your target users actually search for. |
| Privacy Policy URL | Legal Requirement | This is non-negotiable. You need a live webpage detailing your data handling practices. |
| Category & Age Rating | User Targeting | Choose the most fitting category and be honest about the content to ensure the correct age rating is applied. |
Preparing these components thoughtfully will give your app a fighting chance in a competitive marketplace.
The potential here is huge. In a recent year, consumer spending on the App Store soared to $89.3 billion, a figure that keeps climbing and is more than double the revenue of Google Play.
Getting this listing right is just one part of the overall journey. To see how this fits into the bigger picture, you can explore our detailed guide on the complete mobile app deployment process. Once all this metadata is filled out, you’ll be ready to link the build you uploaded from Xcode and get one step closer to hitting “Submit for Review.”
Alright, you’re at the final hurdle. Your metadata is looking sharp in App Store Connect, your build is archived in Xcode, and now it’s time to bring it all together and get it in front of the App Store review team. This is where all that careful preparation really pays off.
First things first, let’s get that build uploaded. Head back to Xcode’s Organizer window, find the archive you just created, and hit “Distribute App.” You’ll want to select the “App Store Connect” option (previously called “TestFlight & App Store”) and follow the prompts. Xcode does the heavy lifting here—it validates your app, bundles it up, and securely sends it over to App Store Connect. Be patient; this can take a few minutes. Once it’s done, your build will pop up under the “Build” section for your app’s version on the App Store Connect website.
Giving the Reviewer a Helping Hand
With your build processed and selected, you need to provide some crucial details for the review team. Don’t treat this as just another box to check; clear communication here can be the difference between a swift approval and a frustrating rejection.
The App Review Information section is your direct line to the person who will be testing your app. If your app has any kind of login, you absolutely must provide a working demo account—username and password included. Forgetting this is one of the fastest ways to get an immediate rejection. They can’t review what they can’t access.
And please, don’t ignore the Notes for Reviewer field. This is your chance to preempt any confusion.
- Does a key feature only activate after a specific user action? Explain it.
- Does your app need to connect to a piece of hardware to work correctly? Describe it.
- Is there a non-obvious navigation path to a critical screen? Spell it out.
Clear, concise notes show you respect the reviewer’s time and can prevent a lot of back-and-forth.
The Waiting Game: What to Expect During Review
Once you click that final “Submit for Review” button, your app’s status will flip to Waiting for Review. This kicks off a process that, in my experience, usually takes about one to three days. You’ll get email updates as your app moves through the queue to In Review and, finally, to its decision.
A Pro Tip: That “In Review” status can feel a bit nerve-wracking, but it’s a great sign. It means a real person is actively testing your app. Remember, reviewers are looking for guideline compliance, not just trying to find reasons to reject you. If you’ve submitted a polished, bug-free app with clear notes, your odds of a smooth approval are very high.
The most common rejections I see stem from basic guideline violations or performance problems. A big one is failing to meet Guideline 2.1, which covers app completeness. Things like hidden bugs, broken links, or placeholder content are almost guaranteed rejection magnets. The best defense is a good offense: get familiar with the official https://codepushgo.com/es/blog/app-store-review-guidelines/ long before you even think about submitting.
If you do get rejected, don’t panic. The Resolution Center in App Store Connect will give you specific feedback, often with helpful screenshots, explaining exactly what went wrong. Read their notes carefully, fix the issue, and resubmit. A professional and direct response can turn a rejection into a simple, constructive step toward a successful launch.
Monitoring Success and Planning Your Next Update
So, your app is live on the App Store. Congratulations! It’s a huge milestone, but resist the urge to just sit back and relax. The real journey begins now. Publishing the app was the first half; the second half is about managing it as a living, breathing product.
Think of it this way: you’ve just opened a new shop. Now you need to watch who comes in, what they look at, and what they think.
Interpreting User Feedback and Data
Your first port of call should be App Analytics right inside App Store Connect. This is where you get the hard numbers. Keep a close eye on metrics like impressions, product page views, and downloads. This data tells the story of how well your App Store page is convincing people to hit that “Get” button.
But numbers only tell you part of the story. To truly understand the user experience, you need to dig into crash reports and user reviews. App Store Connect gives you surprisingly detailed crash logs. Use them to hunt down those pesky stability bugs that somehow slipped through your testing phase. They always do.
User reviews are your direct line to your audience. Yes, some can be harsh, but they are pure gold. Look for recurring themes. Are multiple people complaining about a confusing UI element? Is the same bug mentioned over and over? That’s your priority list for the next update, handed to you on a silver platter. Learning effective customer feedback strategies will be invaluable as you plan what comes next.
Key Takeaway: Treat every piece of user feedback, positive or negative, as a gift. It’s free market research that tells you exactly what to build or fix next to keep your audience engaged and happy.
The Art of the App Update
Knowing when to push an update is a bit of an art form. If you’ve found a critical, app-crashing bug, you need to patch it immediately. Don’t wait. For new features, however, it’s often smarter to bundle them into a more significant, noteworthy release to build up some hype.
Whenever you’re ready to submit a new version, don’t forget the basics in Xcode: increment your version and build numbers. For instance, if your first release was 1.0 (build 1), a small bug-fix release might become 1.0.1 (build 2). A bigger update with a new feature could be 1.1 (build 1).
When you submit, make your “What’s New in This Version” notes count. Nobody is inspired by “Bug fixes and performance improvements.” Be specific and show you’re listening.
- “We squashed a bug that caused crashes when editing your profile.”
- “You can now share your creations directly to Instagram!”
This kind of transparency builds trust and gives people a reason to actually install the update.
For those looking to streamline their workflow, you can even explore ways to push updates without going through the full App Store review every single time. We have a great guide on how to get started with implementing automatic app updates. This cycle of monitoring, learning, and updating is the engine that drives long-term success.
Frequently Asked Questions About App Store Publishing
Even with the best guides, hitting that final “Submit for Review” button can feel like a leap of faith. I’ve been there. Over the years, I’ve seen the same questions pop up time and time again from developers navigating this last mile. Let’s clear up some of that common confusion so you can submit with confidence.
One of the biggest unknowns is always the review time. You’ve worked for months, and now you’re just waiting. So, how long will it actually take? While Apple doesn’t give a hard deadline, my experience and community data consistently point to a 24 to 72-hour window. If your app is straightforward and you’ve provided clear notes for the reviewer, you’ll likely land on the faster end of that estimate.
Handling Rejections and Resubmissions
What happens if your app gets rejected? First, don’t panic. A rejection is just feedback, not a final ‘no’. It’s a normal part of the process.
Apple’s Resolution Center will give you the exact reason, usually referencing a specific App Store Guideline and sometimes even providing screenshots. Your job is to read it carefully, address the issue, and then resubmit. I’ve found that a polite, professional response in the submission notes explaining what you fixed can really smooth out the resubmission process.
Some of the most common rejection flags I see are:
- Guideline 2.1 - App Completeness: This is the big one. It’s their polite way of saying your app is buggy, has broken links, or still contains placeholder content. It means it just wasn’t ready for prime time.
- Missing Demo Account: An instant rejection. If your app has a login screen, you must provide a working demo account for the reviewer. No exceptions.
- Privacy Violations: Your privacy policy isn’t just a formality. It has to perfectly match what your app actually does with user data. Be crystal clear about what you collect and why.
A Quick Tip: Your best defense against a rejection is one last, exhaustive testing pass before you submit. Get fresh eyes on it. Check out these pointers on how to test a mobile app to make sure you catch those show-stopping bugs before Apple’s team does. This single step can save you days of frustrating back-and-forth.
Post-Launch Questions
“Can I change my app’s name or price after it’s live?” Yes, you absolutely can. Most of your app’s metadata—the name, description, screenshots, keywords, and price—can be edited at any time in App Store Connect.
The only things that are pretty much set in stone after your first submission are the Bundle ID and your company’s legal entity name. Everything else is flexible, which is great for A/B testing your store listing, running promotions, or even pivoting your marketing strategy down the road. Just keep in mind that metadata changes still require a quick review from Apple, but it’s usually much faster than a full app review.
Ready to ship features and bug fixes instantly, without waiting for App Store review? With CodePushGo, you can deploy over-the-air updates directly to your users’ devices in minutes. Take control of your release cycle and deliver a seamless experience by visiting https://codepushgo.com.


