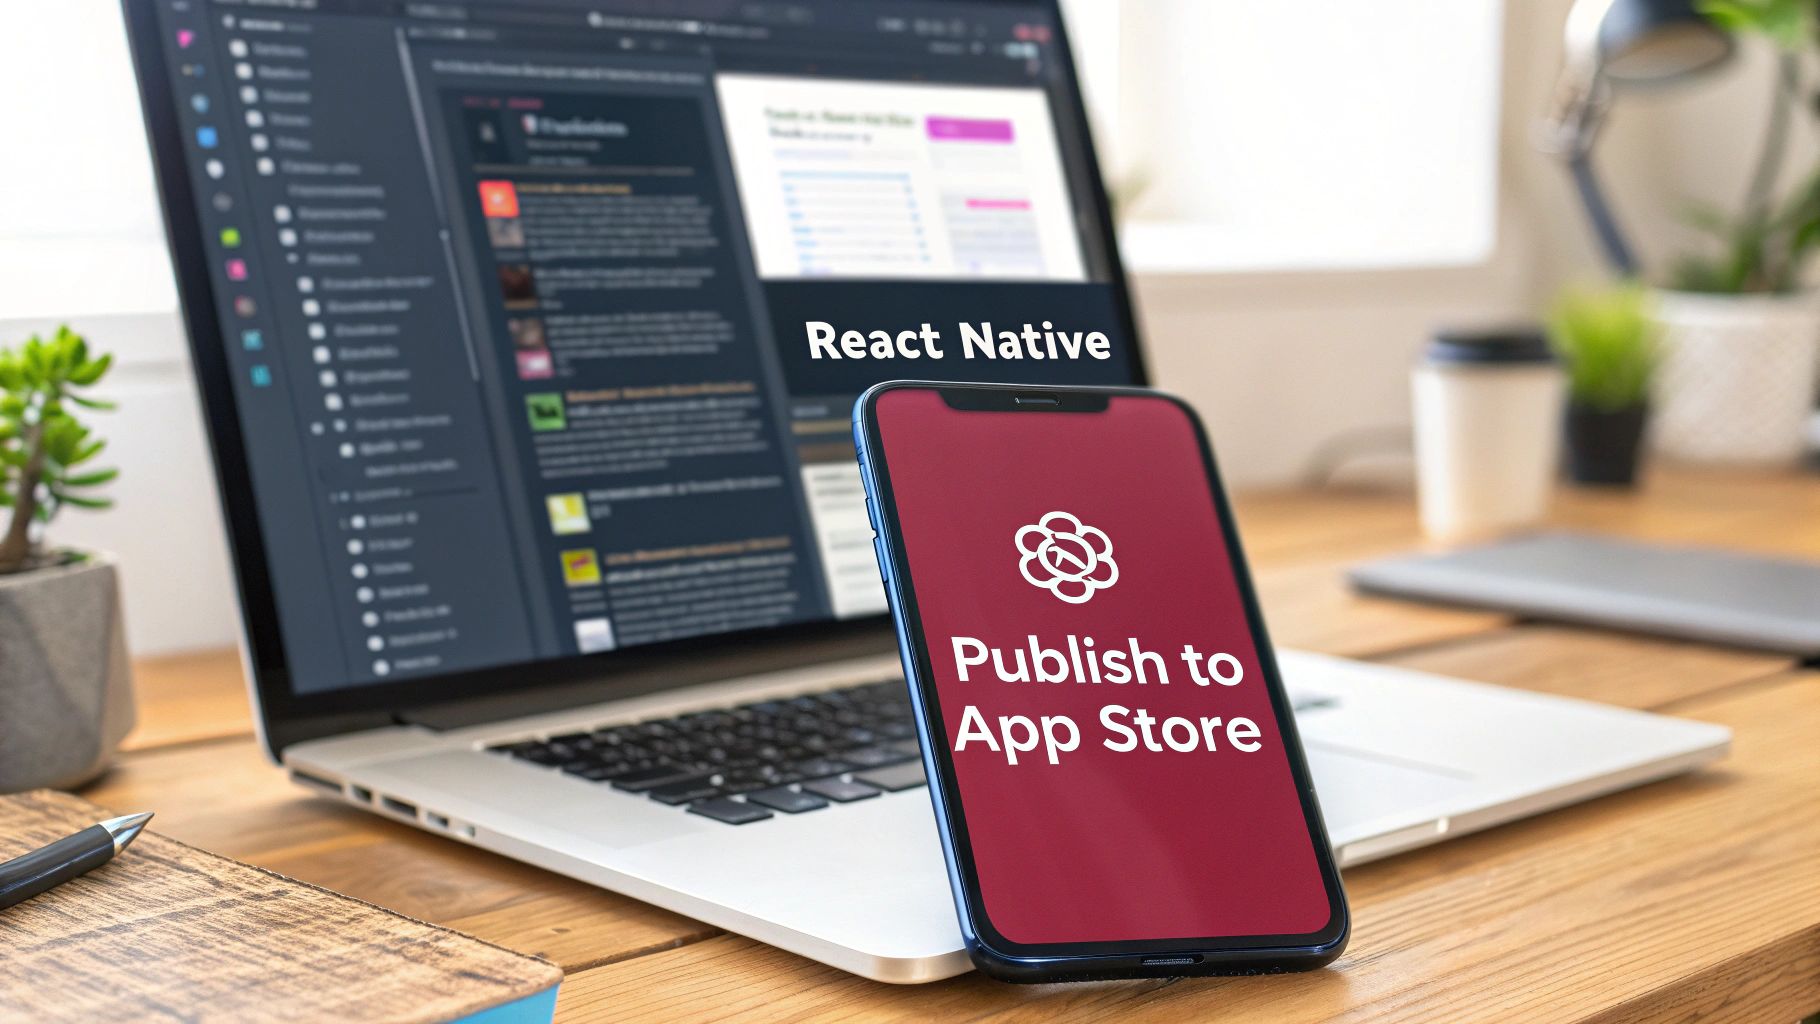
Publishing your app on the Apple App Store is a rite of passage for any developer. The process boils down to getting your app ready, signing up for the Apple Developer Program (which costs $99 annually), and then using a combination of Xcode and App Store Connect to get it into the store. It’s a journey that involves generating certificates, creating a compelling app listing, and navigating Apple’s notorious review process.
Laying the Groundwork for a Successful Launch

Before you even dream of hitting that “Submit for Review” button, you need to run a serious pre-flight check. Getting these foundational pieces right from the get-go will save you a world of hurt later. I’ve seen countless developers dive headfirst into Xcode, only to get stuck backtracking to fix simple configuration mistakes.
The App Store is a crowded place—you’re competing with over 1.96 million other apps. In 2024, more than 450,000 new apps were submitted, but fewer than 60% made it through on their first attempt. That number alone should tell you how critical preparation is.
Before you get started, it’s wise to gather all your assets and information. Having everything in one place makes the whole process smoother and helps you avoid last-minute scrambles.
Essential Pre-Submission Checklist
| Requirement | Description | Key Tip |
|---|---|---|
| App Name | The name that appears on the App Store. Must be unique. | Check for uniqueness on the App Store before you commit. Have a backup name ready just in case. |
| Bundle ID | A unique, reverse-domain identifier (e.g., com.company.appname). | This cannot be changed after your first build is uploaded. Choose it carefully. |
| App Icon | A high-resolution icon (1024x1024px) without transparency. | Xcode will automatically generate the other required sizes from this primary asset. |
| Screenshots | A set of images for various device sizes (iPhone and iPad). | Don’t just take screenshots. Design them to tell a story and highlight your app’s best features. |
| App Description | Compelling copy that explains what your app does and why people need it. | Focus on the benefits, not just the features. The first few lines are the most important. |
| Privacy Policy URL | A link to your app’s privacy policy. This is a non-negotiable requirement. | Use a free privacy policy generator if you don’t have one, but ensure it accurately reflects your data practices. |
Having this checklist sorted will make the technical steps in Xcode and App Store Connect feel much less daunting.
Defining Your App’s Core Identity
Your app’s identity is anchored by a few critical details that must be unique and consistent. Think of this as your app’s digital fingerprint—it’s how Apple keeps track of everything.
-
Bundle Identifier: This is a reverse-domain name string like
com.yourcompany.yourappthat uniquely identifies your app. Once you upload a build with a specific bundle ID, it’s locked in forever. Seriously, you can’t change it. So pick a good one. -
Version and Build Numbers: The version number (e.g.,
1.0.1) is the one your users see in the App Store. The build number (e.g.,12) is your internal counter. You have to increment the build number with every single upload to App Store Connect, even if it’s for the same user-facing version.
A classic rookie mistake is leaving a generic bundle ID from a tutorial (
com.example.myapp) in the release build. This will get your submission rejected immediately because, you guessed it, that ID is already taken.
To avoid common pitfalls, it’s a great idea to familiarize yourself with proven release management best practices. This will help you manage versions, builds, and releases in a more organized way, which is a lifesaver as your app grows.
Crafting Your Visual Assets
On the App Store, looks are everything. Your app icon and screenshots are your storefront, and they need to be sharp, compliant, and enticing.
Your app icon needs to be supplied in various sizes to look good everywhere, from the Home Screen to search results. Thankfully, you just need to provide the largest one, and Xcode handles the rest. For screenshots, go beyond simple screen grabs. Use them to create a compelling visual narrative that shows off what makes your app special.
Getting early feedback on these visual elements is also a smart move. You can learn more about preparing your app for initial user impressions in our guide here: https://codepushgo.com/blog/beta-testing-apps/
Navigating Certificates, Identifiers, and Profiles
Alright, let’s tackle what is often the most confusing part of this whole process: the world of Apple’s certificates, identifiers, and profiles. Getting these digital credentials in order can feel like a maze, and it’s a step that trips up even seasoned developers. But don’t worry, we’re going to walk through it piece by piece so you can sidestep the common pitfalls.
Think of Apple’s system as a three-part security check designed to make sure every app is secure and comes from a verified source.
- Certificates: This is your digital ID card. It proves you are who you claim to be.
- Identifiers (App ID): This is your app’s unique fingerprint, its official registration with Apple.
- Provisioning Profiles: This is the magic document that connects your ID card (certificate) to your app’s fingerprint (identifier), giving you the green light to submit to the App Store.
This infographic gives a great high-level view of where this credential setup fits into the bigger picture.
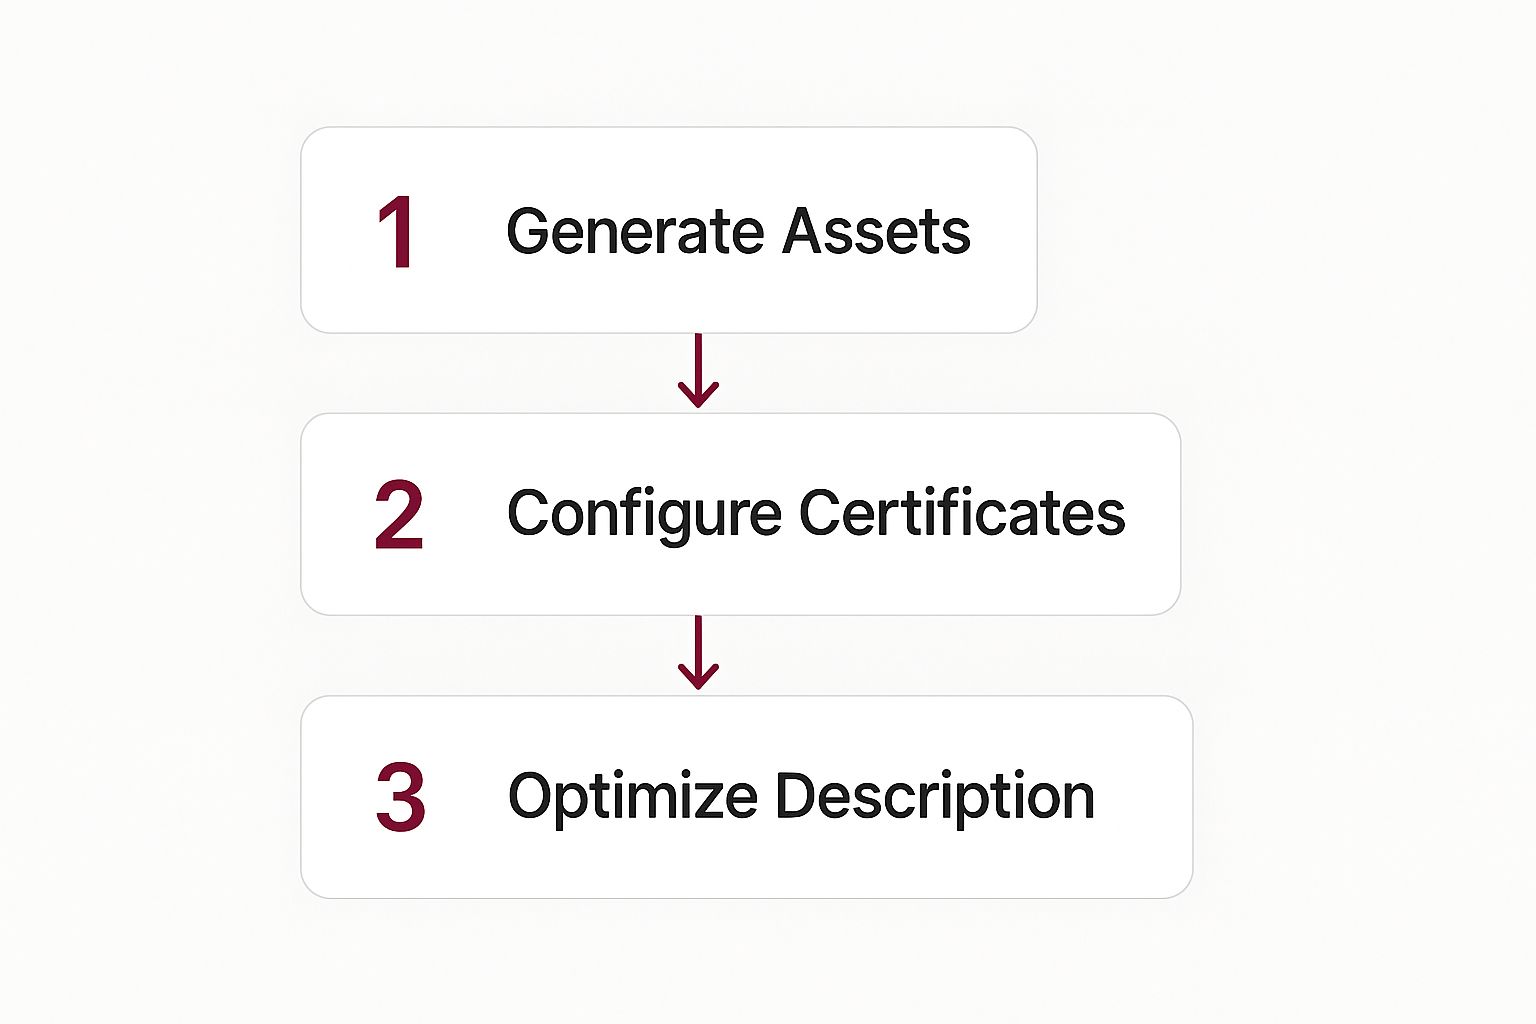
As you can see, getting your app’s credentials sorted out is a foundational step. You have to get this done before you can move on to the fun stuff like optimizing your store listing or uploading the final build.
Creating Your App ID
First on the list is creating an App ID. This is how you formally register your app with Apple. Head over to the “Certificates, Identifiers & Profiles” section of the Apple Developer portal to get started.
You’ll need your app’s Bundle ID handy—that unique, reverse-domain string like com.yourcompany.yourapp that you’ve already set up in your project. Be sure to select the “Explicit” App ID option and make sure the Bundle ID you enter matches exactly.
This is also the spot where you’ll enable any special capabilities your app requires, like Push Notifications, Sign in with Apple, or HealthKit. A word of advice: only select the services your app actually uses. Ticking extra boxes you don’t need can sometimes cause unnecessary complications down the road.
Generating the Distribution Certificate
Next up is the Distribution Certificate. This is the cryptographic key that officially signs your app, proving to Apple that it came from you and hasn’t been messed with. To get one, you’ll first need to create a Certificate Signing Request (or CSR) using the Keychain Access app on your Mac.
Once you have that CSR file, you’ll upload it to the Apple Developer portal. In return, Apple gives you the official distribution certificate (a .cer file). Just download and double-click that file, and it’ll be added to your Keychain, making it ready for Xcode to use.
If you want a more granular walkthrough, our guide on how to manage your Apple Developer Certificate breaks down every single click.
My Two Cents: Xcode has an “Automatically manage signing” feature that can do a lot of this heavy lifting for you. While it’s tempting and often works great, I really recommend you go through this manual process at least once. Understanding how a certificate, an App ID, and a profile all connect is priceless knowledge for when you inevitably run into a cryptic error like “No valid signing identities found.”
Assembling the Provisioning Profile
With the App ID and certificate ready, it’s time for the final piece: the App Store Provisioning Profile. This is the file that ties everything together.
When creating it, you’ll simply select “App Store” as the distribution type. From there, you just need to select the App ID and the Distribution Certificate you created in the previous steps.
Download the profile, double-click to install it, and you’re set. This profile is the final permission slip that tells Xcode, “Yes, this specific app, signed by this specific developer, is officially cleared for takeoff to the App Store.”
Alright, with your certificates and profiles sorted, it’s time to move on to the fun part: setting up your app’s digital storefront in App Store Connect. This isn’t just a box-ticking exercise. Think of it as your first, and arguably most important, conversation with a potential user. A well-crafted listing is the heart of App Store Optimization (ASO) and can make or break your launch.
We’re shifting gears here from pure code and configuration into the world of marketing and persuasion. Every word, every image you choose will either convince someone to tap “Get” or send them scrolling right past your app. Let’s make sure it’s the former.
Crafting Your App Store Metadata
The metadata—your app’s name, subtitle, and keywords—is how people find you in the first place. Get this right, and you’ve won half the battle. Your app name needs to be memorable, but for a new app, it should also hint at what it does. The subtitle is your chance to expand on that with a punchy value proposition.
For example, if your app is a “Personal Finance Tracker,” you absolutely want those keywords in your title or subtitle. It directly answers a user’s search query.
I see this all the time: a developer comes up with a clever, brandable name that tells the user absolutely nothing. While that can work for established brands, a new app needs clarity more than cleverness. Always start by telling people what your app actually does.
The stakes are high. In 2025, consumer spending on the App Store rocketed to $89.3 billion, with giants like TikTok pulling in around $1.9 billion in consumer spending on its own. This isn’t just abstract data; it’s proof of a massive, engaged audience ready to spend money on apps that solve their problems. A strong listing is your ticket to getting a piece of that pie. You can find more details on these trends and discover more insights about App Store statistics on Tekrevol.com.
The App Description and Visuals
Your app description is your sales pitch. The first couple of sentences are critical because they’re all a user sees before they have to tap “more.” Lead with the strongest benefit. What problem are you solving?
Don’t just write a wall of text. Use bullet points or short paragraphs to highlight the best features. Make it scannable.
And please, don’t just take random screenshots. Your screenshots and app preview video are your visual story. They need to be curated to walk a user through the best parts of your app. I always recommend using text overlays on each image to explain the feature being shown. It provides context and guides the user’s eye.
To really drive this home, here’s a quick look at what separates a lazy listing from a compelling one.
App Store Metadata Optimization at a Glance
| Metadata Field | Weak Example | Strong Example | Reasoning |
|---|---|---|---|
| App Name | ”Aura" | "Aura: AI Meditation & Sleep” | The weak example is vague. The strong one is brandable but also packed with high-intent keywords, immediately telling users its purpose. |
| Subtitle | ”Find your inner peace." | "Guided sessions for anxiety & focus.” | The weak subtitle is generic marketing speak. The strong one is benefit-driven and uses specific keywords users might search for. |
| Screenshots | Random UI captures with no text. | A curated flow showing key features with text overlays like “Track Your Progress” or “5-Minute Guided Meditations.” | The strong example tells a story and highlights value, while the weak one forces the user to guess what they’re looking at. |
| Description | A long paragraph about the app’s mission. | A short, punchy opening sentence followed by a bulleted list of key features and benefits. | The strong description is scannable and user-centric, focusing on what the app does for them. The weak one is easily ignored. |
As you can see, the “strong” examples aren’t just more descriptive; they’re strategically designed to answer a user’s unspoken questions and rank better in search.
Pricing, Availability, and Legal Essentials
Setting your app’s price and where it’s available is pretty straightforward in App Store Connect. You can pick from Apple’s pricing tiers or go the free-with-in-app-purchases route. You also get to choose the countries for your launch, which is great for a phased rollout if you want to test in a smaller market first.
Now for the legal stuff you can’t ignore: a privacy policy and terms of service are non-negotiable. If you’re not sure where to start, there are great resources on how to write effective policies that can guide you through meeting all the legal requirements.
Finally, you’ll need to fill out the App Privacy section—Apple’s “nutrition label” for apps. This is where you declare exactly what data your app collects and why. Be brutally honest here. Apple has and will reject apps for providing inaccurate privacy details. For a deeper dive, check out our guide on the importance of a privacy policy for mobile apps.
Building and Uploading Your App with Xcode
With your App Store Connect listing ready and waiting, it’s time to head back into Xcode for the final technical stretch. This is where your code, certificates, and app metadata all come together. I can’t stress this enough: getting this stage right is crucial. A single mismatched setting can send you down a rabbit hole of confusing error messages.
First things first, make sure your project is set up for a release build, not a debug one. This little change tells Xcode to optimize your app for performance and size—exactly what you want for the App Store.
Configuring Signing and Capabilities
Now, let’s dive into the “Signing & Capabilities” tab for your project’s target. Think of this as the control center that connects your app to the Apple Developer account credentials you worked on earlier. If you’ve ever battled with code signing issues, this screen is probably a familiar (and maybe painful) sight.
You have two main paths you can take here:
- Automatically manage signing: This is Xcode’s attempt to make life easier. You just select your developer team, and Xcode tries to find and assign the correct Distribution Certificate and Provisioning Profile. For straightforward projects, it works great.
- Manual signing: For more complex setups or when you just need total control, uncheck the automatic option. This lets you manually select the exact App Store Provisioning Profile you created. I usually lean this way if I’m troubleshooting or managing multiple app targets.
Whichever route you choose, the goal is the same: Xcode needs to show a “Ready” status with no angry red error icons. If you get stuck here, our comprehensive guide on signing an iOS app can help you sort out those common certificate and profile headaches.
Archiving and Validating Your Build
Once signing is all green, you’re ready to create the actual build file for the App Store. This isn’t your everyday build; it’s an archive.
Head up to the Xcode menu and choose Product > Archive. This is a critical step: you absolutely must have “Any iOS Device (arm64)” selected as your build destination. If you have a simulator selected, the “Archive” option will be grayed out—a classic mistake that trips up even seasoned developers.
Xcode will then compile your code and neatly package it into a .xcarchive file. When it’s finished, the Organizer window will pop open, showing your new archive. This is mission control for the final upload.
Before you even think about hitting that “Distribute App” button, use the “Validate App” button. This feature is your best friend. It runs a pre-check that simulates the first part of the App Store submission, catching common problems like missing icons or private API usage before you waste time on a full upload that’s doomed to fail.
If the validation passes without any errors, give yourself a pat on the back! You’re clear to click “Distribute App” and send your work off to App Store Connect. This final step uploads your build, which will then go through some automated processing before it’s ready for you to attach to your listing and submit for review.
Surviving the App Review and Post-Launch Strategy
https://www.youtube.com/embed/bz_KJdXylh0
You’ve finally hit that “Submit for Review” button. There’s a moment of relief, but it’s quickly followed by a new status in App Store Connect: “Waiting for Review.” This is where the real waiting game begins, and understanding what’s happening behind the scenes can save you a lot of anxiety.
At this point, your app is in a queue for Apple’s review team. They’ll manually go through it to make sure it meets their notoriously strict quality and safety standards. This isn’t just a quick bug check; it’s a deep dive into everything from your app’s functionality to its privacy policy to ensure it aligns with their ever-evolving guidelines.
The market you’re trying to enter is massive. Annual App Store revenue is on a trajectory to hit $122.4 billion in 2025, a staggering increase of over 300% from $28.6 billion in 2016. With that kind of money and user trust on the line, it’s no wonder Apple is so meticulous. You can find more details on this growth over at BankMyCell.com.
Navigating App Rejection
Getting a rejection notice can feel like a punch to the gut, but it’s rarely a dead end. Think of it more as a request for revision. Most rejections I’ve seen come down to pretty common issues: metadata problems, missing information, or simple guideline violations.
For example, promising a feature in your app description that the reviewer can’t find is a classic mistake and a guaranteed rejection. Another common pitfall is a weak or missing privacy policy, especially if your app handles any kind of user data.
My biggest piece of advice here: read the rejection message carefully. Apple’s feedback is usually specific. Don’t just fix the one issue they mention; use it as a clue to find other potential problems they might not have caught yet. Treat it as a free audit of your app.
If their feedback seems vague, don’t just guess. Use the Resolution Center to talk directly with the review team. Keep it professional, provide clear explanations, and attach screenshots or even a short video to make your point. A respectful and detailed response can make all the difference in getting your app re-reviewed quickly.
Post-Approval and Launch Strategy
Seeing that “Ready for Sale” status is an amazing feeling, but don’t rush to flip the switch. You’re in the driver’s seat now, so be strategic about your release.
- Phased Rollout: This is a lifesaver. You can release your app to a small percentage of users and gradually increase it over seven days. It’s the perfect safety net for catching any show-stopping bugs before they reach your entire audience.
- Scheduled Release: If you have a marketing campaign, a press release, or a specific launch event planned, you can pick the exact date and time your app goes live. This is perfect for building hype and coordinating your efforts.
Getting your app on the store is a huge milestone, but it’s just the beginning. The real work starts now. You’ll need to keep an eye on performance analytics in App Store Connect, listen to user feedback, and get ready for a continuous cycle of bug fixes and feature updates. To stay on the right side of Apple, it’s a good idea to regularly refresh your knowledge of the complete App Store Review Guidelines.
Common App Store Submission Questions
After all the hard work of building your app, hitting that “Submit” button can feel like the final step. But it often brings up a whole new set of questions. Let’s walk through some of the most common ones I’ve heard from developers over the years, so you know exactly what to expect.
Getting these last few details right can be the difference between a smooth launch and a frustrating delay.
How Long Does the Apple App Review Usually Take?
The million-dollar question! The waiting period can be nerve-wracking, but the good news is Apple has gotten pretty fast. These days, most reviews are completed within 24 to 48 hours.
Of course, this isn’t a hard and fast rule. A few things can affect your timeline. If it’s your very first time submitting an app, it’s smart to plan for a bit more time—maybe up to a week—just in case Apple’s team has questions. Updates for an app that’s already live, especially minor bug fixes, often fly through the review process in just a few hours.
My number one tip for a faster review? Be generous with your review notes. If your app requires a login, give them a demo account. If you have a complex feature tucked away, explain exactly how to find and use it. This small effort saves a ton of back-and-forth and can prevent days of delays.
What Are the Top Reasons for App Rejection?
Getting a rejection notice is a rite of passage for many developers, but you can avoid the most common pitfalls with a little preparation. Crashes and major bugs are the most obvious dealbreakers—if your app doesn’t work, it’s getting sent back, no questions asked.
But beyond basic stability, a few other things frequently trip people up:
- Incomplete Information: This one is so easy to avoid! Double-check that all your metadata is filled out, your privacy policy link works, and your contact info is correct.
- Guideline Violations: Take the time to actually read the App Store Review Guidelines. Things like violating user privacy or including objectionable content are surefire ways to get rejected.
- Misleading Users: Your app must do what it says it does. Don’t show off features in your screenshots that aren’t actually in the app. That’s a classic mistake that will get you flagged immediately.
Can I Update My App After It Is Published?
Yes, absolutely! Launching your app isn’t the end of the journey; it’s just the beginning. You can, and should, regularly submit updates to add features, fix bugs, and improve the user experience.
The process for submitting an update is almost identical to your first submission. You just create a new build in Xcode with an updated version number and upload it through App Store Connect.
Even small bug-fix updates need to go through the review process, but they usually move much quicker than a brand-new app.
Waiting for App Store reviews can really slow down your momentum, especially when you just need to push a quick fix. That’s where a tool like CodePushGo comes in handy. It lets you send instant, over-the-air updates directly to your React Native app, completely bypassing the review process for any JavaScript-level changes. You can ship bug fixes and small features in minutes, not days. Check it out at https://codepushgo.com.


