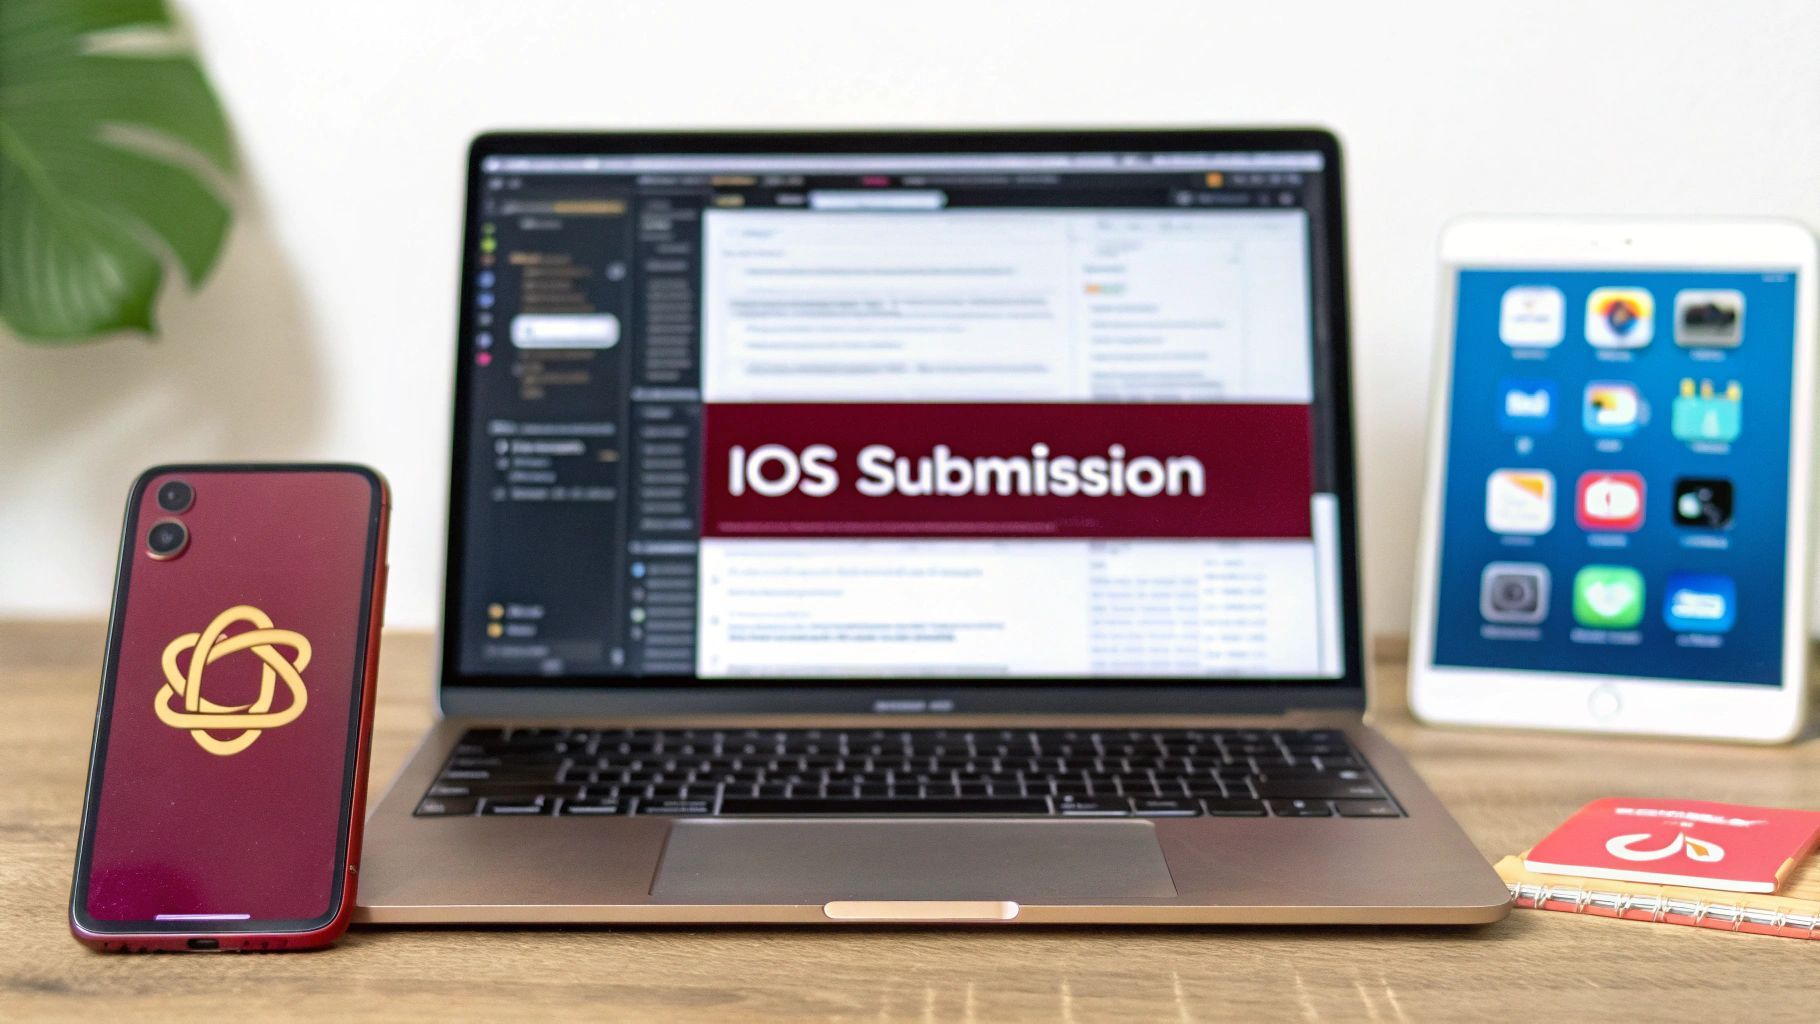
Getting your React Native app onto the Apple App Store is the final, crucial step that stands between your hard work and millions of potential users. This isn’t just a technical upload; it’s a carefully orchestrated process involving specific credentials, compelling marketing assets, and a deep understanding of Apple’s rules. Nailing these steps is what separates a smooth launch from a frustrating series of rejections.
Your iOS App Submission Blueprint
The path from a finished app to a live App Store listing can feel like a maze, but it’s actually a well-trodden road. This guide is your map, breaking down the entire journey into clear, manageable milestones. We’ll start with a bird’s-eye view of the whole process, from setting up your Apple Developer account to polishing the last piece of metadata.
Think of this as your strategic overview. By seeing the full picture from the get-go, you can anticipate what’s coming, sidestep common holdups, and turn a potentially stressful experience into a streamlined workflow.
The Core Submission Milestones
At its core, the submission process unfolds in a few major phases. Each one logically follows the last, transforming your local codebase into a product ready for the public. Understanding this flow is the key to not getting lost in the details.
This visual lays out the fundamental sequence, showing how each piece fits together.
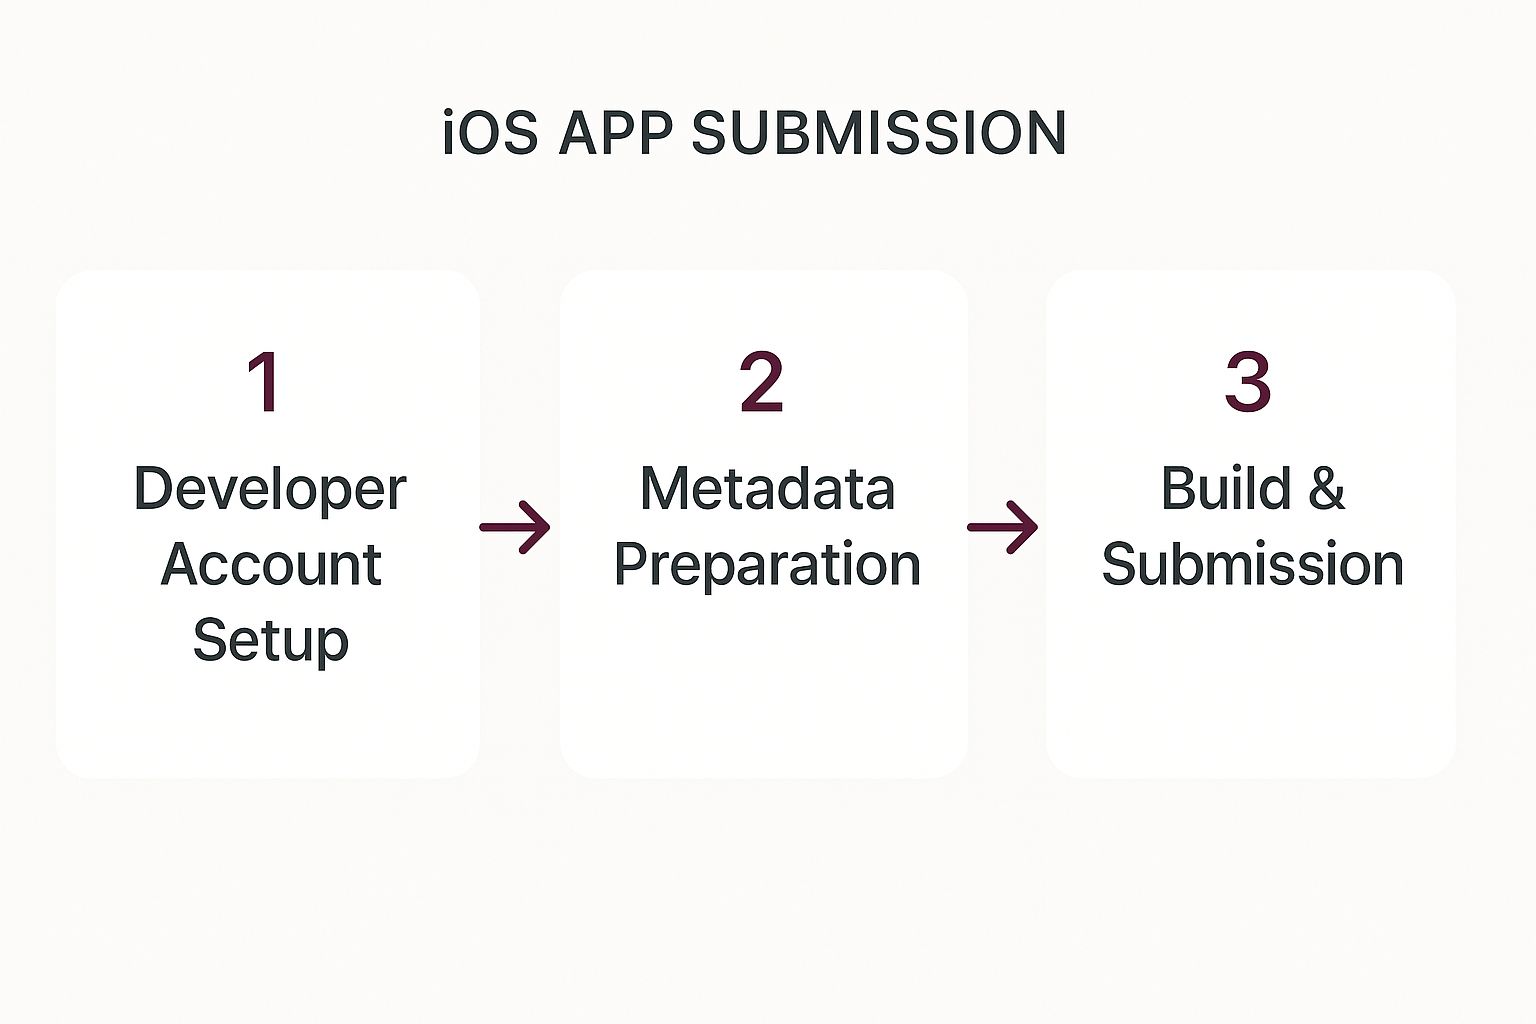
As the diagram shows, it’s a linear path. You can’t jump ahead—foundational steps like getting your developer account in order must happen before you can even think about uploading a build.
The App Store has grown immensely since it launched in 2008. What started with a few thousand apps is now a massive marketplace projected to host nearly 1.91 million apps by 2025. This explosion is fueled by an ever-growing user base, which is expected to climb from 1.04 billion iPhone users in 2020 to an incredible 1.56 billion by 2025. It’s essential to understand these App Store trends to appreciate the competitive landscape you’re about to enter.
What To Expect Along The Way
A smooth submission requires a solid grasp of the entire mobile app deployment process. It’s more than just shipping code; it’s a careful mix of technical configuration, marketing prep, and strategic patience.
To get it right, you’ll need to focus on three critical areas:
- Technical Readiness: This is all about getting the right certificates, creating provisioning profiles that link your app to your account, and archiving a clean build in Xcode.
- Storefront Presentation: This covers everything users will see on your App Store page—your icon, screenshots, description, keywords, and privacy details.
- Compliance and Review: This means thoroughly checking your app against Apple’s strict App Store Review Guidelines to clear the final hurdle.
Before we dive into the nitty-gritty, this table summarizes the key components you’ll be working with.
Core Components of App Submission
| Component | Purpose | Where to Manage |
|---|---|---|
| Apple Developer Account | Your membership for accessing all development and distribution tools. | Apple Developer |
| Certificates | Cryptographic keys that verify your identity as the developer. | Apple Developer Portal & Xcode |
| App ID (Bundle ID) | A unique string that identifies your app across the Apple ecosystem. | Apple Developer Portal |
| Provisioning Profiles | Connects your App ID, certificates, and devices for testing/distribution. | Apple Developer Portal |
| App Store Connect | The web portal for managing your app’s metadata, builds, and sales. | App Store Connect |
| Xcode | The IDE used to archive your app and upload the final build. | Your Mac |
Understanding how these pieces fit together is the first step toward a successful launch.
A successful iOS app submission isn’t just about passing the review; it’s about setting your app up for visibility and user trust from day one. Every piece of metadata is a marketing opportunity.
By approaching the submission with a clear plan, you can avoid the common traps and ensure your app makes a fantastic first impression on both Apple’s reviewers and your future users.
Managing Certificates and Provisioning Profiles
Before your app can even dream of hitting the App Store, you need to get its digital credentials in order. This part of the iOS app submission process is all about security and authenticity. The best way to think about certificates and provisioning profiles is like a passport and visa for your app—they prove who you are and give your app permission to exist inside Apple’s ecosystem.

I know this step can feel a bit intimidating, especially with all the jargon. But at its core, it’s a logical process. The goal is to build a secure chain of trust that links your identity as an Apple Developer directly to the app you’re shipping. Without this, Apple has no way of knowing if the app submitted under your name is actually yours.
Your First Step: Creating a Certificate Signing Request
Everything starts on your own machine with a Certificate Signing Request (CSR). You’ll generate this using the Keychain Access app that comes standard on every Mac. This CSR contains your public key and some identifying info, which you then upload to the Apple Developer Portal.
Apple takes that CSR and uses it to issue you a digital certificate. This certificate is the very first link in the chain, cryptographically tying your developer identity to your computer. Getting this initial step right is crucial, as it prevents a whole mess of problems down the line.
Understanding Development vs. Distribution Certificates
With your CSR in hand, you’ll head to the Apple Developer Portal to generate your certificates. You’ll see two main types, and knowing the difference is non-negotiable.
- Apple Development Certificate: This is your everyday workhorse. It lets you sign your app and install it on specific, registered test devices while you’re still building and debugging.
- Apple Distribution Certificate: This is the golden ticket for your final iOS app submission. You’ll use this to sign the app for distribution, whether that’s for the App Store, ad-hoc testing, or an enterprise release.
For a deeper dive, our guide on the Apple Developer certificate walks through the creation process in much more detail. To get your app on the store, you absolutely need to generate and download an Apple Distribution certificate.
Pro Tip: Guard your private key with your life! When you create a CSR, a matching private key is stored in your Keychain. If you lose it, your certificate is toast. You’ll have to revoke the old one and start over. I always recommend making a secure backup of your Keychain, just in case.
Defining Your App with an App ID
The next piece of the puzzle is the App ID, which you probably know as the Bundle Identifier. It’s a unique string in a reverse-domain format (like com.mycompany.myapp) that acts as your app’s unique fingerprint across Apple’s entire system. It must be an exact match to the bundle identifier you set in your Xcode project.
You’ll register this App ID in the Developer Portal. This is also where you tell Apple about any special capabilities your app needs, such as:
- Push Notifications
- Sign in with Apple
- HealthKit
- In-App Purchases
Enabling these services here ensures your app gets the right entitlements when you build it. I’ve seen countless build failures caused by a simple mismatch between the capabilities enabled in the App ID and the settings in the Xcode project.
Tying It All Together with Provisioning Profiles
Finally, the provisioning profile is the glue that holds everything together. It’s a single file that links your certificates, your App ID, and (for development) your test devices into one package. Xcode relies on this profile to sign your app correctly for a specific purpose.
You’ll see a few different types, but for your App Store submission, only one really matters.
| Profile Type | Use Case |
|---|---|
| Development | For installing the app on your personal test devices. |
| Ad Hoc | For distributing the app to a limited number of testers outside the App Store. |
| App Store | The crucial one for signing your app before uploading to App Store Connect. |
When you’re ready to ship, you’ll create an “App Store” distribution provisioning profile. This profile is what tells Xcode to sign your app with your distribution certificate, getting it ready for Apple’s review. It’s the last—and most critical—credential you need to sort out before you can finally build your app for release.
Configuring Your App in App Store Connect
Alright, with the certificates and profiles out of the way, it’s time to jump into App Store Connect. This is where the magic really happens. Think of it as your command center for your entire app submission—everything from your app’s name to its privacy policy gets defined right here. You’re essentially building the digital storefront that potential users will see.
Don’t rush through this part. The details you enter here directly affect how people find your app and whether they trust it enough to hit “download.” Let’s get this right from the start.
Creating Your Initial App Record
First thing’s first: you need to create a new record for your app. Once you’re in App Store Connect, head over to “My Apps” and click that little plus icon to get started. You’ll be asked for a few key details that form the foundation of your listing.
- App Name: This needs to be unique across the entire App Store, and you only get 30 characters. Make it count. You want something memorable that hints at what your app does.
- Primary Language: Just pick the main language for your app’s description and metadata. You can always add more translations later.
- Bundle ID: This is critical. From the dropdown, you have to select the exact Bundle ID you registered in the Developer Portal and that matches your Xcode project. No typos allowed!
- SKU (Stock Keeping Unit): This one’s just for you; users will never see it. It’s simply a unique ID for your records. I usually just reuse the Bundle ID here to keep things simple.
Once you hit create, you’re in. You’ll land on the product page, which is where you’ll spend most of your time filling in the rest of the information.
Crafting Compelling Metadata
Your app’s metadata is your sales pitch. It’s your chance to convince someone browsing the App Store that your app is the one they’ve been looking for. This is all about clarity, benefits, and smart keyword use.
The description field gives you a generous 4,000 characters to tell your app’s story. Start with a bang—lead with your most compelling features and explain the benefits in plain English. For a deeper dive, our guide on how to publish to the App Store has some great tips for making your description shine.
Then there are the keywords. You get a 100-character field for this. The trick is to use terms your target audience would actually search for. Apple automatically includes your app’s name and category, so don’t waste precious space on those.
Setting Your Pricing and Availability
Now, let’s talk money. In the “Pricing and Availability” section, you’ll select a price from Apple’s predefined tiers—you can’t just type in a random number. This is a big decision, especially when you consider that the Apple App Store is expected to pull in around $138 billion in revenue in 2025.
It’s also fascinating to note that about 95.37% of all apps are free. The freemium model, where you monetize through in-app purchases or subscriptions, is dominant because it removes the initial barrier for users. You can also control which countries your app is available in, which is perfect for a phased rollout or a soft launch in a smaller market first.
Your app’s metadata isn’t just a checklist to complete; it’s your first conversation with a potential user. Make every word count to build interest and drive downloads from the moment they find you.
Declaring Your App Privacy Details
Finally, and this one is non-negotiable, you have to fill out the “App Privacy” section. Apple takes this very seriously. Here, you need to be completely transparent about what data your app collects and what you do with it. This information is used to create that privacy “nutrition label” you see on App Store pages.
Be brutally honest and thorough. You’ll need to specify every piece of data you collect—from contact info to location data—and explain whether it’s linked back to a user’s identity. Getting this wrong is a surefire way to get rejected, and worse, it can destroy user trust before they even download your app.
Getting Your App Built and Uploaded with Xcode
Alright, you’ve got your App Store Connect listing ready to go. Now for the fun part: turning your React Native code into an actual app package that Apple can review. This is where we jump into Xcode.
We’re going to create something called an archive. Think of it as a perfectly wrapped gift box containing your entire app—all the code, assets, and the digital signature that proves it’s from you. Getting this part right is everything. A tiny mistake in your build settings can send you into a frustrating loop of rejected uploads. So, let’s get it done correctly the first time.
Setting Up a Release Build
First things first, you need to tell Xcode you’re building for production, not just for testing on a simulator.
At the top of the Xcode window, you’ll see your project name and a device (like “iPhone 15 Pro”). Click on that and switch the target to Any iOS Device (arm64). This tells Xcode to create a generic build that will run on any modern iPhone or iPad.
Next, you need to switch the build configuration. Go up to the menu bar and navigate to Product > Scheme > Edit Scheme. A new window will pop up. Find Archive in the left-hand menu and make sure the Build Configuration dropdown is set to Release. This is a critical step. It makes Xcode optimize the app for performance, shrink its size, and strip out unnecessary debug code.
With the scheme set, it’s time to talk versioning. This trips up so many developers. In your project’s General settings, you’ll see two fields:
- Version: This is what your users see on the App Store (e.g., 1.0.1). You must increase this number for every new release you submit.
- Build: This is an internal counter (e.g., 1, 2, 3). For any given version number (like 1.0.1), every single upload needs a unique, higher build number. If Apple rejects build 1, your next upload for version 1.0.1 must have build number 2.
Get those two straight, and you’ll save yourself a lot of headaches.
Archiving and Sending It Up
Now that your settings are locked in, the rest is pretty straightforward. Head to Product > Archive. Xcode will get to work, bundling everything up. It can take a few minutes, so now’s a great time to grab a coffee.
Once it’s finished, the Xcode Organizer window will appear, showing your brand-new archive. This is your command center for sending the app to Apple.
The following screenshot shows the Xcode Organizer, where you’ll see your app’s archived builds ready for distribution.
 From this interface, you can validate your app against App Store requirements and distribute it directly, streamlining the final steps of your submission.
Select your new archive and click the “Distribute App” button. Choose App Store Connect as the destination. Xcode will then validate your signing credentials and upload the entire package. It’s the simplest method and works most of the time.
If Xcode’s uploader gives you trouble (it happens!), download Apple’s Transporter app. It’s a standalone tool that does one thing and does it well: upload app builds. It often provides clearer error messages and can be more reliable on a spotty internet connection.
Once the upload finishes, your work here is done for a moment. The build will pop up in App Store Connect under the “TestFlight” tab, but it will have a “Processing” status. Apple is running automated checks. You’ll get an email once it’s ready for you to submit to review. And remember, correctly https://codepushgo.com/blog/signing-ios-app/ is the foundation for all of this; it’s the number one reason uploads fail.
Tackling Common Build Errors
No matter how careful you are, errors happen. Over the years, I’ve seen the same few problems pop up again and again.
- Missing App Icons: The error message is usually pretty clear, complaining about specific missing sizes. Just open your
Images.xcassetsfile in Xcode and fill in all the empty icon slots. - Incorrect
Info.plistKeys: If your app asks for permissions (like camera, photos, or location), you absolutely must provide a “usage description” string in yourInfo.plistfile explaining why you need it. Forgetting this is an automatic rejection. - Code Signing Errors: These are the most dreaded messages because they’re so vague. It almost always boils down to a mismatch between your certificate, App ID, and provisioning profile. My first piece of advice? Go to your project’s “Signing & Capabilities” tab and check the “Automatically manage signing” box. Let Xcode sort it out.
By double-checking your build settings and knowing what to look for, you can make the journey from your machine to App Store Connect a whole lot smoother.
Navigating the App Store Review Process
Getting your build uploaded feels like a huge win, but the real finish line is getting that approval email from Apple. The App Store review process can seem like a mysterious black box, but it’s really just a systematic check against a clear set of rules. If you understand what they’re looking for, you can turn a potentially painful back-and-forth into a smooth, one-shot approval.
It’s easy to get spooked by the idea of rejection, but most of the time, it comes down to a handful of predictable issues. Just look at the numbers: in 2024, Apple blocked nearly 2 million app submissions for failing to meet their standards. Most of these weren’t malicious apps; they were simply rejected for common slip-ups like bugs, incomplete information, or privacy violations.
Preparing Your App for Human Review
After your build clears Apple’s automated checks, it lands in a queue for a human reviewer. This is where your prep work really pays off. The easier you make it for the reviewer to understand and test your app, the faster things will go.
You have to provide crystal-clear notes in the “Notes for Reviewer” section of your iOS app submission. If your app requires a login, you absolutely must provide a valid demo account. I can’t tell you how many times I’ve seen apps get rejected simply because the reviewer couldn’t log in to test the core features.
- Demo Account: Set up a username and password for a fully functional demo account. Populate it with some sample data so the reviewer can immediately see your app in action.
- Feature Explanations: If you have a complex feature or something that isn’t immediately obvious, write out exactly how to find and use it.
- Hardware Requirements: Does your app need a special Bluetooth device to work? State that upfront and explain how the app behaves without it.
Think of the reviewer as your first real user—a little guidance goes a long way.
Understanding Common Rejection Reasons
While an app can be rejected for countless reasons, a few usual suspects pop up again and again. Knowing these can help you spot-check your app before you even think about hitting that “Submit for Review” button.
The most common one I’ve personally run into is Guideline 2.1 - App Completeness. This is Apple’s catch-all for apps that have major bugs, crash on launch, or are full of broken links. It’s absolutely critical to test your app on a physical device, not just the simulator, to catch these kinds of performance hiccups.
Another big one is Guideline 5.1.1 - Data Collection and Storage. This rejection usually means your privacy policy is missing, confusing, or doesn’t match the data your app actually collects. Be totally transparent in your App Privacy details on the App Store listing. For a deep dive into what to watch for, reading the official App Store Review Guidelines is non-negotiable before you submit.
Pro Tip: Don’t treat the submission as your final round of QA. The build you send to Apple should be the most rock-solid, polished version you have. A single crash during review is often an instant rejection.
What to Do If Your App Is Rejected
First off, don’t panic. It happens to everyone, from indie devs to large companies. If your iOS app submission gets rejected, the first thing to do is carefully read the rejection notice in the Resolution Center. Apple is usually pretty good about citing the specific guideline you violated and often includes screenshots or notes from the reviewer.
Your reply needs to be professional and to the point. If it’s a bug, own it, fix it, and upload a new build with an incremented version number. Then, explain in your reply exactly what you changed to resolve the issue.
If you genuinely believe the rejection was a misunderstanding, you can communicate with the review team right there in the Resolution Center. Politely explain your app’s functionality and make a clear case for why it complies with the guidelines. In some situations, you can even appeal the decision. The key is always clear, respectful communication to get your app back in the queue.
Answering Your Lingering iOS Submission Questions
Even with a perfect checklist, you’re bound to have those “what if” questions pop up right before you hit the submit button. It’s totally normal. These are the details that can trip you up at the last minute, so let’s walk through some of the most common questions I get asked.
Think of this as the FAQ section I wish I had when I first started. Getting these details right can be the difference between a smooth approval and a frustrating rejection loop.
How Long Does the iOS App Review Process Really Take?
This is the million-dollar question, and the honest answer is: it varies. Apple’s official line is that most apps are reviewed within 24 to 48 hours, and to their credit, they often hit that target. I’ve seen simple bug-fix updates sail through in as little as six hours.
But don’t bank on that. New apps, especially if they have tricky features like in-app purchases or operate in regulated spaces like healthcare, can easily take several days, sometimes even a week. The queue size at Apple and whether your app gets flagged for a deeper manual review are huge factors.
My personal rule of thumb is to always bake a one-week buffer into any launch timeline. It saves a ton of stress if you get a surprise rejection or the review just takes longer than you hoped.
What Are the Most Common Rejection Reasons I Should Watch Out For?
After doing this for years, I’ve seen the same few rejection reasons pop up over and over. Before you submit, do one last sanity check for these common pitfalls.
- Guideline 2.1 - App Completeness: This is the big one. It’s a catch-all for apps that crash, have obvious bugs, or just feel half-baked. A single crash during the review is pretty much a guaranteed rejection.
- Guideline 5.1.1 - Data Collection and Storage: This trips up so many developers. It usually means your privacy policy is vague or your app’s behavior doesn’t perfectly match what you declared in your privacy nutrition labels. Be brutally honest about every piece of data you collect.
- Incomplete Metadata: It sounds simple, but placeholder screenshots, a generic description, or a broken support link are easy ways to get your app bounced back.
- Guideline 1.2 - User-Generated Content: If users can post anything in your app, you absolutely must have a solid system for filtering offensive content, a way for users to report it, and the power to block abusive accounts.
Checking these areas proactively will dramatically lower your chances of getting that dreaded rejection email.
Can I Submit an Update While My App Is Already in Review?
In a word, no. Once your app’s status flips to “In Review” or “Waiting for Review,” that build is locked in. You can’t upload a new binary to replace it. This is a nightmare scenario if you spot a critical bug right after submitting.
If you find yourself in this situation, you have to withdraw the current submission. You can do this right in App Store Connect by finding your app version and clicking the “Remove this version from review” link. This will revert its status to “Prepare for Submission,” letting you upload a corrected build and restart the clock.
What’s the Real Difference Between a Build Number and a Version Number?
This is a classic point of confusion for newcomers, but it’s a core concept for managing your releases. Both are required for an iOS app submission, but they do very different jobs.
| Identifier | Purpose | Example | User Visibility |
|---|---|---|---|
| Version Number | The public number users see on the App Store. It signals a significant update, like new features. | 1.0, 1.1, 2.0 | Visible |
| Build Number | An internal counter for each binary you upload for a specific version. It helps you and Apple track iterations. | 1, 2, 1.1.4 | Not Visible |
Here’s how it plays out in the real world: You submit Version 1.1 with Build 1. It gets rejected. After you fix the bug, you submit a new binary. The version number stays 1.1, but the build number must be bumped up to 2. The key is that each App Store release needs a version number higher than the last one, and each upload for that version needs a unique, higher build number.
Accelerate your development cycle and bypass the App Store review for instant updates. CodePushGo gives you the power to deploy bug fixes and new features directly to your users’ devices, ensuring a seamless experience.


