Push notifications in React Native are more than just pop-up messages. They’re your direct line to your users, showing up on their device even when your app is closed. Think of them as the best way to re-engage people, share important updates, and keep your app top-of-mind.
This guide will walk you through the entire process of setting them up for both iOS and Android using Firebase, a go-to choice for many developers.
Why Push Notifications Are Your Secret Weapon for App Engagement
Let’s be real: getting people to come back to your app is tough. In a world full of digital noise, a smart push notification strategy is one of the most effective ways to cut through it all, boost retention, and create genuine connections with your audience.
These aren’t just alerts anymore. When done right, they become a core part of the user experience, acting as a friendly nudge, a timely reminder, or an exciting announcement that pulls people right back in.
The Magic of Direct Communication
Unlike an email that might get buried or a social media post that’s at the mercy of an algorithm, a push notification lands directly on a user’s lock screen. It’s an incredibly powerful and personal connection.
Here’s why that matters so much:
- It brings people back. A simple “We miss you!” notification with a special offer can be all it takes to reactivate someone who hasn’t opened your app in weeks, seriously cutting down your churn rate.
- It sparks immediate action. Announcing a flash sale, breaking news, or a new feature prompts an instant response. This drives traffic and interaction exactly when you need it.
- It makes the experience personal. You can tailor messages based on what a user does, what they like, or where they are. This makes them feel understood and strengthens their bond with your app. To dive deeper, check out our guide on https://codepushgo.com/blog/app-engagement-metrics/.
When you shift from generic blasts to personalized, valuable messages, you create a powerful feedback loop. The more a user interacts with relevant notifications, the more you learn, allowing you to refine your strategy for even better results.
Choosing Your Toolkit: A Quick Library Comparison
Before diving into the code, it’s worth knowing the landscape. Several libraries can help you implement notifications, and picking the right one early on can save you a lot of headaches.
Core Notification Libraries for React Native
| Library | Primary Use Case | Key Feature | Best For |
|---|---|---|---|
react-native-firebase | Full Firebase integration | Deep integration with all Firebase services, including Analytics and Firestore | Apps already built on the Firebase ecosystem. |
react-native-push-notification | Local & Remote Notifications | Standalone, works with or without Firebase | Projects needing a simple, flexible solution for both local and remote notifications. |
expo-notifications | Expo-managed projects | Managed workflow, handles credentials automatically | Developers using Expo who want the easiest, quickest setup. |
Notifee | Advanced Customization | Rich notifications, channels, and foreground service control | Apps that require highly customized and complex notification behaviors. |
Each library has its strengths. For this guide, we’re focusing on react-native-firebase because of its robust, all-in-one capabilities, but it’s good to know what else is out there.
Understanding the iOS vs. Android Divide
One of the first things you’ll run into with React Native push notifications is how differently iOS and Android handle them—especially when it comes to asking for permission. This isn’t just a technical detail; it fundamentally changes your strategy.
Consider this: projections for 2025 show that push notifications get an average reaction rate of 7.8%. But that number is misleading. Android users interact at a much higher rate of 10.7%, while iOS users lag behind at just 4.9%.
Why the huge gap? It comes down to permissions. Apple’s privacy-first approach means you have to explicitly ask users to opt-in, resulting in a 43.9% opt-in rate. Android, on the other hand, historically granted this permission by default, leading to a massive 91.1% opt-in rate.
Getting a handle on these differences is key. On Android, you have a larger audience from the get-go. On iOS, your first job is to convince users that your notifications are worth receiving. This strategic “why” is the foundation for all the technical work that follows.
Building Your Firebase Foundation
Before your React Native app can get its first push notification, you need a solid backend to handle the heavy lifting. For this, most developers, myself included, turn to Firebase. Think of it as the central nervous system for your notifications, connecting your server to both Apple’s and Google’s notification services so you don’t have to.
Setting up a Firebase project is the first real step on the ground. This isn’t just about creating an account; it’s about building the infrastructure for Firebase Cloud Messaging (FCM), the engine that will actually deliver your notifications across platforms. We’ll generate a couple of key configuration files that securely link your React Native app directly to your Firebase project.
Creating Your First Firebase Project
First things first, head over to the Firebase console and create a new project. This project acts as a container for all the cool things Firebase can do for your app, but for now, our focus is squarely on Cloud Messaging.
During the setup, you’ll be prompted to register both an iOS and an Android app. This is a crucial step. Firebase needs the unique identifiers for each platform to know where to send things.
- For Android, you’ll need your applicationId. You can grab this from your
android/app/build.gradlefile. - For iOS, it’s the bundleIdentifier. Pop open Xcode, and you’ll find it under the “General” tab of your main target.
Once you’ve registered both, Firebase will hand you the configuration files you need.
Integrating Configuration Files
These files are essentially the keys to the kingdom, letting your app talk to Firebase securely.
For Android, you get a google-services.json file. You need to drop this file right into the android/app/ directory of your React Native project. It’s packed with project-specific keys that the Firebase SDK needs to connect to the right services.
The process for iOS is nearly identical. You’ll download a GoogleService-Info.plist file. This one needs to be added to the root of your Xcode project, making sure it’s included in your main app target.
It’s also a good time to mention that handling these files securely is non-negotiable. If you want to dive deeper into managing app secrets, checking out guides on Expo environment variables can offer some valuable patterns, even for non-Expo projects.
Pro Tip: Whatever you do, never commit your
google-services.jsonorGoogleService-Info.plistfiles to a public Git repository. They contain sensitive API keys. Add them to your.gitignoreimmediately and manage them through environment variables or a secure CI/CD pipeline.
Installing the Necessary Libraries
With the config files in place, it’s time to pull in the React Native Firebase libraries. These packages are the bridge that lets your JavaScript code talk to the native Firebase SDKs.
To get started with push notifications, you need two core packages:
@react-native-firebase/app: This is the foundational module. You have to install it before any other Firebase package, as it handles the initial connection.@react-native-firebase/messaging: This is the star of the show for us. It gives you all the tools for handling device tokens and incoming notifications.
You can install them with your package manager of choice.
Using npm
npm install @react-native-firebase/app @react-native-firebase/messaging
Or using yarn
yarn add @react-native-firebase/app @react-native-firebase/messaging
After the packages are installed, the last piece of this puzzle is linking the native dependencies. For iOS, this means navigating to your ios directory and running pod install. This command pulls in the native Firebase SDKs and links them into your Xcode project.
On the Android side, Gradle typically takes care of this automatically during the next build. And with that, the groundwork is done. Your app is now officially connected to Firebase and ready for the platform-specific tweaks needed to start receiving notifications.
Getting Notifications Working on Android
When it comes to React Native push notifications, the Android setup can feel like a different beast compared to iOS. Forget about certificates for a moment; here, it’s all about getting your native project files configured just right. Getting these details correct is the key to making sure your notifications land reliably on the countless different Android devices and OS versions out there.
We’re going to dive into the necessary tweaks for your build.gradle files, the specific permissions you need to declare in AndroidManifest.xml, and the absolutely crucial task of creating notification channels. Think of this less as a checklist and more as a tour of why each piece matters for a solid implementation.
Tweaking Your Gradle Files
Alright, let’s pop the hood and get into the native Android side of things. We need to make a couple of quick edits to your Gradle files. This is what lets the Firebase SDK get properly recognized and bundled into your app during the build process.
First up is the project-level android/build.gradle file. You need to add the Google Services plugin classpath here. This little plugin is a workhorse—it reads the google-services.json file you added earlier and injects all that configuration right into your app.
// In your android/build.gradle file buildscript { dependencies { // … other dependencies classpath ‘com.google.gms:google-services:4.4.1’ // Always good to check for the latest version! } }
With that in place, we move on to your app-level android/app/build.gradle file. Here, you just need to apply the plugin you just referenced. Slap this line at the very bottom of the file. It’s the final piece of the puzzle that lets your app talk to Firebase services.
// In your android/app/build.gradle file apply plugin: ‘com.google.gms.google-services’ // Add this at the very bottom
Don’t underestimate these small changes. Without them, your app has no idea how to communicate with Firebase, and you’ll be staring at build errors. Getting these steps automated can be a real game-changer; if you’re looking to streamline your workflow, checking out topics like Android continuous integration can open up a world of possibilities.
Setting Permissions and Metadata
Next, we need to have a little chat with the Android operating system and tell it what our app plans to do. This conversation happens in the AndroidManifest.xml file, which lives at android/app/src/main/AndroidManifest.xml. This is the blueprint for your entire Android app.
You’ll need to add a permission that explicitly allows your app to post notifications. This became a hard requirement with Android 13 (API level 33), but frankly, it’s just good practice to include it for all versions.
While you’re in there, you can also add some metadata to set a default icon and color for your notifications. It’s a small touch, but it goes a long way toward maintaining brand consistency and making your alerts instantly recognizable to users.
Just make sure you actually have an icon file (like ic_notification.png) in your android/app/src/main/res/mipmap-* folders and have defined a color resource in android/app/src/main/res/values/colors.xml.
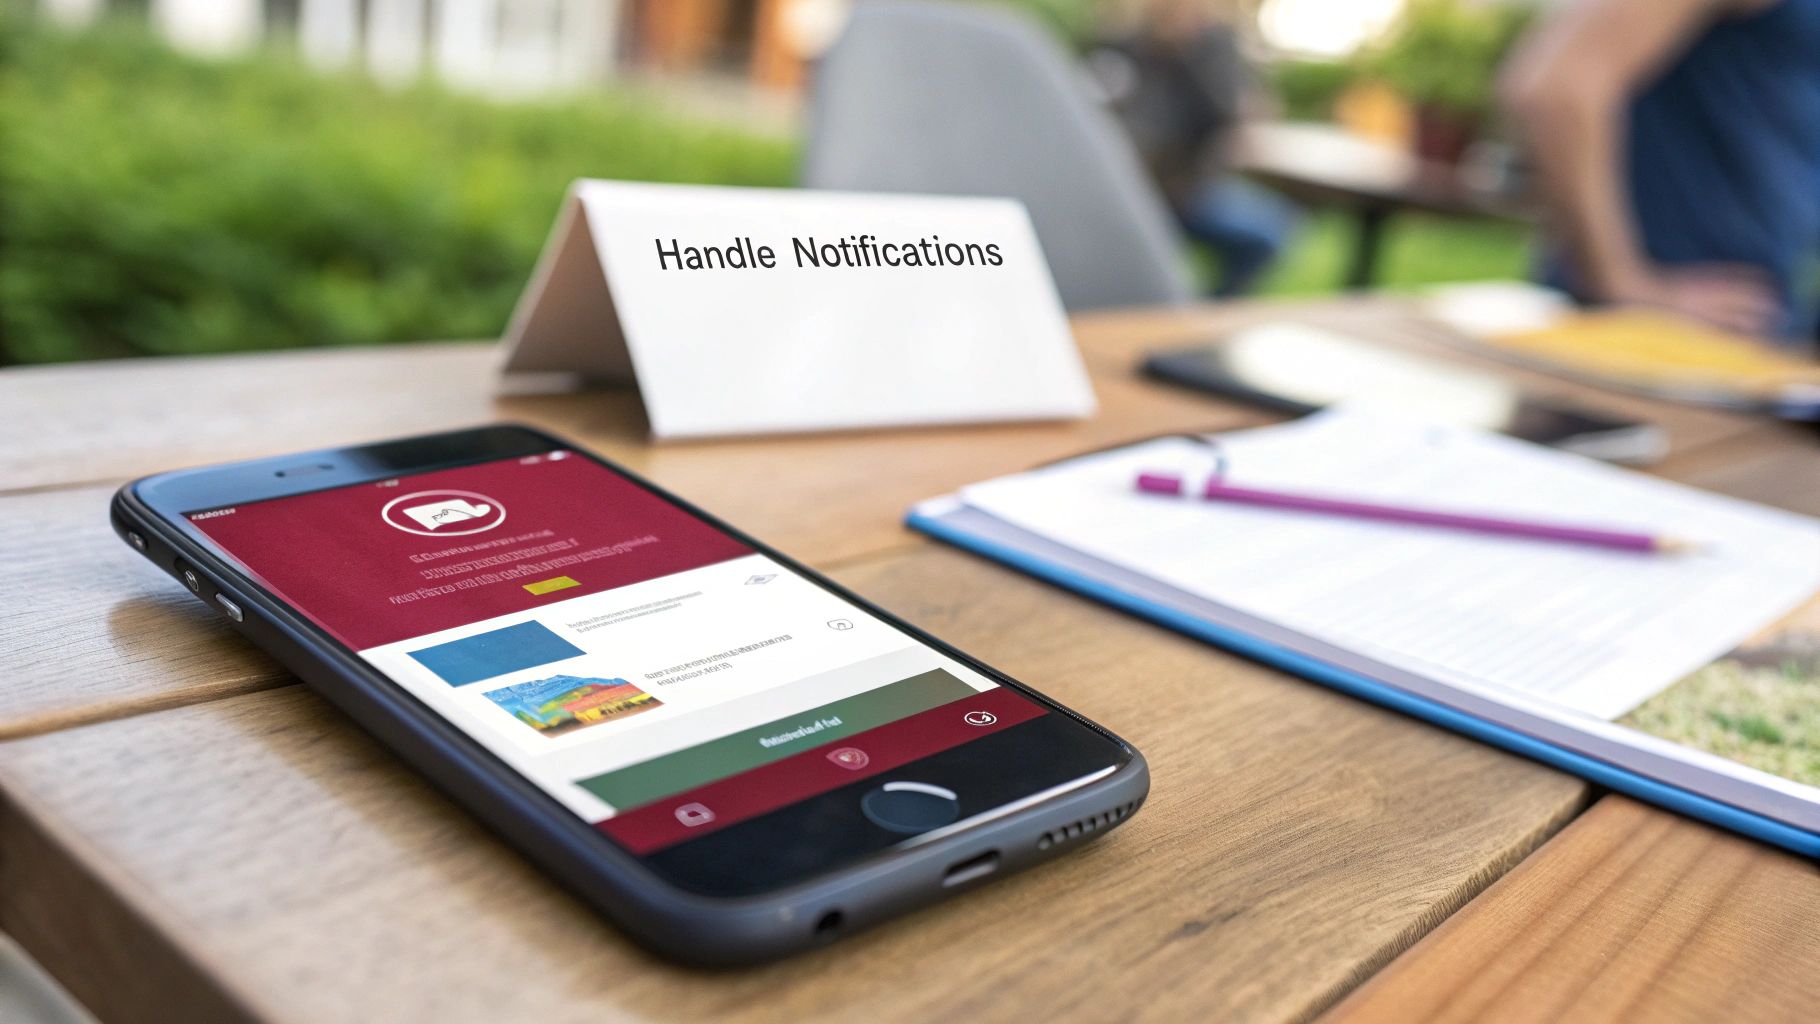
This graphic breaks down the simple flow for requesting notification permissions from within your React Native code.
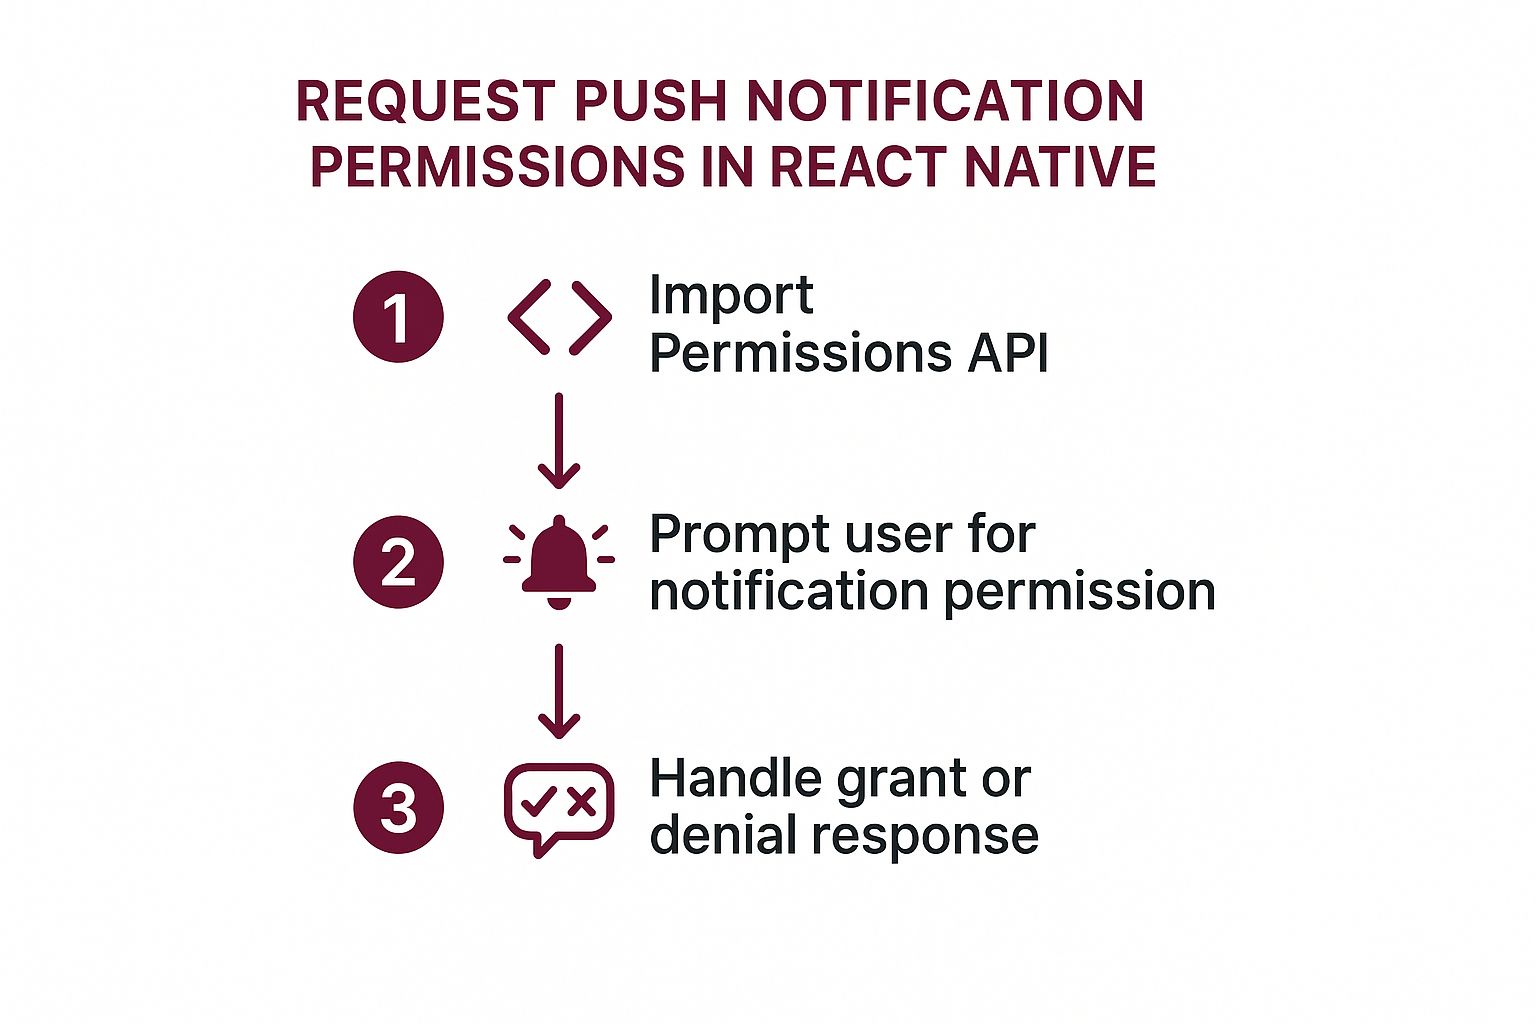 As you can see, it’s all about gracefully handling both “yes” and “no” from the user to create a respectful experience.
Why Notification Channels Are Non-Negotiable
Here’s a step that trips up a lot of developers: creating a notification channel. Ever since Android 8.0 (API level 26), every single notification must be assigned to a channel. If you skip this, your notifications will simply vanish into thin air on any device running a modern version of Android. They won’t show up. Period.
A notification channel is a fantastic feature for users. It gives them fine-grained control to, say, turn off promotional alerts while keeping critical order updates. This is a massive win for user experience and makes it far less likely they’ll just nuke all your app’s notifications in frustration.
The first step is to declare a default channel ID in your AndroidManifest.xml. This is a hint to Firebase about which channel to use for messages that arrive when your app is in the background.
But just declaring the ID isn’t enough. You have to programmatically create the channel itself, complete with a name and description that users will see in their phone’s settings. You can handle this with a library like Notifee or by writing a bit of native Java/Kotlin code that runs when your app first launches.
Conceptually, creating a channel involves a few key things:
- A unique Channel ID: A simple string, like
"default_channel". - A user-friendly name: Something descriptive, like
"General Updates". - An importance level: This tells the system how to behave (e.g., make a sound, pop up on screen, or be silent).
- System registration: Using Android’s
NotificationManagerto officially register the channel.
By taking the time to set up channels correctly, you ensure your React Native push notifications work flawlessly across the modern Android landscape, delivering a much more professional and polished experience.
Getting iOS Notifications Set Up
Unlike the Android setup that has you digging through Gradle files, getting iOS push notifications to work means stepping into Apple’s world. It’s all about getting your provisioning profiles, certificates, and Xcode settings just right. It can feel like a lot at first, but if you tackle it one piece at a time, it’s perfectly manageable.
Honestly, this part of the process is less about writing React Native code and more about properly configuring the communication bridge between your app, the Apple Push Notification service (APNs), and Firebase.
Configure Your App ID in the Apple Developer Portal
First things first, head over to the Apple Developer portal. Before your app can receive a single notification, its official identity—the App ID—needs to have the right permissions.
Think of an App ID as your app’s digital passport. It has basic access by default, but for special powers like push notifications, you have to get an explicit stamp of approval.
- Log into your Apple Developer account and go to “Certificates, Identifiers & Profiles.”
- Find your app’s Identifier and click on it. (If you haven’t created one yet, you’ll need to do that now).
- Scroll through the list of Capabilities until you find Push Notifications and make sure that box is checked. This is non-negotiable.
This simple checkbox tells Apple that your app is officially allowed to talk to the APNs system. If you skip this, Apple will reject any notification requests for your app right out of the gate. Getting these credentials right is a common sticking point; for a deeper dive, check out our guide on the Apple developer provisioning profile.
Generate Your APNs Authentication Key
Now that your App ID is ready, you need a secure way to let Firebase send notifications for you. This is where an APNs Authentication Key comes in. It’s the modern, more flexible alternative to the old certificate-based method.
A huge advantage here is that you can use a single key for all of your apps, which dramatically simplifies things as you build more projects.
To get your key, go to the “Keys” section within “Certificates, Identifiers & Profiles.” When you create it, be sure to enable the Apple Push Notifications service (APNs).
Crucial Tip: You get exactly one chance to download your new APNs key (
.p8file). Download it immediately and store it somewhere safe, because you can’t get it again. You’ll also need your Key ID and Team ID, which are displayed on the same page.
Wire Everything Up in Xcode
With your portal settings in place, it’s time to sync them with your actual project. Open your React Native project’s ios folder in Xcode.
Inside Xcode, select your main app target and click on the “Signing & Capabilities” tab. Hit the ”+ Capability” button and add Push Notifications. This makes sure your app’s local build settings perfectly match its profile on the developer portal.
Next, you’ll need to add another capability: Background Modes. Once it’s added, a new section will appear. In there, check the box for Remote notifications. This is what tells iOS to briefly wake up your app when a notification arrives, so it can process the data even if it’s not running in the foreground.
Link APNs to Firebase
The final piece of the puzzle is uploading your APNs key to your Firebase project. This completes the circle of trust, giving Firebase the authority to talk to APNs.
- Go to your Firebase project settings and open the “Cloud Messaging” tab.
- Find the iOS app configuration section, where you’ll see a spot to upload your APNs Authentication Key.
- Provide the
.p8key file you saved, along with the Key ID and your Team ID.
With that connection made, Firebase can now securely route messages through Apple’s servers and straight to your users’ devices. This is a critical link; mobile device traffic is projected to dominate push notification engagement in 2025, with over 72.8% of web push traffic coming from mobile. For in-app campaigns, promotions with coupon codes are especially effective, boasting clickthrough rates of 17.9% on iOS. Read the full research about these push notification trends on batch.com.
And that’s it! Your iOS app is now fully configured and ready to start receiving remote notifications.
Alright, with the platform-specific groundwork out of the way, it’s time for the fun part: making things happen in your JavaScript code. This is where we’ll bring your React Native push notifications to life, connecting all that setup to a real, tangible experience for your users.
We’re going to cover requesting permission, grabbing that all-important device token, and listening for messages as they arrive. The real trick is managing notifications based on what the user is doing. Is the app open? Is it in the background? Or is it closed completely? Getting this logic right is what separates a clunky notification system from a seamless one.
Asking for Permission
First things first, you can’t send notifications to someone who hasn’t said “yes.” You absolutely have to ask for their permission, a step that’s especially critical on iOS where users must explicitly opt in. When and how you ask can make a huge difference in your opt-in rates.
Instead of hitting them with a permission request the second they open the app, try to find a more natural moment. Maybe it’s after they’ve finished onboarding or right when they enable a feature that would clearly benefit from alerts. When you’re ready, the @react-native-firebase/messaging library makes it simple.
import messaging from ‘@react-native-firebase/messaging’;
const requestUserPermission = async () => { const authStatus = await messaging().requestPermission(); const enabled = authStatus === messaging.AuthorizationStatus.AUTHORIZED || authStatus === messaging.AuthorizationStatus.PROVISIONAL;
if (enabled) { console.log(‘Authorization status:’, authStatus); } }
This snippet will trigger the native permission pop-up. We check for both AUTHORIZED and PROVISIONAL statuses—the latter is an iOS feature for delivering notifications quietly. If either is true, you’re good to go.
Getting the Device Token
Once you’ve got the user’s okay, you need to get the unique Firebase Cloud Messaging (FCM) token for their device. Think of this token as the specific address you’ll use to send a notification directly to them. Your next move is to grab this token and send it over to your backend, where you’ll want to store it with their user profile.
const getFcmToken = async () => { const fcmToken = await messaging().getToken(); if (fcmToken) { console.log(‘Your Firebase Token is:’, fcmToken); // Now, send this token to your server. } else { console.log(‘Failed, could not get FCM token’); } }
Don’t forget that this token can change. A user might reinstall the app or restore their phone from a backup, generating a new token. You need to be ready for that. Setting up a listener for token refreshes ensures your backend always has the latest “address” for that user.
messaging().onTokenRefresh(token => { console.log(‘New FCM token received!’, token); // Make sure to send this new token to your server too. });
Handling Incoming Messages
How your app responds to a notification really depends on its current state. The library gives us event listeners to handle each scenario.
- When the app is in the foreground: A notification arrives while the user is actively using your app. This is your chance to handle it gracefully. Instead of a jarring system alert, you could show a custom in-app banner or quietly update a part of the UI.
- When the app is in the background: The user has your app open, but it’s minimized. The operating system will automatically show the notification in the device’s notification tray. Your job is to listen for the user tapping on it to bring the app back into focus.
- When the app is quit: Much like the background state, the system handles displaying the notification. Your code’s responsibility kicks in when the user taps that notification, launching your app from a cold start.
The real magic isn’t just opening the app when a notification is tapped. The ultimate goal is to take the user directly to the relevant content. If they get an alert about a new message, tapping it should open that specific conversation. If it’s a sale on a product, it should navigate to that product’s page. This is called deep linking, and it transforms a simple alert into a powerful navigation tool.
For apps built around community and engagement, notifications are your lifeblood. They’re perfect for improving your user-generated content marketing strategies by alerting people to replies, comments, or new posts. This kind of timely interaction is precisely why React Native push notifications are so powerful. It’s no surprise that 88% of users report higher engagement with apps that use them effectively. You can find more stats like this over at Wisernotify’s push notification report.
Common Questions About React Native Push Notifications
Even with the best setup, you’re going to run into a few quirks or have questions pop up when working with React Native push notifications. It happens to everyone. Let’s walk through some of the most common hurdles I’ve seen developers face and get you back to building.
How Can I Test Push Notifications During Development?
Testing is where the rubber meets the road, and you’ll want to get this right early on.
The most straightforward way is to use the Firebase Cloud Messaging console. It gives you a simple UI to send a test message directly to your device. All you need is the device’s unique FCM token, which you can easily log out from your app during startup.
One thing to drill in: for iOS, you absolutely must test on a physical device. The iOS simulator can’t receive remote push notifications. It’s a classic “gotcha” that has burned countless hours for developers new to the ecosystem.
When you need to test more complex scenarios, like custom data payloads or automated flows, I always reach for a tool like Postman. It lets you make direct API calls to the FCM endpoint, giving you total control over the notification’s entire structure and content.
What’s the Difference Between Local and Remote Notifications?
This is a core concept that trips a lot of people up, but the distinction is simple. It all comes down to where the notification originates.
-
Remote Notifications: These come from your server. They’re sent over the internet through a service like FCM or Apple’s APNs and land on the user’s device. This is what you use for real-time, external events—think new messages, breaking news alerts, or a heads-up that a live stream is starting.
-
Local Notifications: These are scheduled and triggered right on the device by your app. Once they’re set, they don’t need a server or an internet connection to fire. They’re perfect for things like to-do list reminders, alarms, or calendar events that the user creates within the app.
A good rule of thumb: if the trigger for the alert happens outside the user’s phone, it’s remote. If the app itself is the trigger, it’s local.
A common mistake is using remote notifications for something that should be local, like a daily medication reminder. That just adds unnecessary server load and complexity. Always pick the right tool for the job to keep your setup efficient and bulletproof.
Why Aren’t My Notifications Arriving on iOS?
This is probably the most frequent and frustrating question I get. If your iOS notifications are disappearing into the void, methodically work through this checklist. It’s almost always one of these things.
- Physical Device: Seriously, double-check this. Are you testing on a real iPhone or iPad, not the simulator?
- APNs Key: Go back to your Apple Developer portal and Firebase project. Make sure your APNs key was generated correctly and, more importantly, that the exact same key was uploaded to Firebase. A mismatch here is a silent killer.
- Xcode Capabilities: Pop open your project in Xcode. Under the “Signing & Capabilities” tab for your main app target, you need to see Push Notifications and Background Modes (with Remote notifications checked) enabled. If they aren’t, it won’t work.
- User Permission: Did the user actually grant permission? Your app has to ask for it, and the user has to approve it. If they tapped “Don’t Allow,” iOS will block everything from that point on.
- App Store Guidelines: While you’re at it, make sure your notification strategy aligns with Apple’s rules. They have some pretty strict guidelines, so it’s always smart to stay current on the latest app store review guidelines to avoid any nasty surprises during your app submission.
How Do I Handle a Notification When the App Is Closed?
Handling notifications when the user has fully swiped away your app (the “quit” state) is essential for a great user experience.
The React Native Firebase library gives us a powerful tool just for this: messaging().setBackgroundMessageHandler().
When you register a function with this method, you’re essentially creating a “headless” JavaScript task. This is just a small, lightweight bit of code that the OS can run in the background the moment a remote message arrives, even if your app UI isn’t active. It’s your chance to perform silent work like updating local storage with new data or scheduling a local notification so the user actually sees the alert.
Just remember, this background handler has to be registered outside of your component lifecycle—your index.js file is the perfect spot. That ensures it’s ready to go as soon as your app’s code is loaded.
At CodePushGo, we know a flawless user experience is everything. Our platform helps you ship instant over-the-air updates to fix bugs and roll out new features without waiting for app store reviews. You can make sure your users always have the best version of your app. See how you can speed up your release cycle and boost your app ratings by visiting https://codepushgo.com.


