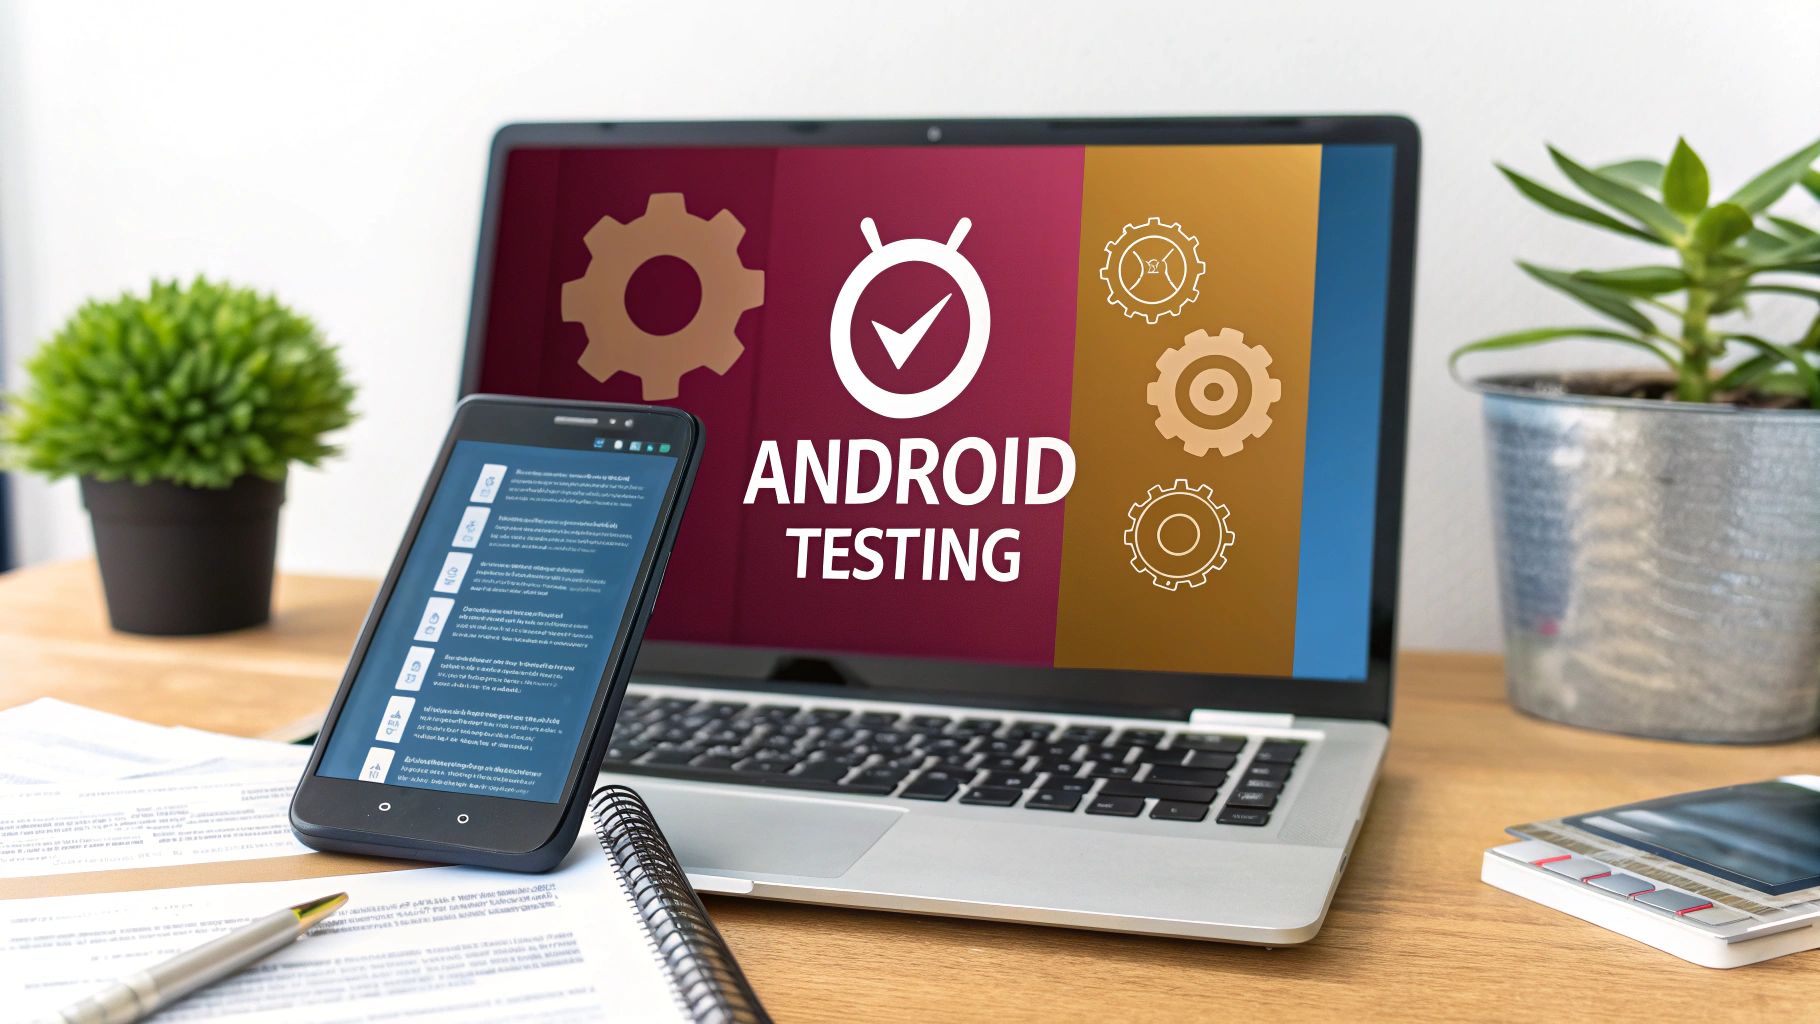
Testing an Android application is the quality assurance safety net that catches bugs before they get to your users. It’s a methodical process of checking for functionality, usability, and performance to make sure your app is solid, stable, and ready for the real world.
Why App Testing Is Your Most Important Feature
Let’s be honest, the Google Play Store is a battlefield. Users have thousands of choices and zero patience for apps that crash, freeze, or just feel clunky. This is why thinking of testing as just a final checkbox is a huge mistake.
A rock-solid testing strategy isn’t an afterthought; it’s a core feature. It directly protects your user retention numbers and your brand’s reputation. Skipping it is like building a house and just hoping the foundation is strong enough. It might look fine at first, but it’s only a matter of time before cracks start to show.
The Unique Challenge of Android Fragmentation
The biggest headache in the Android world is easily fragmentation. Unlike a closed ecosystem, Android powers thousands of different devices from countless manufacturers. Each one comes with its own unique cocktail of screen sizes, hardware specs, and custom OS skins.
A bug might crash a specific Samsung model running Android 12 but be completely nonexistent on a Google Pixel with Android 14. This sheer variety means you can’t just test on one device and call it a day.
With a global user base hovering around 3.3 billion devices, you’re dealing with a massive spread of hardware and software. You have to be smart about where you focus your testing efforts to get the most bang for your buck.
Key Android OS Version Distribution
To tackle fragmentation, you need data. Prioritizing your testing on the most widely-used OS versions is a great place to start. This table shows the current market share breakdown.
| Android Version | Market Share (%) |
|---|---|
| Android 13 | 22.4 |
| Android 12 | 15.8 |
| Android 11 | 15.5 |
| Android 14 | 14.7 |
| Android 10 | 8.1 |
Focusing your primary efforts on versions 11 through 14 will cover the vast majority of your potential user base, making your testing far more efficient.
This fragmentation is one of the biggest challenges in mobile application testing that every Android developer has to wrestle with.
Adopting a Proactive Quality Mindset
The best development teams don’t treat testing as a final gatekeeper. Instead, they weave it into the entire development lifecycle. Shifting from a reactive “find and fix” approach to a proactive quality mindset changes everything.
Here’s what that looks like in practice:
- Early Bug Detection: You find—and squash—bugs early on, when they’re way cheaper and easier to fix.
- Improved User Satisfaction: A smooth, predictable app experience is what earns those 5-star ratings and glowing reviews.
- Enhanced Brand Credibility: When your app just works, you build trust. Trust builds loyalty.
- Faster Release Cycles: Good automated testing doesn’t slow you down; it speeds you up by giving you the confidence to ship more often.
When you build testing into your daily workflow, you create a powerful feedback loop. It stops being a bottleneck and starts being the engine that drives quality and lets you innovate without fear.
Building Your App on a Solid Foundation
You wouldn’t build a house on shaky ground, right? The same principle applies to building a high-quality Android app. A smart testing strategy starts from the ground up, with the smallest, fastest, and most frequent tests forming a bedrock for everything else you build on top.
This foundational layer is all about making sure every single piece of your app works perfectly on its own before you start putting them together.
Starting Small: Unit Tests
Think of your app’s code as a giant box of LEGOs. A unit test is like picking up a single brick—one function, one class, one method—and making sure it’s flawless. Is it the right shape? Is it the color you expect? Does it do its one specific job without fail?
These tests need to be lightning-fast and laser-focused. For instance, you could write a quick unit test to confirm that a function designed to format a date string always returns it as “MM-DD-YYYY,” regardless of the valid date you throw at it.
To keep these tests pure and isolated, developers lean on tools like JUnit, the go-to testing framework, and Mockito, a brilliant mocking library. Mocking lets you create “fake” stand-ins for other components your code might rely on. This ensures your test is examining only the single unit you care about, not its neighbors.
Here’s a quick look at a simple Kotlin test for a ViewModel:
// Example ViewModel class LoginViewModel { fun isValidEmail(email: String): Boolean { return android.util.Patterns.EMAIL_ADDRESS.matcher(email).matches() } }
// JUnit Test for the ViewModel class LoginViewModelTest { private lateinit var viewModel: LoginViewModel
@Before
fun setup() {
    viewModel = LoginViewModel()
}

@Test
fun `valid email returns true`() {
    val email = "[email protected]"
    val result = viewModel.isValidEmail(email)
    assertTrue(result)
}

@Test
fun `invalid email returns false`() {
    val email = "invalid-email"
    val result = viewModel.isValidEmail(email)
    assertFalse(result)
}
}
This tiny test gives immediate feedback, confirming the isValidEmail function works as expected for both good and bad inputs. A solid suite of unit tests becomes your first line of defense, catching bugs before they can cause bigger headaches.
Connecting the Pieces: Integration Tests
Okay, so your individual LEGO bricks are perfect. Now it’s time to see how they fit together. Integration tests check if small groups of components—or small LEGO assemblies—work together like they’re supposed to.
They answer the really important questions:
- Does the
UserRepositoryactually pull the right data from theUserApiService? - When a user taps a button in a
Fragment, does theViewModelactually get the message?
Integration tests are all about verifying the handshakes and communication lines between different parts of your app. They make sure data flows correctly and components can talk to each other without causing chaos.
Unlike unit tests, which are completely isolated, integration tests often use real components. You might have a real ViewModel talking to a real Repository class. This is where you uncover problems that unit tests just can’t see, like mismatched data formats or a misconfigured API call between two modules.
Of course, a solid foundation isn’t just about functionality—it’s also about security. When building your app, it pays to think about penetration testing best practices to bake security into your process from the very beginning.
By layering unit and integration tests, you create a truly resilient codebase. For more on this, check out our other guides on mobile app development best practices. This approach guarantees that by the time you’re ready to test the entire user interface, you already know the logic underneath is rock-solid.
Putting the User Experience to the Test
So, you’ve confirmed all the hidden machinery of your app is working smoothly with unit and integration tests. That’s a huge step. But now it’s time to focus on what your users actually see and touch—the user interface.
This is where UI testing comes in. Think of it as the final, hands-on inspection before shipping. It ensures every button, menu, and form not only looks right but also behaves exactly as you designed it to when a user taps, swipes, and types.
Let’s use an analogy. If unit and integration tests made sure the car’s engine and transmission work together, UI testing is like getting in the driver’s seat. Does the steering wheel actually turn the car? Does the gas pedal make it go? Do the radio buttons change the station? It’s the only way to validate the real user experience.
Simulating User Actions with Espresso
When you need to test the UI inside your own app, Espresso is the go-to framework from Google. It’s built to be fast, reliable, and automatic because it runs directly within your app’s own process. This gives it an intimate understanding of every UI component and its current state.
With Espresso, you can write simple, readable tests that mimic exactly what a user would do. For example, you can tell it to:
- Find a button labeled “Sign In” and tap it.
- Type a username and password into specific fields.
- Scroll down a list until a certain item is visible.
- Check that a “Success!” message appears after an action.
These tests are your first line of defense against visual bugs, layout glitches, and broken interactions that can frustrate users. A button that looks perfect but does nothing is a classic bug that only UI testing for android applications can reliably catch.
Testing Interactions Across Apps with UI Automator
But what happens when your app needs to interact with the wider Android system? Maybe you need to open the camera, pull a contact from the address book, or navigate to system settings. For these kinds of cross-app workflows, UI Automator is the tool for the job.
Unlike Espresso, UI Automator runs outside of your app’s process. This gives it a bird’s-eye view, allowing it to see and control anything on the screen—system notifications, other apps, even the home screen. It’s perfect for testing user journeys that cross application boundaries.
UI Automator behaves like a real person using the phone. It can navigate not just your app but the entire device, validating that your app plays nicely with the rest of the Android ecosystem.
A great example is testing permission requests. A UI Automator test could trigger a permission pop-up, tap “Allow” in the system dialog, and then verify that your app correctly registers the granted permission and continues the flow.
Validating the Entire Customer Journey
While UI tests are great for individual screens, End-to-End (E2E) testing zooms out to look at the big picture. E2E tests validate an entire user journey from start to finish, making sure every single piece—from the UI to the network calls to the backend server—all works together in harmony.
Think about a shopping app. A critical E2E test would simulate a complete purchase from start to finish:
- A user launches the app and logs in.
- They search for a specific product.
- They add that product to their cart.
- They navigate to checkout and enter their payment information.
- Finally, they see the order confirmation screen.
That single test just validated your login screen, search feature, cart logic, payment integration, and order confirmation UI. If any link in that chain breaks, the E2E test fails, flagging a critical issue that could be losing you money. A good user experience has a direct impact on performance, and you can learn more by understanding core app engagement metrics.
The Tools and Their Roles
Choosing the right tool is all about knowing what you need to test. Each framework has a distinct role to play in your overall Android testing strategy.
| Tool | Primary Use Case | Scope | Example Test |
|---|---|---|---|
| Espresso | In-app UI testing | Single application | Verifying that tapping the “Login” button navigates to the home screen. |
| UI Automator | Cross-app & system testing | Entire device UI | Confirming your app can open the camera and correctly receive a photo. |
By layering these different types of UI validation, you create a powerful safety net. Espresso ensures your app’s screens work perfectly on their own, UI Automator confirms your app integrates cleanly with the Android OS, and E2E tests guarantee that your core user journeys deliver the value your customers expect. It’s this combination that paves the way for a truly reliable user experience.
How to Optimize App Stability and Performance
A beautiful UI is great, but if the app feels sluggish, lags, or crashes, users will walk away and never look back. Optimizing your app’s stability and performance isn’t just a “nice-to-have”—it’s a core part of any serious testing for android applications. A user’s patience for a clunky app is practically zero, making this a make-or-break step in your quality assurance process.
Think about it: an app that freezes, stutters, or kills the battery is an app that gets uninstalled. Fast. The performance bar is incredibly high these days. The industry benchmark for crash-free sessions is a staggering 99.95%, with the best-in-class apps achieving 99.99%. That’s not much room for error, especially when you consider that 88% of mobile users will ditch an app if they run into bugs or performance hiccups.

Hunting Down Performance Bottlenecks
Performance testing turns you into a detective, hunting for clues about what’s draining your app’s resources. This is where we stop asking “does it work?” and start asking “how well does it work?”
You’re primarily looking for problems in a few key areas:
- CPU Usage: Is a specific function hogging the processor, causing the UI to stutter?
- Memory Leaks: Is your app failing to release memory it no longer needs, leading to slowdowns and crashes?
- Battery Consumption: Is your app a power hog, draining the battery even when idle?
- Network Performance: How does your app behave on slow or spotty connections?
Your Performance Testing Toolkit
The good news is that Android gives you some powerful tools to investigate these very issues. The Android Studio Profiler is your command center for this mission. It offers a live, unified view of your app’s CPU, memory, network, and energy usage, letting you see what’s happening under the hood in real time.
When you need to dig even deeper, Perfetto provides system-level tracing. It helps you see how your app interacts with the entire Android system, which is fantastic for diagnosing those tricky, complex performance bugs that the standard profiler might not catch.
These profilers are game-changers. Instead of guessing, you can pinpoint the exact line of code causing a memory leak or identify the background process that’s secretly draining the battery. It transforms performance tuning from a frustrating guessing game into a data-driven science.
Turning Crashes into Actionable Data
Let’s be realistic: no matter how much you test, some bugs will eventually make it into the wild. The trick is to be ready for them. A good crash reporting tool acts as your early warning system, turning those unexpected failures into clear, actionable data before they affect your entire user base.
Firebase Crashlytics is the go-to tool for this. It automatically captures detailed crash reports, intelligently groups them, and gives you all the context you need to start debugging. No more trying to decipher a one-star review that just says, “It crashed.” Instead, you get a precise stack trace showing exactly where things went wrong.
Setting up a solid crash reporting pipeline is one of the most impactful things you can do for your app’s long-term health. To learn more, check out our deep dive on mobile app crash reporting. It’s a practice that lets you find, prioritize, and fix the most critical stability problems, making your app more resilient with every single update.
Choosing the Right Android Testing Tools
Picking the right tools for your testing arsenal is a lot like a chef choosing their knives. Each one is designed for a specific job, and having the right set makes all the difference. Building an effective stack for testing for Android applications isn’t about finding one magic tool; it’s about combining several to cover all your bases, from the smallest unit of code to the entire user journey.
Instead of just running down a list, let’s group these tools by what they do best. This way, you can see how they fit together to create a complete testing toolkit. We’ll look at where each one shines, its ideal use case, and any trade-offs you should know about.
H3: Core Tools for Unit and Integration Testing
At the ground level, you need tools that are fast, dependable, and fit right into your development workflow. This is where you prove your app’s internal logic works exactly as you expect.
- JUnit: This is the undisputed champion for unit testing on the JVM. JUnit provides the essential structure—like the
@Testand@Beforeannotations—that you need to organize, run, and check the results of your tests. It’s the bedrock of pretty much every Android testing strategy out there. - Mockito: A fantastic mocking framework that pairs perfectly with JUnit. With Mockito, you can create “fake” versions of object dependencies, which lets you isolate the single class you’re trying to test. This ensures your unit tests are pure, focused, and not accidentally testing something else.
H3: Mastering the User Interface
When it’s time to check what the user actually sees and interacts with, you need a different set of tools. UI testing frameworks are built to automate user actions and confirm your app looks and behaves correctly.
This is where automation really starts to pay off.
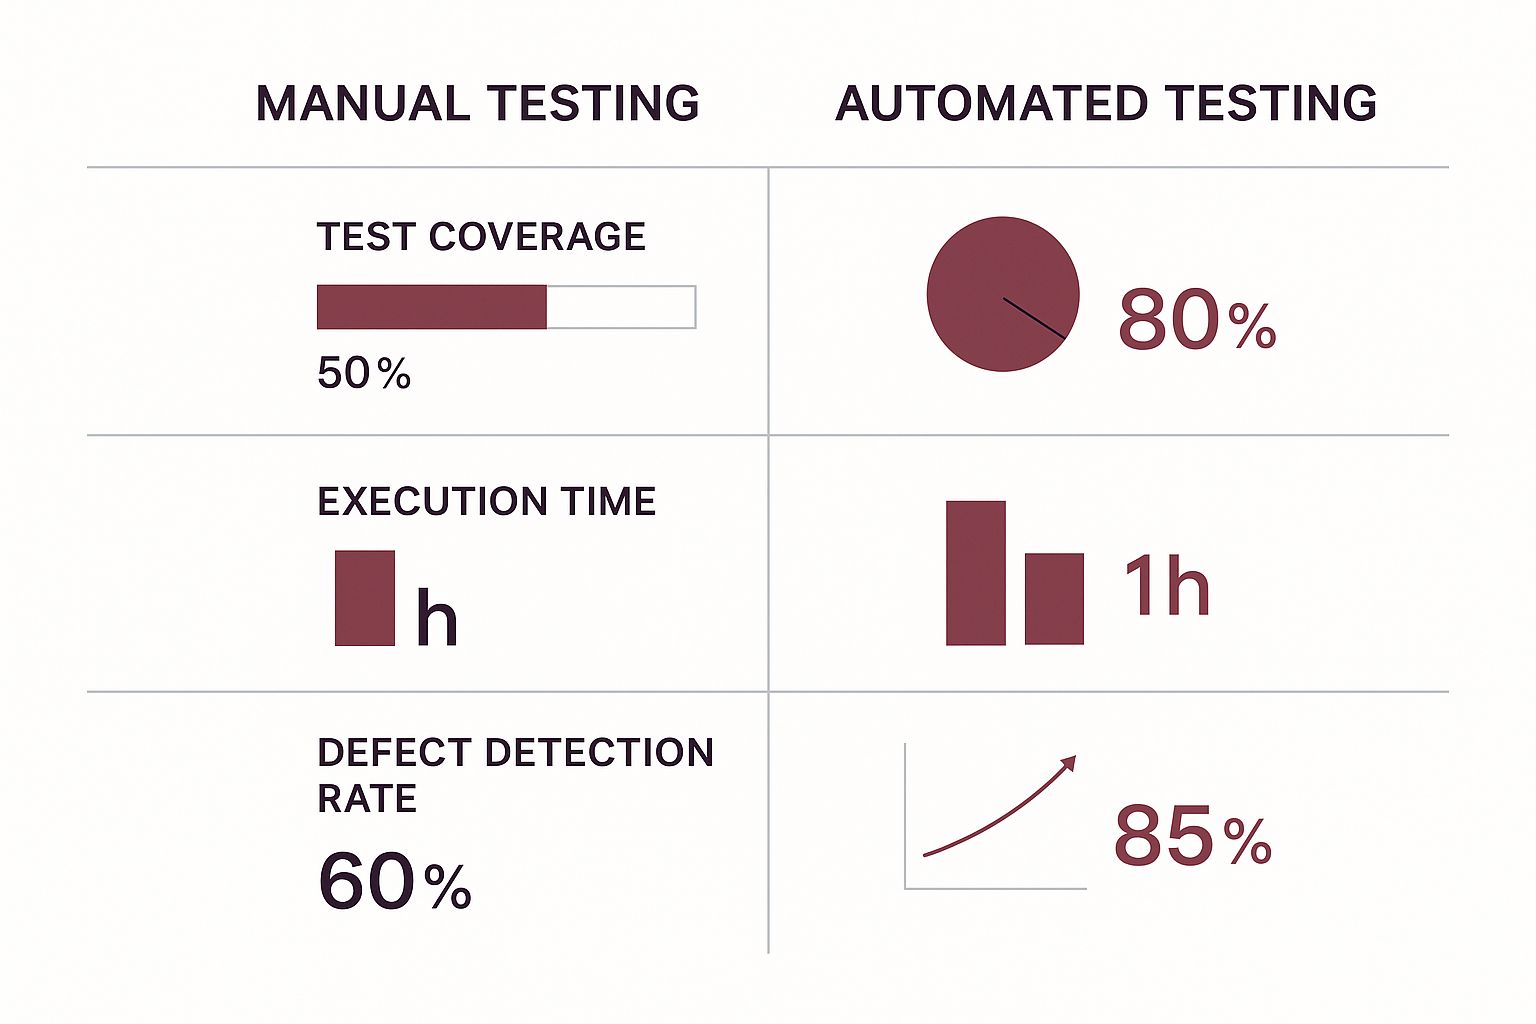
As you can see, the switch from manual clicking to automated scripts dramatically increases test coverage, slashes execution time, and catches more bugs. It’s a game-changer for shipping a high-quality user experience.
- Espresso: This is Google’s own framework for UI testing that happens entirely inside your app. Espresso is incredibly fast and reliable because it automatically syncs with the UI thread, waiting for the app to go idle before it makes its next move. This simple feature drastically cuts down on flaky tests and makes it perfect for validating workflows within your application.
- UI Automator: What if your test needs to check something outside your app, like a system notification or another app? That’s where UI Automator comes in. It can simulate user actions across the entire device, making it the go-to for testing cross-app integrations and system-level interactions.
A good way to think about it is this: Espresso is the specialist for inspecting every room inside your house. UI Automator is the generalist that can check how your house interacts with the whole neighborhood, from the mail delivery to the power lines.
H3: Cross-Functional and Cross-Platform Frameworks
For teams building hybrid apps or needing to test across both Android and iOS with a single test suite, a more versatile tool is the answer.
Appium is a popular open-source tool that lets you write tests for native, hybrid, and mobile web apps using the same API. It’s built on the WebDriver protocol, which means your team can write test scripts in familiar languages like Java, Python, or JavaScript. While Appium offers incredible flexibility, it can be a bit slower and more complex to set up than native tools like Espresso.
For a deeper look into the world of automation options, our guide on the top mobile app test automation tools for 2025 provides an extensive comparison.
To help you visualize where each tool fits, here’s a quick breakdown of the most common frameworks.
Comparison of Popular Android Testing Frameworks
| Framework | Primary Use | Key Strengths | Best For |
|---|---|---|---|
| JUnit | Unit Testing | Industry standard, simple annotations, fast execution. | Verifying individual methods and classes in isolation on the JVM. |
| Mockito | Unit Testing | Powerful mocking, dependency isolation, great for complex logic. | Creating “fake” objects to ensure pure unit tests without side effects. |
| Espresso | UI Testing | Fast, reliable, automatic sync with UI thread, less flakiness. | Validating UI flows and user interactions entirely within your own app. |
| UI Automator | UI Testing | Interacts with system UI and other apps, black-box testing. | End-to-end tests involving system notifications or cross-app functionality. |
| Appium | Cross-Platform Testing | Single codebase for Android & iOS, language-agnostic. | Teams needing to test across multiple platforms with a unified test suite. |
Ultimately, the best stack combines the speed of JUnit and Mockito for the foundation, the reliability of Espresso for in-app flows, and specialized tools like UI Automator or Appium when your test scope expands.
Putting Your Testing on Autopilot with CI/CD
So far, we’ve talked about testing as something you do—a distinct, manual step in your development process. But in a fast-moving project, running tests by hand just doesn’t work. The real magic happens when you let automation take over by plugging your tests into a Continuous Integration/Continuous Deployment (CI/CD) pipeline.
Think of it like an automated assembly line in a factory. A new part (your code commit) gets added to the line and is immediately whisked away for a series of automated quality checks. If it fails a single check, the line stops, and that faulty part is rejected before it ever makes it into the final product. That’s exactly what CI/CD does for your app.
How CI/CD Enforces Quality
A CI/CD pipeline is basically an automated workflow for building, testing, and deploying your app. As an Android developer, you’d typically connect your code repository (like GitHub) to a CI platform such as GitHub Actions or Jenkins. You then set up this pipeline to run automatically whenever new code gets pushed.
This setup acts as a strict, automated quality gate. Before any code is allowed to merge into your main branch, it must pass every single automated test you’ve written—unit, integration, and UI tests.
By baking testing directly into your pipeline, you stop hoping for quality and start enforcing it. Code that breaks existing features is caught and blocked on the spot, long before it ever has a chance to reach a user.
This automation frees up your team from the soul-crushing work of manual regression testing. Instead of spending hours checking if a new feature accidentally broke an old one, developers can stay focused on building cool stuff, trusting the pipeline to stand guard.
Key Steps in a Testing Pipeline
Getting this automated workflow up and running involves a few core stages that execute one after another.
- Trigger: The whole thing kicks off automatically when a developer pushes a commit or opens a pull request. This is the green light for the assembly line to start.
- Build: The CI server grabs the latest code and compiles your application, usually creating a debug APK. If the app can’t even build, the pipeline fails right then and there.
- Test Execution: This is where the real work happens. The server runs all of your automated tests, starting with the super-fast unit tests and moving on to the more thorough UI tests running on an emulator or real device.
- Reporting: Once the tests are done, the pipeline spits out detailed reports. They show exactly what passed, what failed, and why, giving developers instant feedback.
- Deployment (Optional): If everything passes, the pipeline can be configured to automatically deploy the new build to a testing environment, a beta channel like Google Play Console’s internal testing track, or even straight to production.
This continuous loop ensures that every single change is put through its paces, keeping your app’s quality consistently high with every commit.
At CodePushGo, we understand the need for speed and reliability. Our platform integrates seamlessly with your CI/CD pipeline, allowing you to deploy critical bug fixes and features directly to your users’ devices, bypassing app store delays. Find out how you can accelerate your release cycle at https://codepushgo.com.


