Why Your React Native Team Needs CI/CD (Before It’s Too Late)
Imagine this: It’s late Friday afternoon. You just deployed what you thought was a minor bug fix, and suddenly your React Native app is crashing for everyone. Panic sets in. This is exactly the kind of nightmare scenario continuous integration and continuous deployment (CI/CD) helps you avoid. From my own experience and countless conversations with other React Native developers, I know manual deployment processes are often a ticking time bomb, especially as your project scales.
This screenshot from the official React Native website highlights the framework’s focus on speed and efficiency—goals directly supported by solid CI/CD practices. It’s a good reminder of how expansive the ecosystem is, and why automated processes are so important for managing that complexity.
One major pain point CI/CD addresses is inconsistent builds. We’ve all been there, right? “It works on my machine” becomes the dreaded mantra. Different Node versions, conflicting dependencies – all those little variations in local environments can lead to hours wasted tracking down build errors that only appear when someone else tries to run the code. A good CI setup provides a consistent build environment, catching these compatibility issues early before they derail your release. Plus, it makes onboarding new team members so much smoother.
Another huge productivity drain? Manual testing. Clicking through the same test cases over and over is not only tedious, it’s also prone to human error. Automated tests, triggered by your CI/CD pipeline, free up your developers to focus on building new features. At the same time, you’re improving your testing coverage and catching regressions much more reliably. Think of it as a safety net for your code, constantly ensuring quality and preventing those frustrating rollbacks.
React Native’s popularity is exploding, especially as more companies embrace cross-platform development. By 2025, it’s projected that over 32% of mobile developers worldwide will be using React Native, making it a leading mobile app development framework. This growth alone underscores how crucial CI/CD is for ensuring consistent quality and timely deployments. Want to learn more about React Native adoption? Check out this article! The framework’s emphasis on speed, cost efficiency, and scalability further reinforces the value of automated CI/CD practices.
Implementing continuous integration for React Native isn’t just a best practice – it’s essential for any team that values their sanity and their users’ satisfaction. It’s a proactive approach that pays off big time in the long run, letting you ship faster and with more confidence. Looking for more CI/CD resources? Here’s a guide on continuous integration for Android. Embracing CI/CD empowers your team to focus on what they do best – building great apps – without the constant worry of deployment disasters looming overhead.
GitHub Actions That Actually Work for React Native Projects
I’ve seen a lot of hype around GitHub Actions and how it’s supposed to be a game-changer for CI/CD. But honestly, I’ve also seen a ton of React Native implementations that just… miss the mark. So, let’s ditch the basic tutorials and get into the nitty-gritty of building workflows that actually handle the real-world quirks of React Native—the stuff that usually trips people up.
The GitHub Actions interface looks pretty straightforward, right? Sure, at first glance. But setting it up effectively for React Native? That’s a whole other ball game. The real trick is moving beyond the generic copy-paste examples and crafting workflows that fit the specific demands of mobile development.
Node Version Nightmares (And How to Avoid Them)
One of the biggest pains I’ve run into is managing Node versions. Something that works perfectly fine on a developer’s local machine can completely break in the CI environment. It’s like a bad game of “but it works on my machine!” Locking down your Node version in your workflow file is absolutely essential for consistent builds. Specify the exact Node version your project needs, and you’ll save yourself a lot of headaches down the line.
Taming iOS Simulators and Android SDKs in CI
iOS simulators and the Android SDK can also be a real hassle in CI. Simulators, especially, can act differently in a headless CI environment. One workaround I’ve found helpful is using a specific simulator destination in your workflow. This helps ensure your tests run consistently and reliably, without any surprises. For Android, pre-caching the SDK components can significantly speed up your build times.
Optimizing Your React Native Workflows
Let’s be real, build speed is everything in CI. Slow builds kill productivity and frustrate everyone. Optimizing your workflows is crucial for keeping things moving smoothly. Caching dependencies between builds is a simple but incredibly effective trick to reduce build times. It’s like this: you wouldn’t rebuild your entire house just to change a lightbulb. Caching works the same way, reusing the unchanged parts of your build.
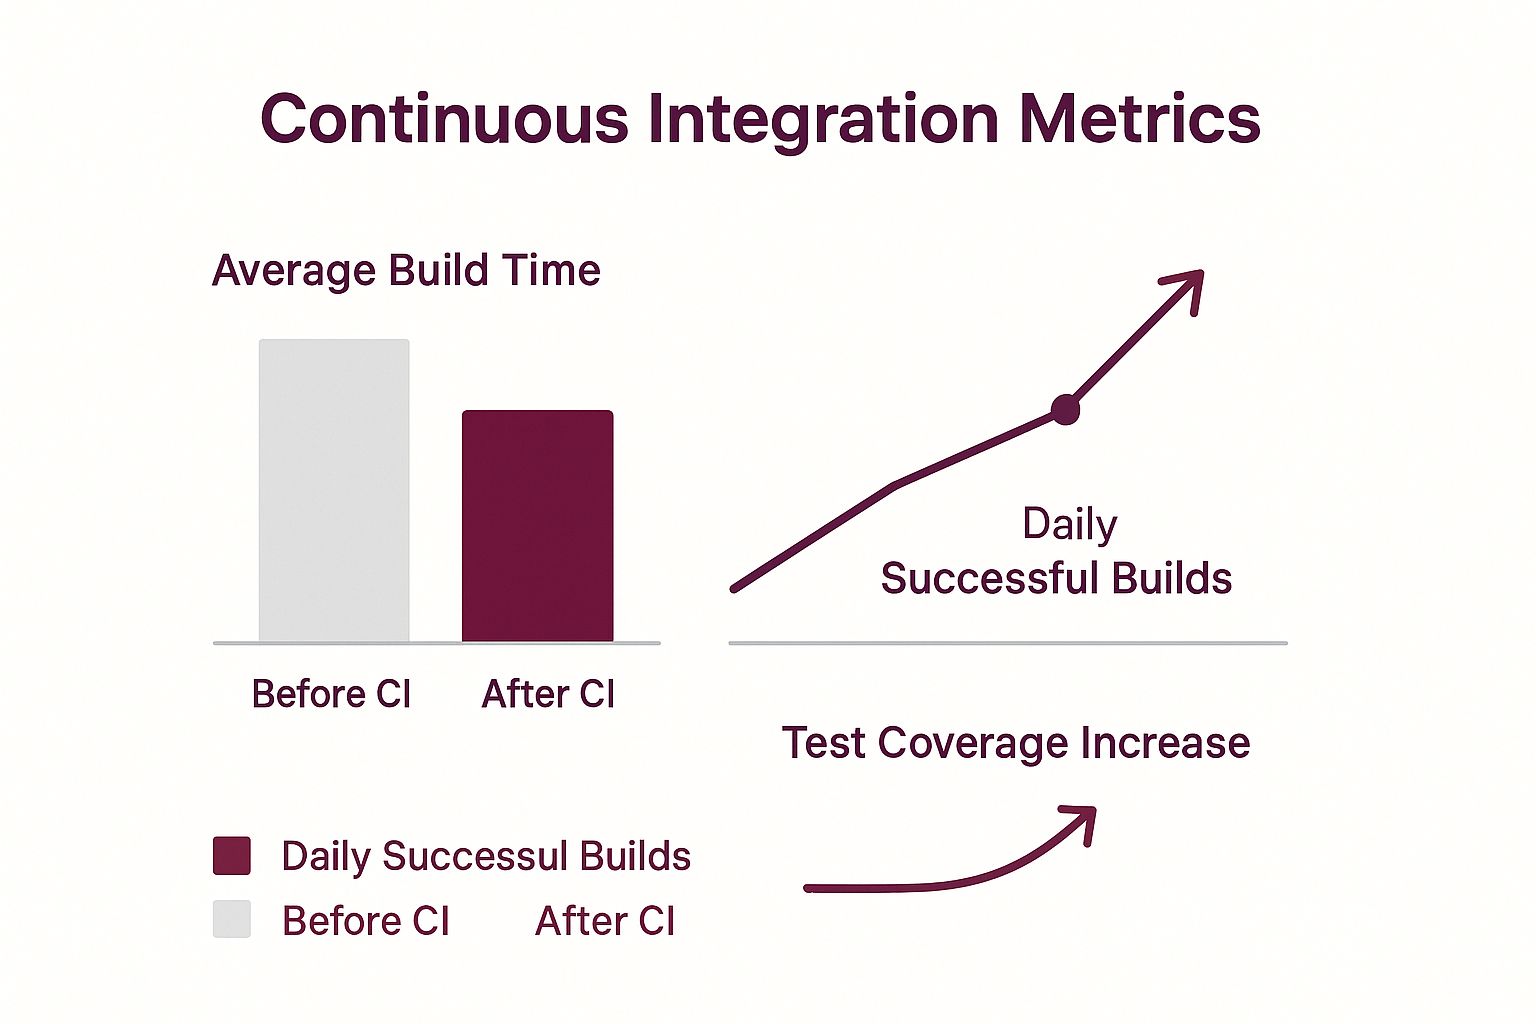
This infographic shows the real impact of CI optimization. Look at the difference in average build times, daily successful builds, and test coverage before and after implementing a solid continuous integration strategy for React Native. A significant reduction in average build times, a noticeable increase in daily successful builds, and a substantial boost in test coverage. Optimized workflows can seriously level up your development efficiency and code quality.
Another great tip is parallelizing your tests. Instead of running them one after another, run them concurrently. This is a huge time saver, especially for React Native projects where tests can sometimes take a while.
Finally, let’s talk about monitoring. Proper monitoring is key. Set up alerts for failed builds and flaky tests. Catching problems early, before they turn into major issues, is essential. A well-configured CI pipeline isn’t just about automating tasks; it’s about continuous feedback that keeps your whole team informed. It’s about making continuous integration for React Native a valuable asset, not just another item on your to-do list.
Let’s take a look at how GitHub Actions stacks up against other popular CI services for React Native projects. I’ve put together a comparison table to highlight some key differences and similarities.
To understand how GitHub Actions fits into the CI landscape for React Native, I’ve compiled a comparison table highlighting the strengths and weaknesses of different CI services.
| Feature | GitHub Actions | Jenkins | CircleCI | Travis CI |
|---|---|---|---|---|
| Ease of Setup | Easy | Moderate | Easy | Easy |
| React Native Integration | Good | Moderate | Good | Good |
| macOS Support | Excellent | Moderate | Good | Good |
| Pricing | Free for public repos, paid for private | Free (self-hosted) | Free tier, paid plans | Free tier, paid plans |
| Community Support | Large | Large | Large | Large |
| Build Customization | High | High | Moderate | Moderate |
| Integration with GitHub | Seamless | Requires configuration | Good | Good |
As you can see, each service has its own strengths and weaknesses. GitHub Actions shines with its tight integration with GitHub and excellent macOS support, which is crucial for React Native development. Jenkins offers a high degree of customization but requires more setup effort. CircleCI and Travis CI provide good overall options with varying pricing structures. Choosing the right CI service depends on your specific project needs and priorities.
Building a Testing Strategy That Catches Real Bugs
This screenshot shows Jest, a popular JavaScript testing framework. Jest’s a great tool, no doubt, but here’s the thing: just having tests isn’t enough. You need the right tests, the kind that actually catch the bugs your users will run into.
I’ve seen so many React Native testing setups that are basically just for show. Tons of passing tests, yet bugs still make it into production. Trust me, I’ve talked with enough teams to know this is a common pain point. The secret is building a testing pyramid tailored for mobile.
The Mobile Testing Pyramid: Unit, Integration, and End-to-End
Picture this: At the bottom of your pyramid are your unit tests. These are small, quick tests that make sure individual components or functions are working as expected in isolation. Above that, you have integration tests. These verify that different parts of your app play nicely together. Finally, at the very top, sit your end-to-end (E2E) tests. These simulate real user interactions across your entire app.
Here’s the rub: mobile UI tests can be notoriously flaky. Simulators have their quirks, network conditions can be unpredictable, and even small OS updates can break your tests. That’s why you should lean heavily on your unit and integration tests. They’re much faster and more reliable. You’d be surprised how many bugs they can catch before they even get close to your UI.
Snapshot Testing: Value or Noise?
Everyone’s talking about snapshot testing. The basic idea is to save a “snapshot” of your component’s output and then compare it against future renders to catch any unexpected UI changes. It can be helpful, but it can also create a ton of noise if you’re not careful. My advice? Use it strategically, focusing on crucial UI components where visual consistency is absolutely essential.
The growing trend of integrating AI into apps makes testing even more complex. Speaking of trends, did you know that 60% of developers are expected to be adding AI to their apps by 2025? Discover more insights into React Native and AI trends. This makes robust continuous integration for your React Native projects absolutely vital. You need to be sure those complex AI integrations are thoroughly tested and deployed reliably.
You might be thinking, “How can I run all these tests in a CI environment without spending a fortune on simulator time?” It’s a good question. One approach is to run your unit and integration tests on every commit. They’re fast, so it won’t bog down your pipeline. Then, schedule your E2E tests to run less frequently—maybe nightly or just before releases.
From Flaky Tests to Reliable Insights
Another headache is figuring out whether a test failed because of a real bug or just a hiccup in your CI infrastructure. This is where good monitoring comes in. Keep a close eye on your build times, test pass rates, and simulator stability within your CI pipeline. These metrics will help you spot patterns and fix the root causes of those annoying flaky tests. Check out our guide on testing in continuous integration. A solid testing strategy is the best way to keep bugs out of production. It’s an investment that will save you time, headaches, and ultimately lead to a much happier user base.
Reliable Builds and Distribution Without the Headaches
Let’s face it, React Native builds can be tricky. One minute everything’s humming along perfectly on your machine, the next your CI is throwing a fit. I’ve been there, pulling my hair out trying to figure out what went wrong. But I’ve also learned a few things along the way that can help you avoid these CI nightmares.
Code Signing and Provisioning Profiles: Taming the iOS Beast
iOS code signing and provisioning profiles… just the words can send shivers down a developer’s spine. I remember spending hours, even days, battling with these, convinced I was cursed. The biggest breakthrough? A dedicated CI machine with all the necessary certificates and profiles installed. If you’re using Fastlane Match, make sure your CI workflow has access to that encrypted repository. The initial setup might take a bit of time, but it will save you countless headaches down the road.
Seriously, I can’t emphasize this enough. It’s a game-changer.
Android Build Optimization: Speed and Efficiency
Android builds, while generally less finicky than iOS, can still bog down your CI. Two things made a huge difference for me: code shrinking and obfuscation with R8 or ProGuard, and caching Gradle dependencies. Code shrinking not only slims down your app (which makes users happy) but also speeds up build times. And caching Gradle dependencies? Just like caching your Node modules, this avoids redundant downloads and saves precious CI minutes.
This screenshot shows EAS Build from Expo, a cloud build service that seriously streamlines the React Native build process. It takes away so much of the setup pain you normally get with local build machines or self-hosted CI runners. Offloading builds to the cloud saves time and resources, letting you focus on building your app, not your build infrastructure.
Dependency Management: Preventing “Works on My Machine”
We’ve all been there. “Works on my machine,” you say, as your teammates give you the side-eye. Dependency conflicts can be a real pain in React Native. Locking down your dependency versions in your package.json is essential. This ensures everyone, including your CI, is on the same page. Another tip: regularly audit those dependencies! Outdated ones can clash with newer React Native versions or other libraries. Staying up-to-date is key.
Automated Distribution: Smooth Sailing to App Stores
Once your builds are running smoothly, automate distribution to TestFlight and the Google Play Console. Fastlane is your friend here. You can configure it to automatically increment your build number, upload your app, and even submit it for review, all triggered by your CI pipeline. Think about your rollback strategy too. What if something goes wrong? You want to revert quickly to a stable version. CodePush can be a lifesaver, letting you push hotfixes without the app store review process.
Build Variants and Enterprise Distribution: Managing Complexity
As your app grows, you’ll probably need different build variants – development, staging, production, etc. Gradle’s product flavors for Android and Xcode’s build configurations for iOS are invaluable for managing this complexity. And for enterprise distribution, platforms like Microsoft App Center or Firebase App Distribution can simplify internal app distribution, handling those tricky signing and provisioning details for you.
Let’s talk build tools. Here’s a quick comparison table I put together to give you a sense of the landscape:
React Native Build Tools Performance Comparison Build times, reliability scores, and resource usage for different build configurations
| Tool/Method | Average Build Time | Success Rate | Resource Usage | Best For |
|---|---|---|---|---|
| Local Build (Xcode/Android Studio) | Varies greatly | Dependent on local environment | High | Debugging, initial setup |
| Fastlane | Moderate | High (with proper configuration) | Moderate | Automating common tasks |
| EAS Build | Fast | High | Low (managed service) | Cloud builds, simplifying CI/CD |
| Self-hosted CI (e.g., Jenkins) | Moderate to Slow | Dependent on configuration | High | Maximum control, complex pipelines |
This table provides a high-level comparison. The best choice for you really depends on the specific needs of your project. Consider factors like team size, project complexity, and your comfort level with managing build infrastructure.
With the right tools and a bit of know-how, you can achieve reliable builds and painless distribution for your React Native projects. These are the lessons I’ve learned, often the hard way, and I hope they save you some pain and frustration.
CodePush Integration That Users Will Thank You For
This screenshot shows the CodePush deployment overview. It gives you a good visual of how CodePush handles updates, especially how it separates update channels and lets you target specific releases to different user groups. This level of control is a game-changer.
CodePush is a seriously powerful tool for React Native developers, allowing for over-the-air (OTA) updates. But I’ve noticed a lot of teams aren’t using it to its full potential. Let’s dive into how to integrate CodePush into your continuous integration React Native pipeline and make things smoother for everyone, users and developers alike.
Seamless Updates: The Magic Behind the Curtain
Picture this: You’ve got a bug in your production app. Instead of the usual app store approval wait, you fix the bug, push an update via CodePush, and boom, it’s live in minutes. No app store downloads, no user interruptions. That’s the power of OTA updates.
But there’s more to seamless updates than just pushing code. Versioning is critical. A good, consistent versioning strategy will save you from compatibility headaches. Trust me, I’ve seen the mess that mismatched versions can make. It’s not fun. A solid versioning scheme keeps your updates organized and predictable.
Rollback: Your Safety Net in the Cloud
Even with all the testing in the world, sometimes updates just don’t behave. That’s where rollback comes in. It’s your emergency brake, letting you quickly revert to a stable version if things go sideways. I remember pushing an update once that caused some weird UI glitches. Rollback was a lifesaver, letting me go back to the previous version in minutes and minimizing the impact on users. It’s a must-have for any solid CodePush strategy.
Automated CodePush Deployments You Can Trust
Integrating CodePush into your CI/CD pipeline is where things get really interesting. Automate your deployments, but do it smartly. Don’t just push every single change straight to production. Think about using staging environments and release channels to test updates before they hit your users. It’s an extra layer of testing that catches problems early and gives you more confidence in your deployments.
Learn more about automatic app updates with CodePushGo.
Testing and Monitoring: Keeping Your Finger on the Pulse
Testing, testing, testing. It’s crucial before any CodePush deployment. Your automated tests shouldn’t just cover your app’s main functions; they should also cover the CodePush update process itself. This makes sure your updates apply smoothly and don’t create new bugs.
Once your updates are live, monitor their performance. Keep an eye on update success rates, error logs, and user feedback to see how your updates are doing in the real world. This constant monitoring helps you find and fix any issues quickly.
Managing the Update Landscape
CodePush lets you manage different update channels for different user groups. This is super handy for beta testing. You can push updates to a small group of testers first, get their feedback, and polish your code before releasing it to everyone. It’s a great way to get real-world feedback without the risk of a widespread problem.
Another important thing to consider is the difference between native module changes and JavaScript updates. CodePush is awesome for updating JavaScript bundles, but native module updates need a full app store release. Knowing this difference is key to planning your update strategy.
Debugging CI Failures Without Losing Your Mind
When your React Native continuous integration pipeline goes belly up at 2 AM, you need your detective hat more than your coding gloves. Trust me, I’ve been there. Staring bleary-eyed at an indecipherable wall of red text, scrolling endlessly through CI logs… it’s not fun. But years of late-night debugging (and a few gray hairs) have taught me a thing or two about turning CI mysteries into quick fixes.
Log Analysis: Finding the Needle in the Haystack
Logs. They’re your best friend and worst enemy when debugging. Thousands of lines of output can feel overwhelming. A trick that’s saved my bacon more times than I can count? Searching for specific keywords related to the failure. Android build crashing? Search for “error” or “exception.” iOS acting up? Look for “failed” or “terminated.” This cuts through the noise and gets you to the problem area fast.
Another pro-tip: structure your logs. Add clear separators or timestamps in your CI scripts. It’s like adding chapter markers to a massive textbook – you can quickly jump to the right section and see what happened. Makes a huge difference when you’re trying to piece together the sequence of events.
This is a screenshot from an error tracking dashboard like Sentry. Tools like Sentry collect errors from your application, including those from your CI runs, and group them together. This gives you a much better overview of what’s going wrong and how often, compared to just raw logs.
Monitoring and Alerting: Catching Problems Early
Monitoring isn’t just for production apps. It’s a secret weapon for catching CI issues before they derail your whole day. Set up alerts for failed builds, flaky tests, and even unexpectedly long build times. The key is to make these alerts meaningful and actionable. Nobody wants to be jolted awake for a minor blip.
My approach? I configure alerts for critical failures or repeating patterns. A single flaky test? No big deal. But if that same test fails three times in a row, something’s fishy and it’s time to dive in. For more on this, check out this article on Regression Testing Best Practices.
Debugging Workflows: From Chaos to Clarity
When a CI failure does happen, a clear debugging workflow is your lifeline. First things first: reproduce the failure locally. Your CI environment usually leaves breadcrumbs that can help you recreate the issue on your machine. Once you can reproduce it locally, you’re halfway to a solution.
Other usual suspects in CI failures? Flaky tests, environment-specific issues, and performance bottlenecks. Flaky tests need to be hunted down and either fixed or quarantined. Environment issues often pop up because of differences between your CI environment and your local setup. And performance bottlenecks? They can slow down your entire CI/CD pipeline, making builds take forever and generally frustrating everyone. Tackling these challenges methodically is the key to a smooth, reliable CI/CD process.
Advanced Patterns and Hard-Won Lessons
After managing React Native CI/CD at scale for a while, you start to see things differently. One lesson that surprised me? Don’t over-optimize too early. It’s a trap! Focus on a solid, functional React Native continuous integration pipeline first, then worry about making it faster. I’ve watched teams spend weeks shaving milliseconds off build times while their whole pipeline is basically held together with duct tape and hope.
Optimization That Matters
Once you’ve got a stable base, concentrate on optimizations that actually make a difference. Caching dependencies and parallelizing tests are your best friends here. And let’s talk about monorepos. They can be a real headache. In my experience, treating each package like its own little project within the pipeline, with its own tests and deployments, is the way to stay sane.
Handling Multiple App Variants
Things get even more interesting when you have multiple app variants, like free, paid, and enterprise versions. Environment variables are lifesavers here. Use them to manage your build configurations and CodePush deployments. This keeps your main workflow clean and tidy while still supporting all those different builds. Remember that time I had to roll back a bad update at 2 AM? Yeah, a solid rollback strategy is essential, but preventing those late-night emergencies through thorough testing and staged rollouts is even better.
Maintaining Pipeline Reliability
Dependency chains can turn into a tangled mess, especially in bigger React Native projects. Regularly auditing your dependencies is key. Keep them updated and be on the lookout for conflicts. And monitor your CI pipeline closely. Seriously, treat it like a pet hawk. Build times, test pass rates, resource usage—these metrics are trying to tell you something. A sudden increase in build time could be a sign of trouble brewing.
Finally, your team’s culture is just as important as the tech you use. Encourage everyone to take ownership of the CI/CD pipeline. When everyone understands how it works and how to contribute, you build a sustainable process that grows and adapts alongside your team and your codebase.
Ready to give your React Native deployments a boost? Take a look at CodePushGo (https://codepushgo.com) for smooth over-the-air updates and a more streamlined CI/CD experience.


